
One thing Sarah wanted to do last weekend was visit all of her favorite stores. So before our downtown adventure, we made several shopping stops. One of those was at American Apparel. She loves hair accessories of all shapes and sorts. So when we happened across an entire wall filled with hair bows she was more than a little ecstatic. She's trying out the bows and I'm deconstructing them in my head. I realized almost immediately that they'd be incredibly easy to DIY at home. Then I asked her how much they cost, just to make sure it'd be more cost efficient. $14. I nearly fell over. $14 for a hair bow that I knew wouldn't take me longer than 20 minutes? No flippin' way. So Sunday morning we did just that. I was a little distracted so I didn't get any pictures of the one we made on Sunday. So yesterday I decided to make another one. Unfortunately for you, that means you have to see it modeled in my wild Medusa hair instead of Sarah's well styled hair. {Side note- I've never been one for hair accessories. There's something about having a mop of curls that makes hair anything superfluous. Hence the sad attempts at bow wearing. Oh well.}

The greatest thing about this project? It was completely free. It only requires a couple of things, and so long as you have some fabric scraps at home, you won't have to buy a single thing. That sure as heck beats a $14 one.
Materials:


The greatest thing about this project? It was completely free. It only requires a couple of things, and so long as you have some fabric scraps at home, you won't have to buy a single thing. That sure as heck beats a $14 one.
Materials:
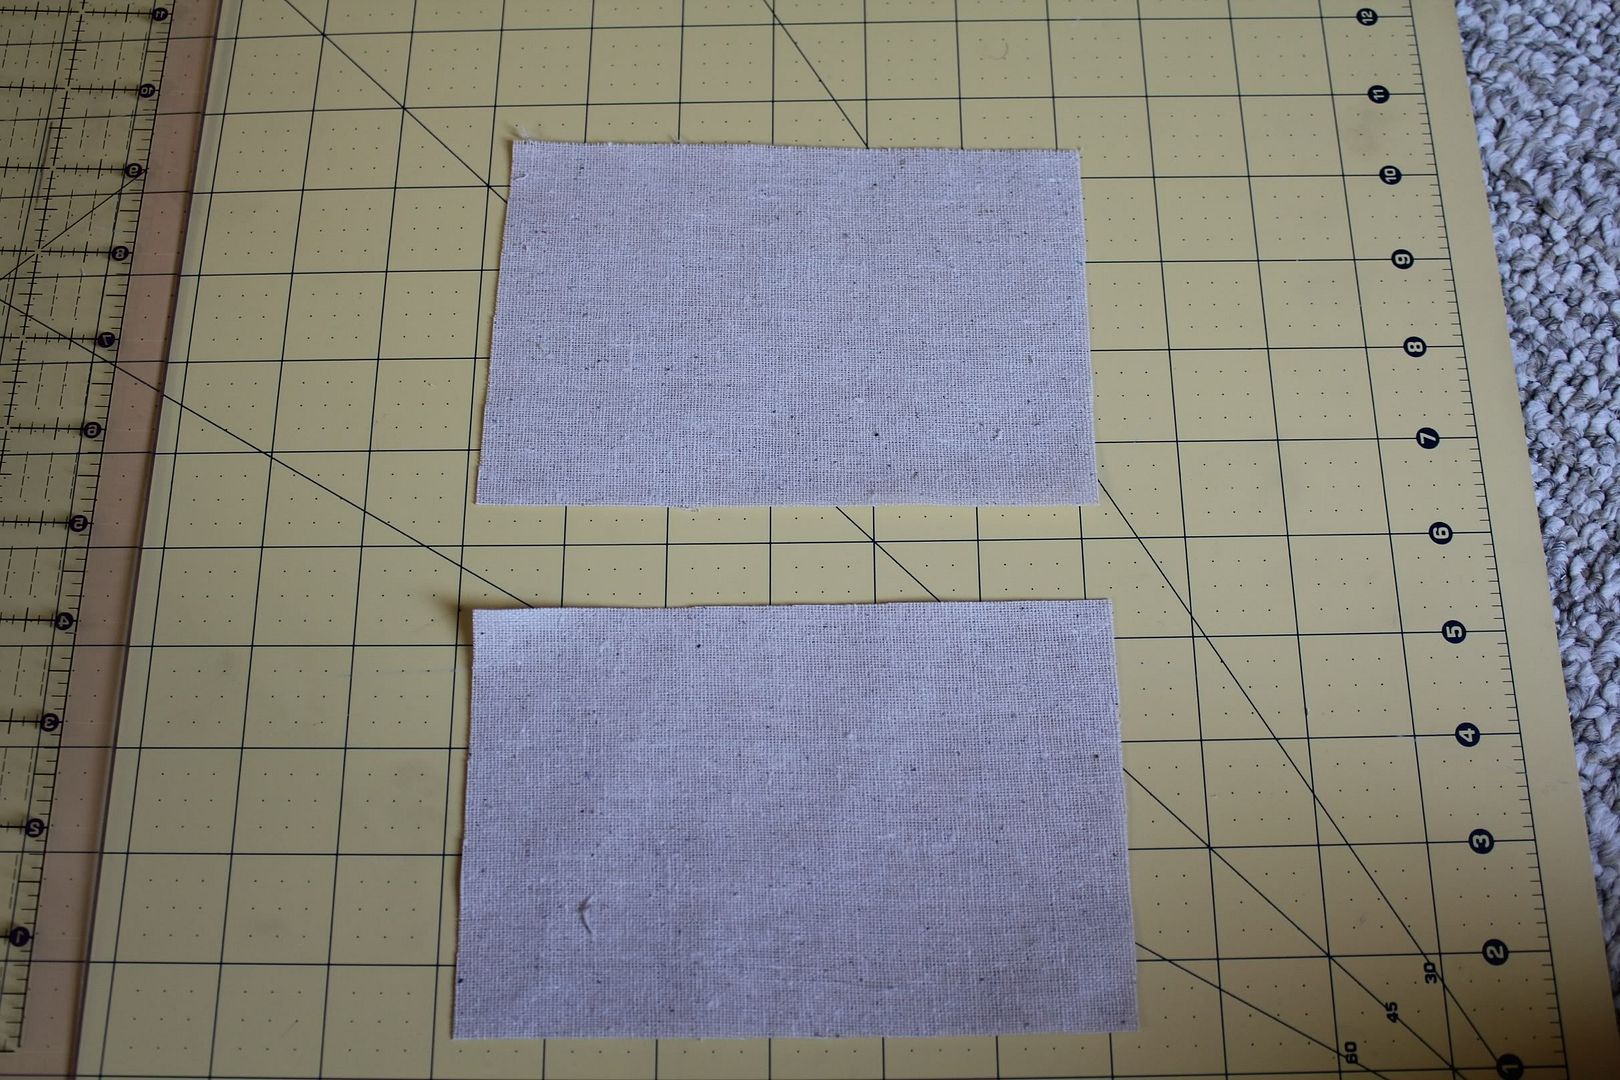
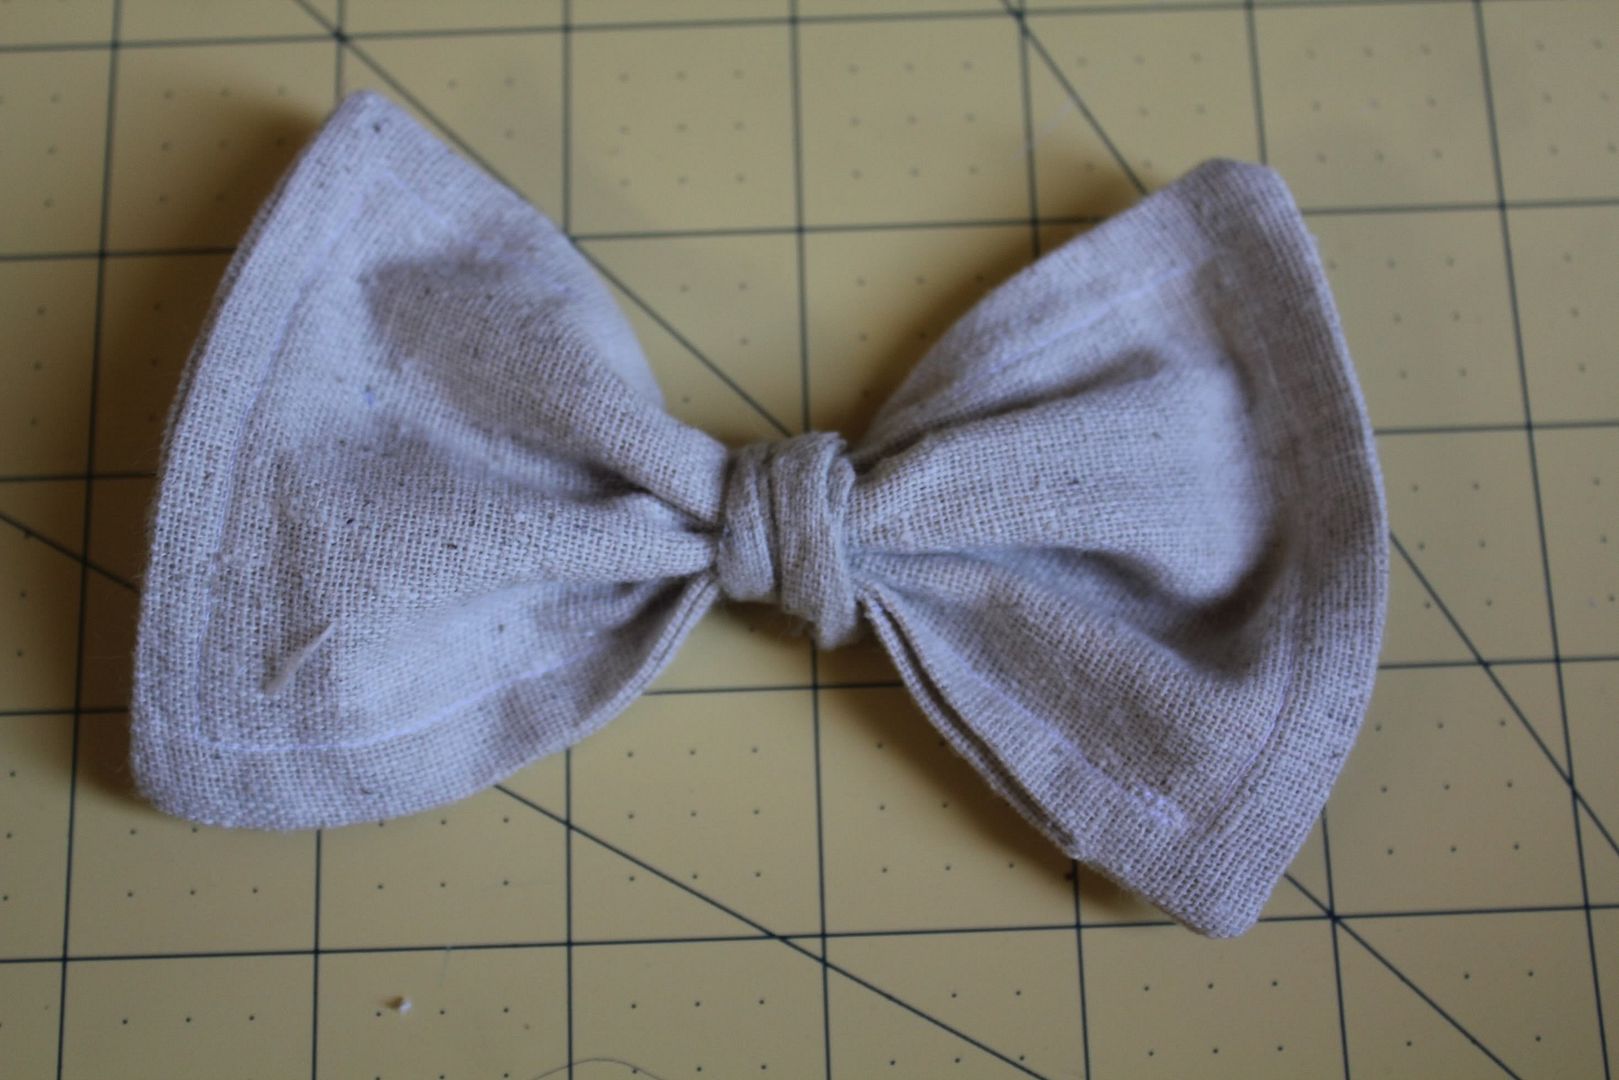
- Two 4"x6" fabric rectangles. And how did I come to this size? Simply by cutting a piece of paper until Sarah was happy with the shape and size. Pretty much an exact science.
- One small fabric scrap to make the tube
- Basic sewing equipment
Instructions:
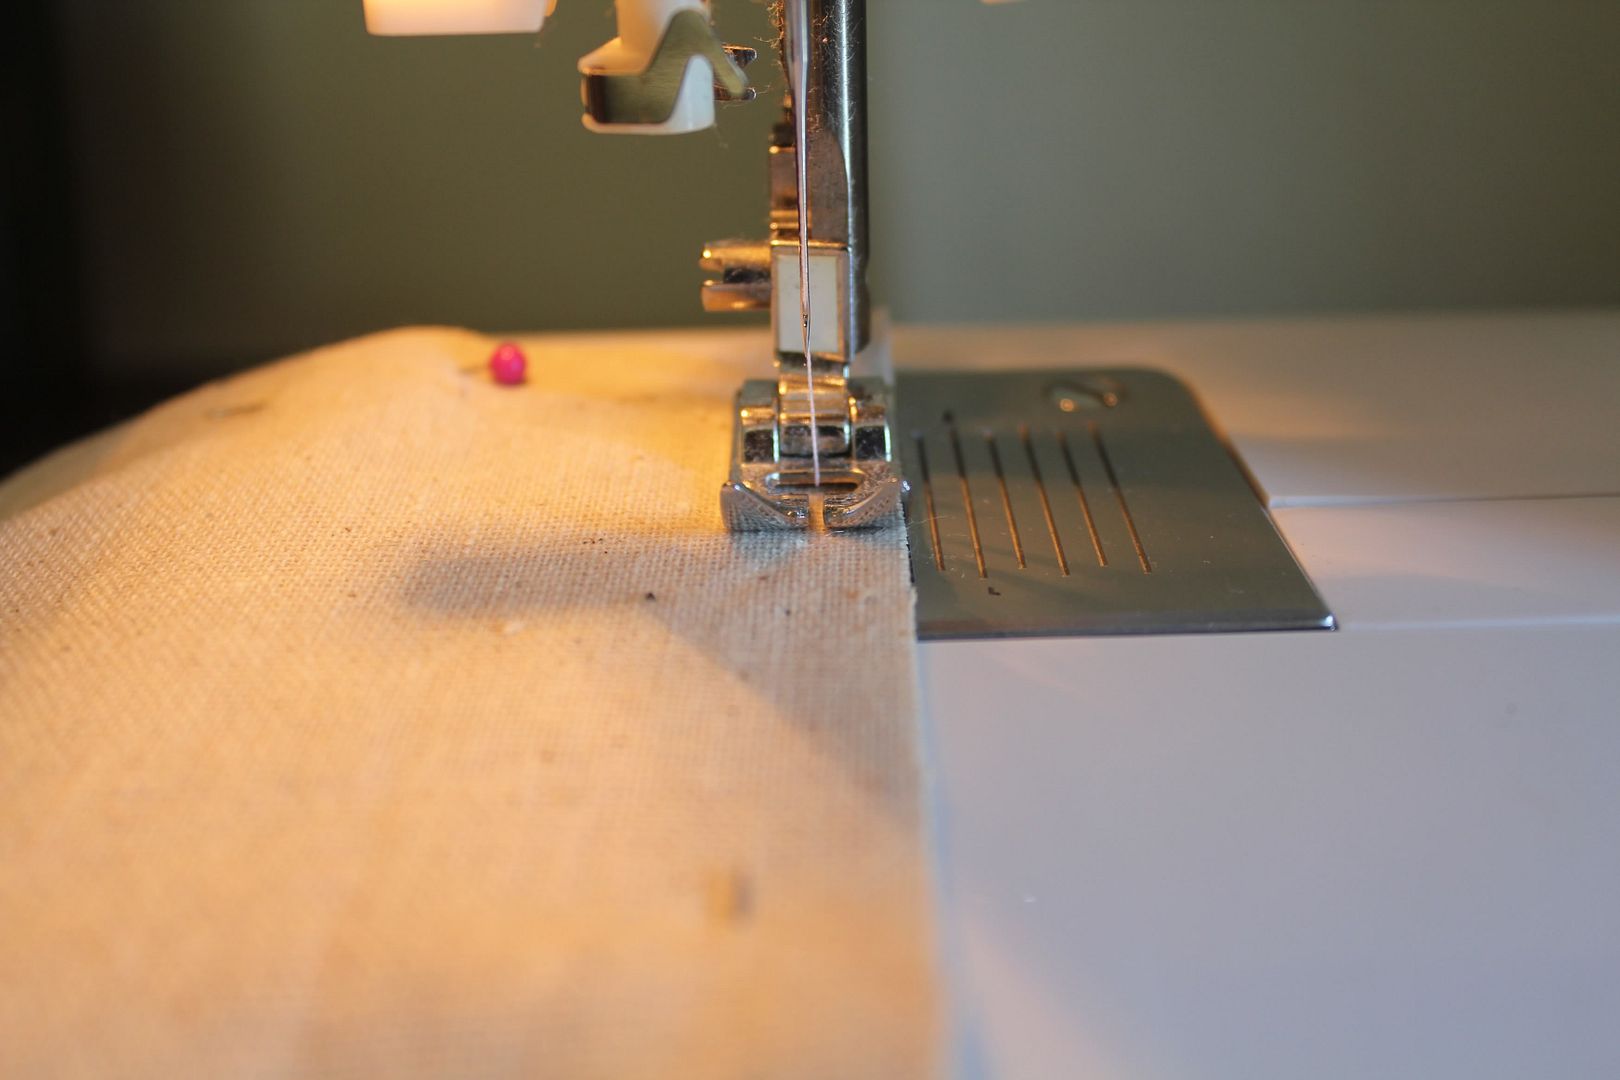
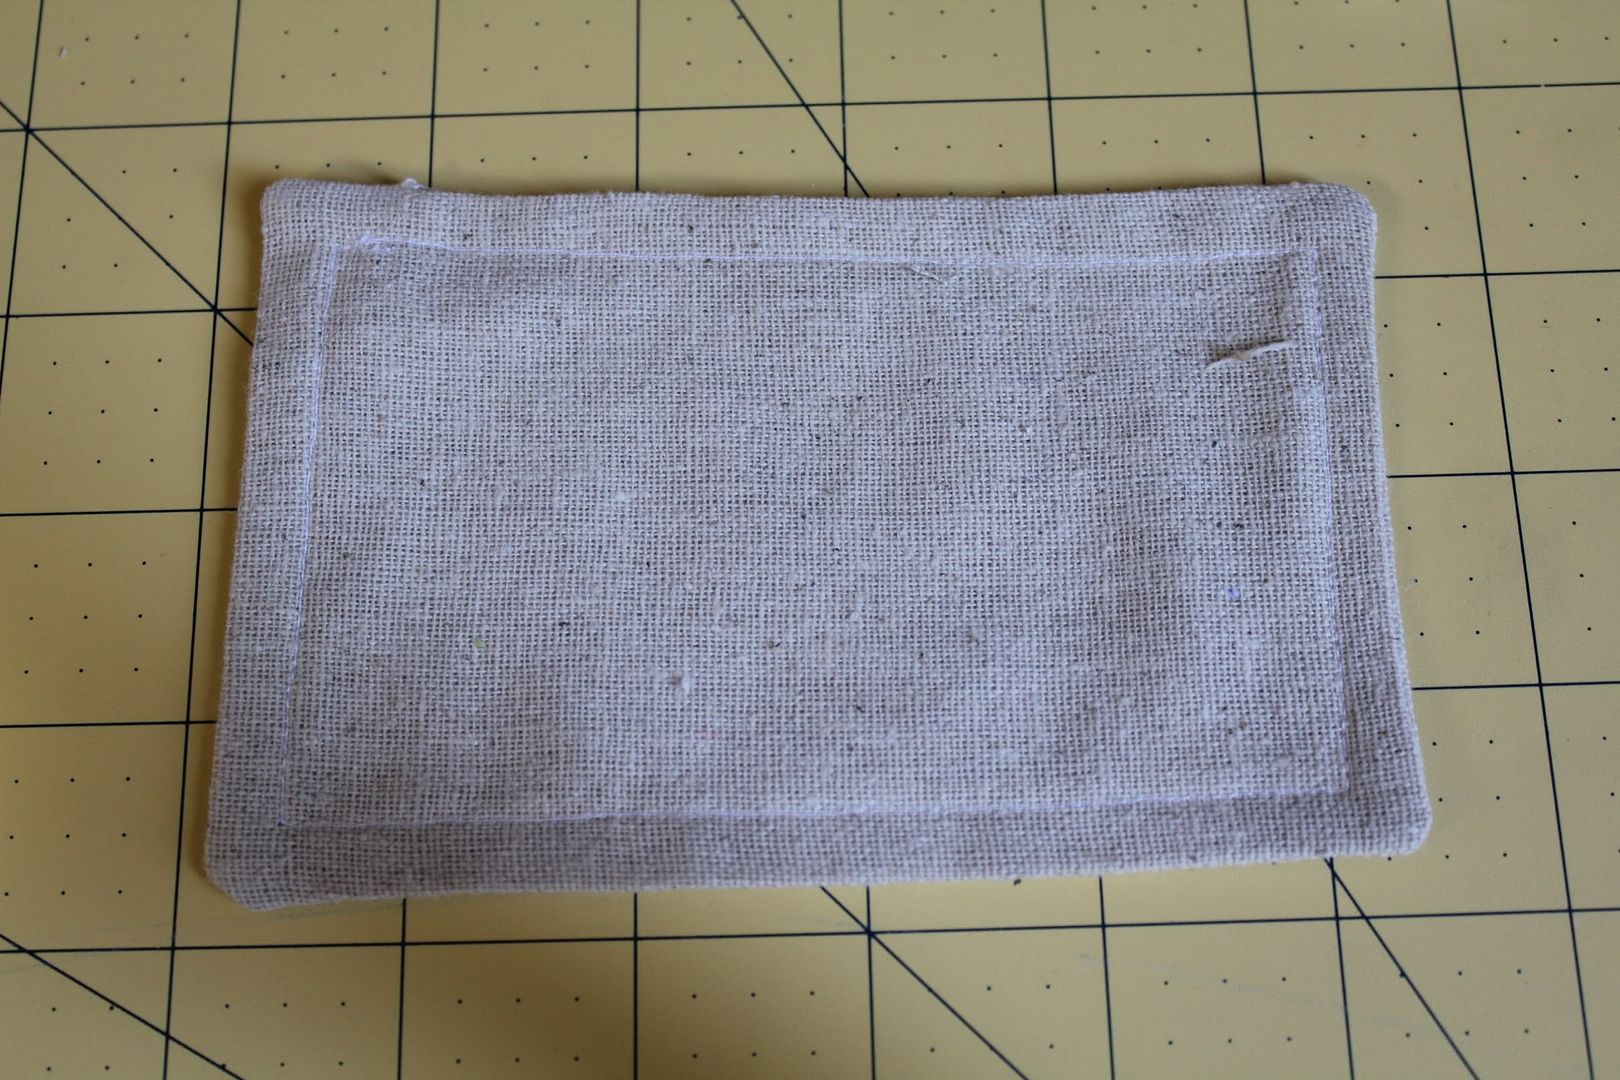
- Iron the two fabric rectangles. Place them right sides together and pin around the edges.
- Using a straight stitch sew around the edges with a 1/4 inch seam allowance. Leave a 1-2 inch opening on one side to turn the rectangle right side to.
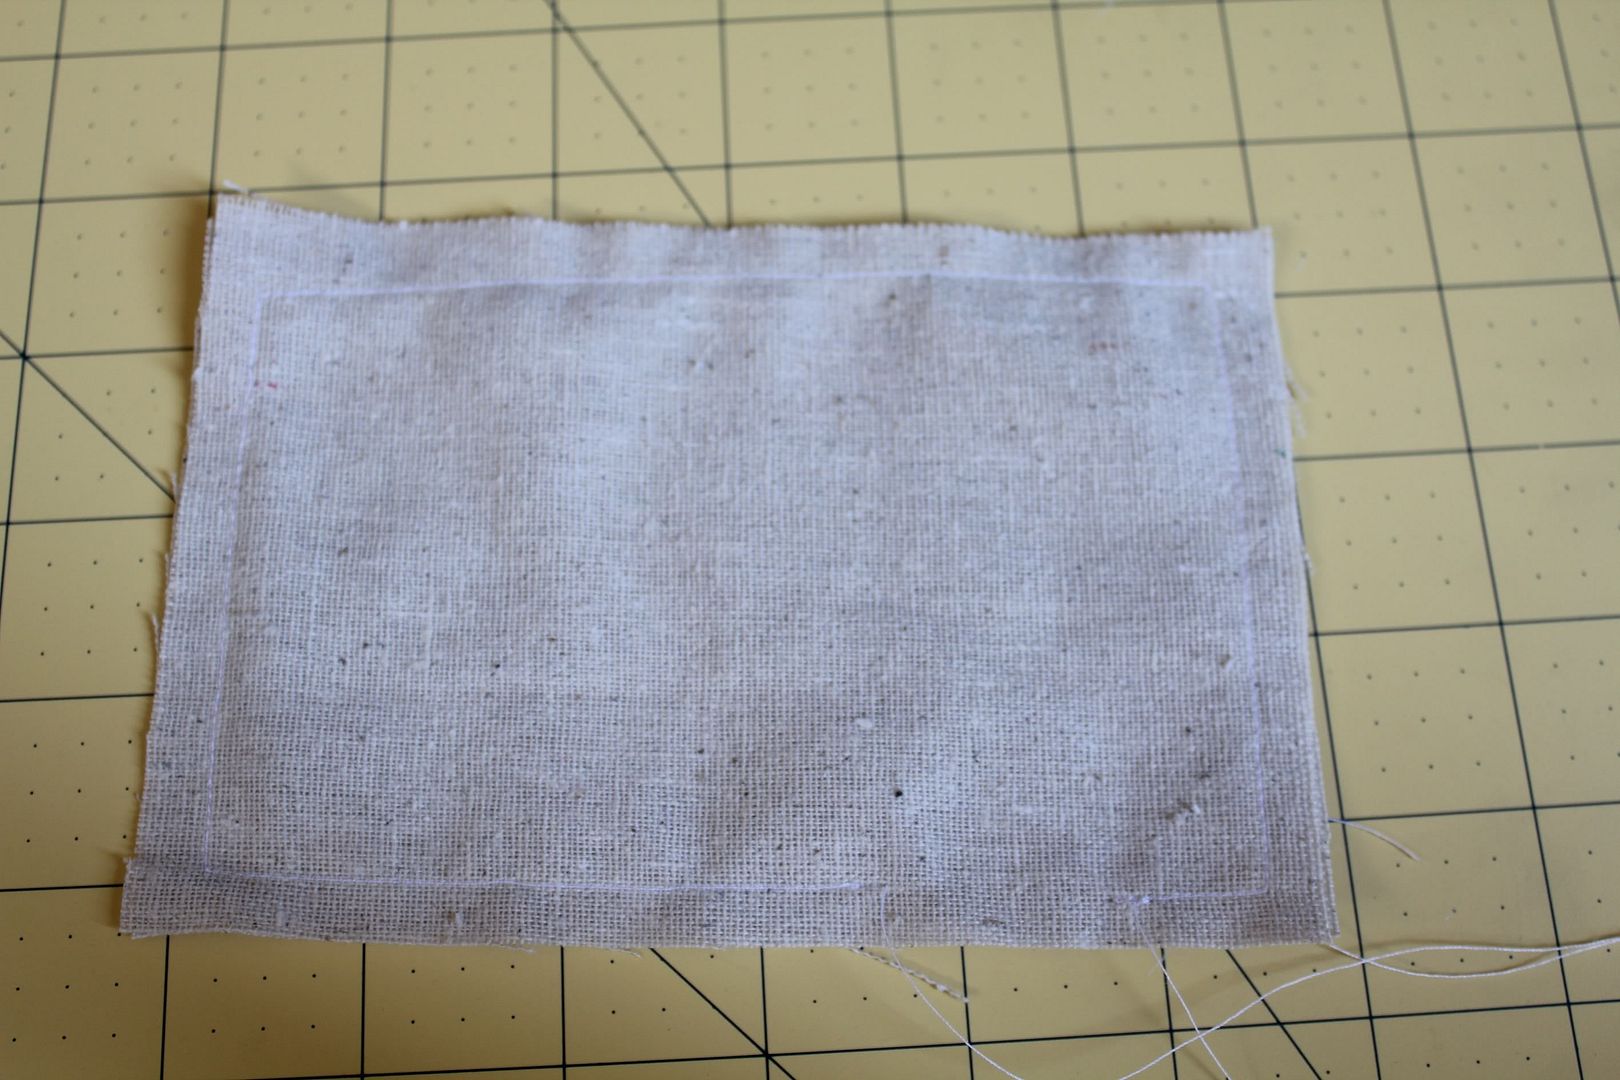
- Snip the corners and turn right side to. Use something to push out the corners; I usually use a wooden skewer or a chopstick. Iron flat and top stitch around using a 1/4 inch seam allowance.
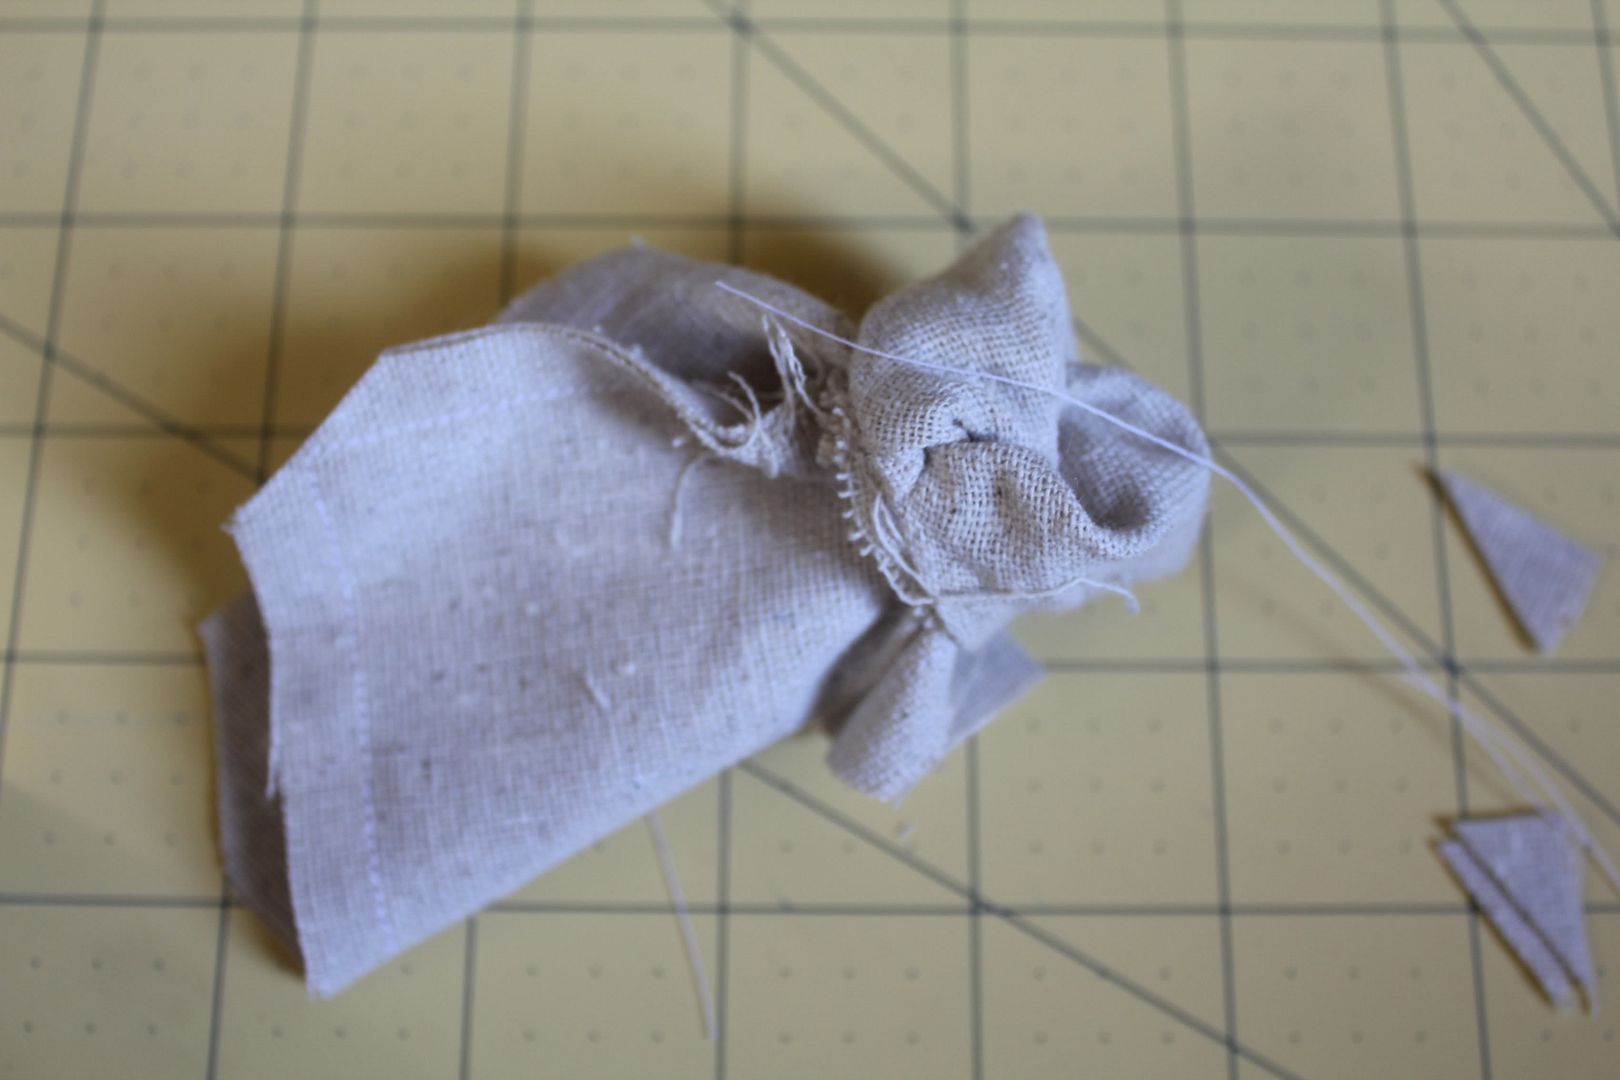
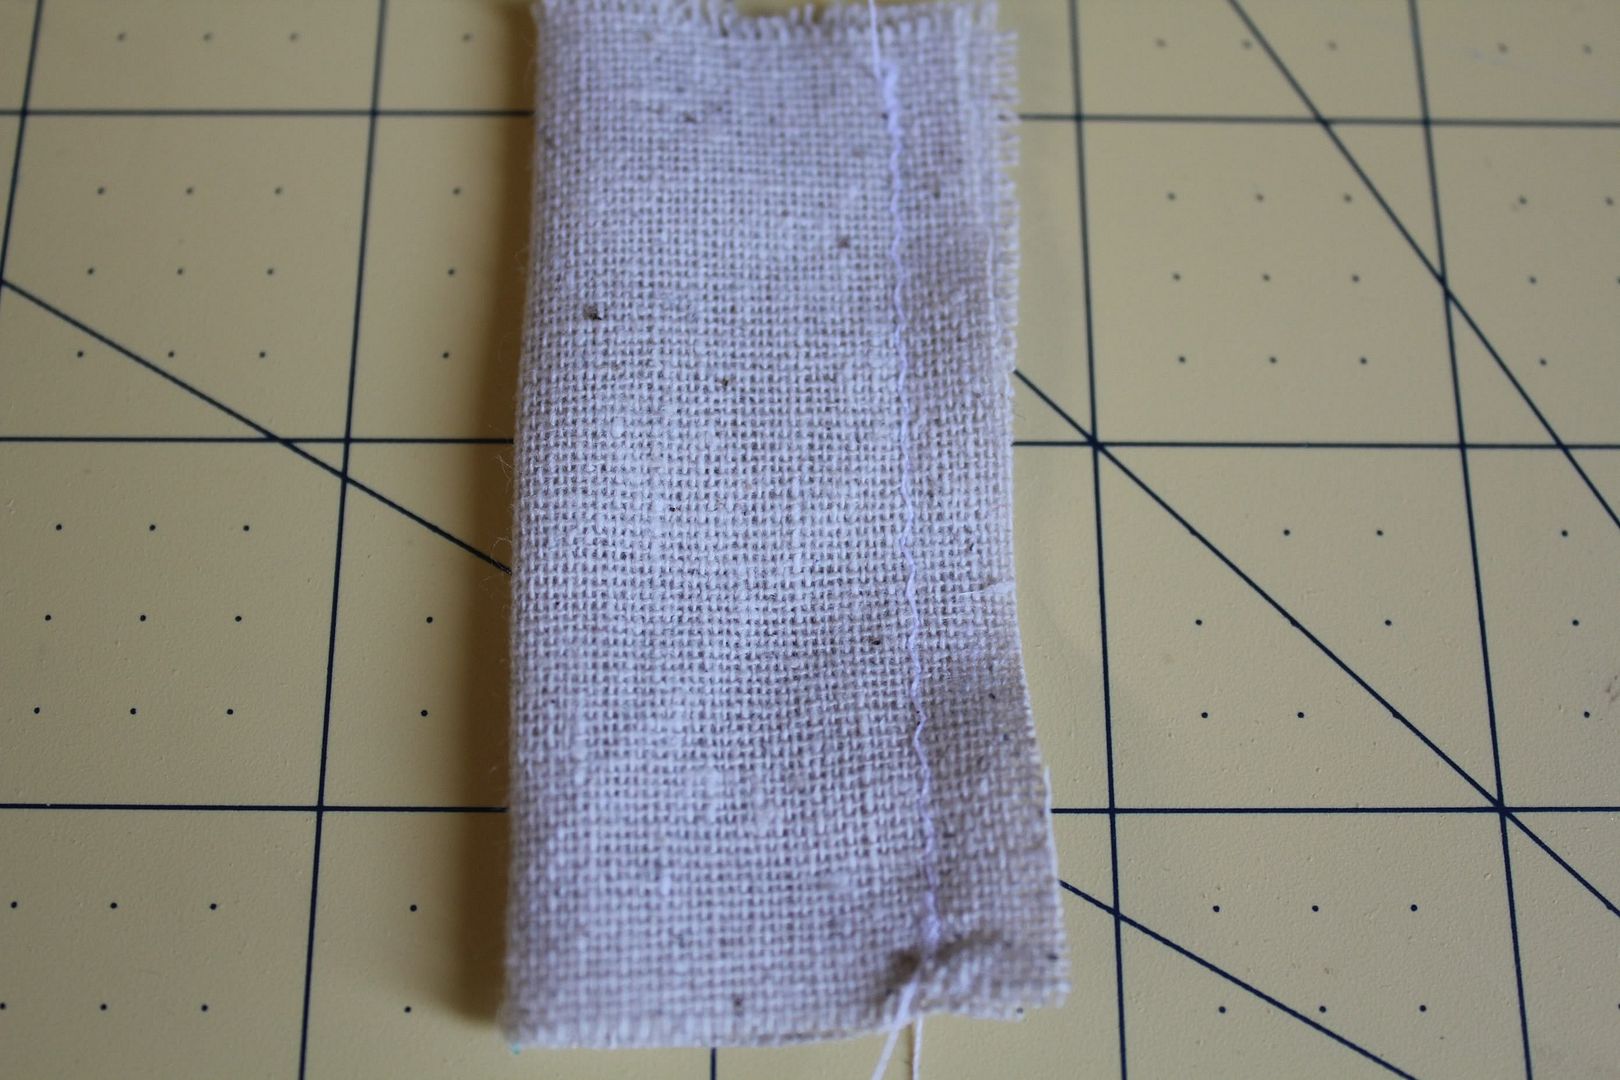
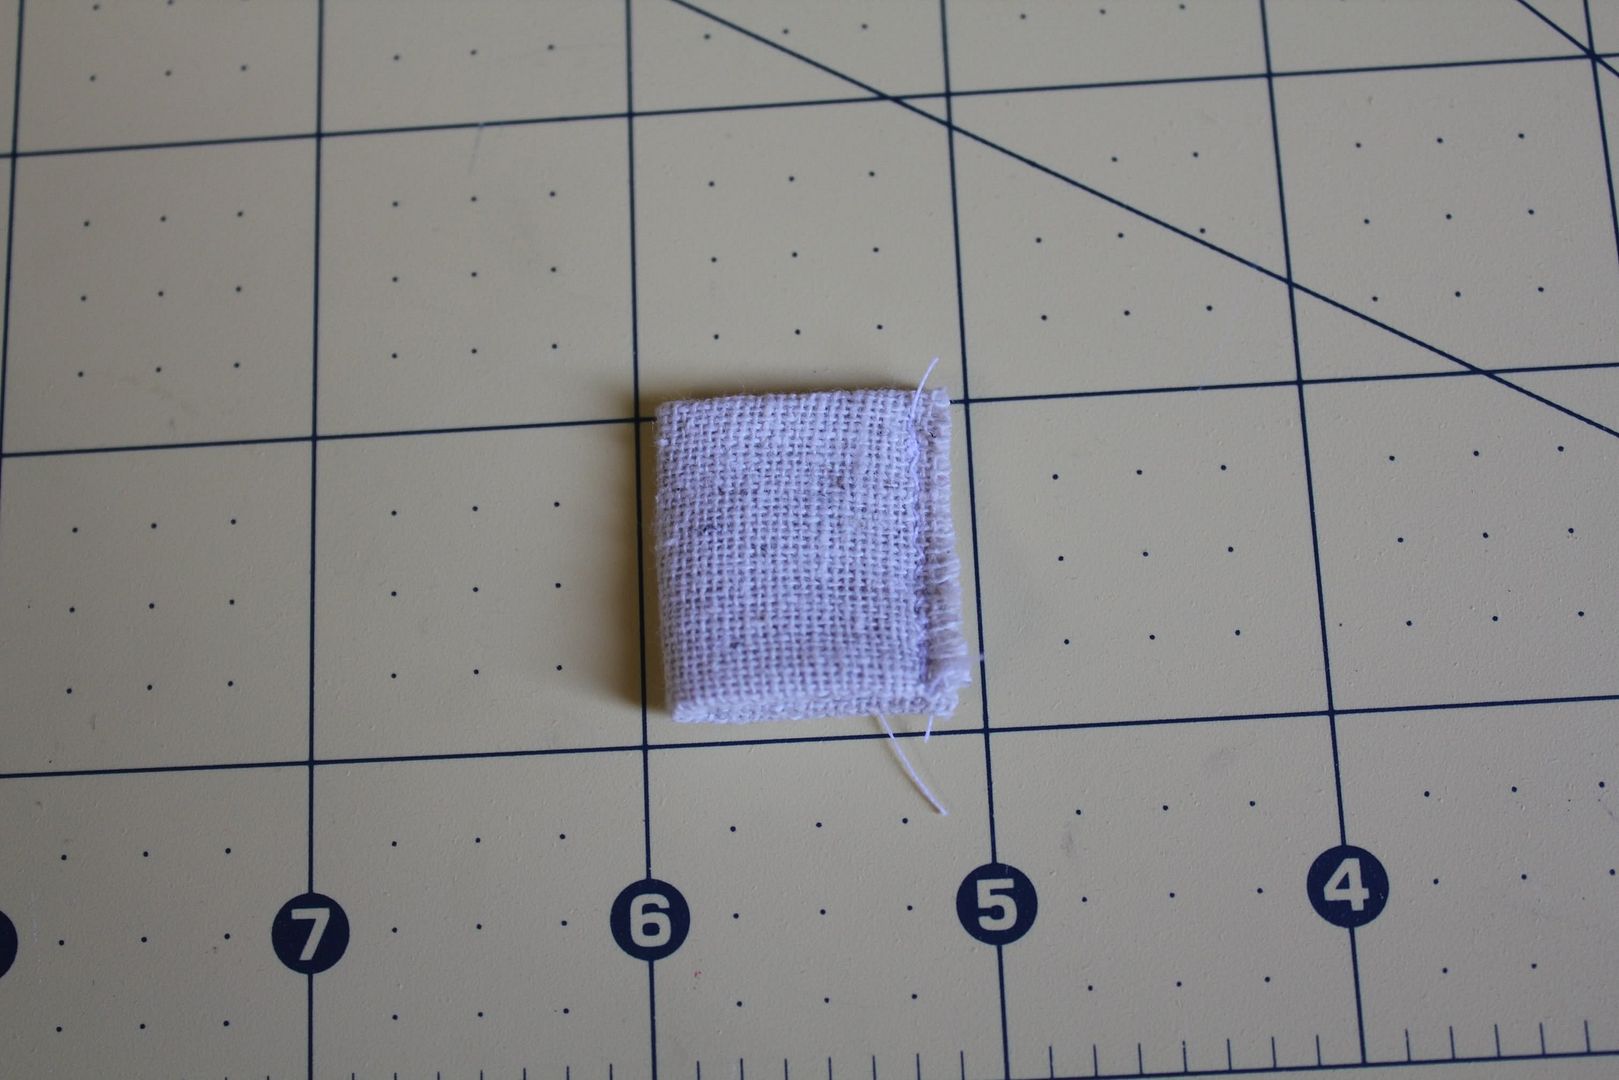
- Take another scrap of fabric. Fold in half. Sew a small zig-zag stitch down the side to make a tube. Turn right side to. This might be somewhat difficult depending on the size of your tube. The size of your tube will determine how tight or loose the center of the bow will be. Sarah wanted hers fairly tight so my tube is pretty small.
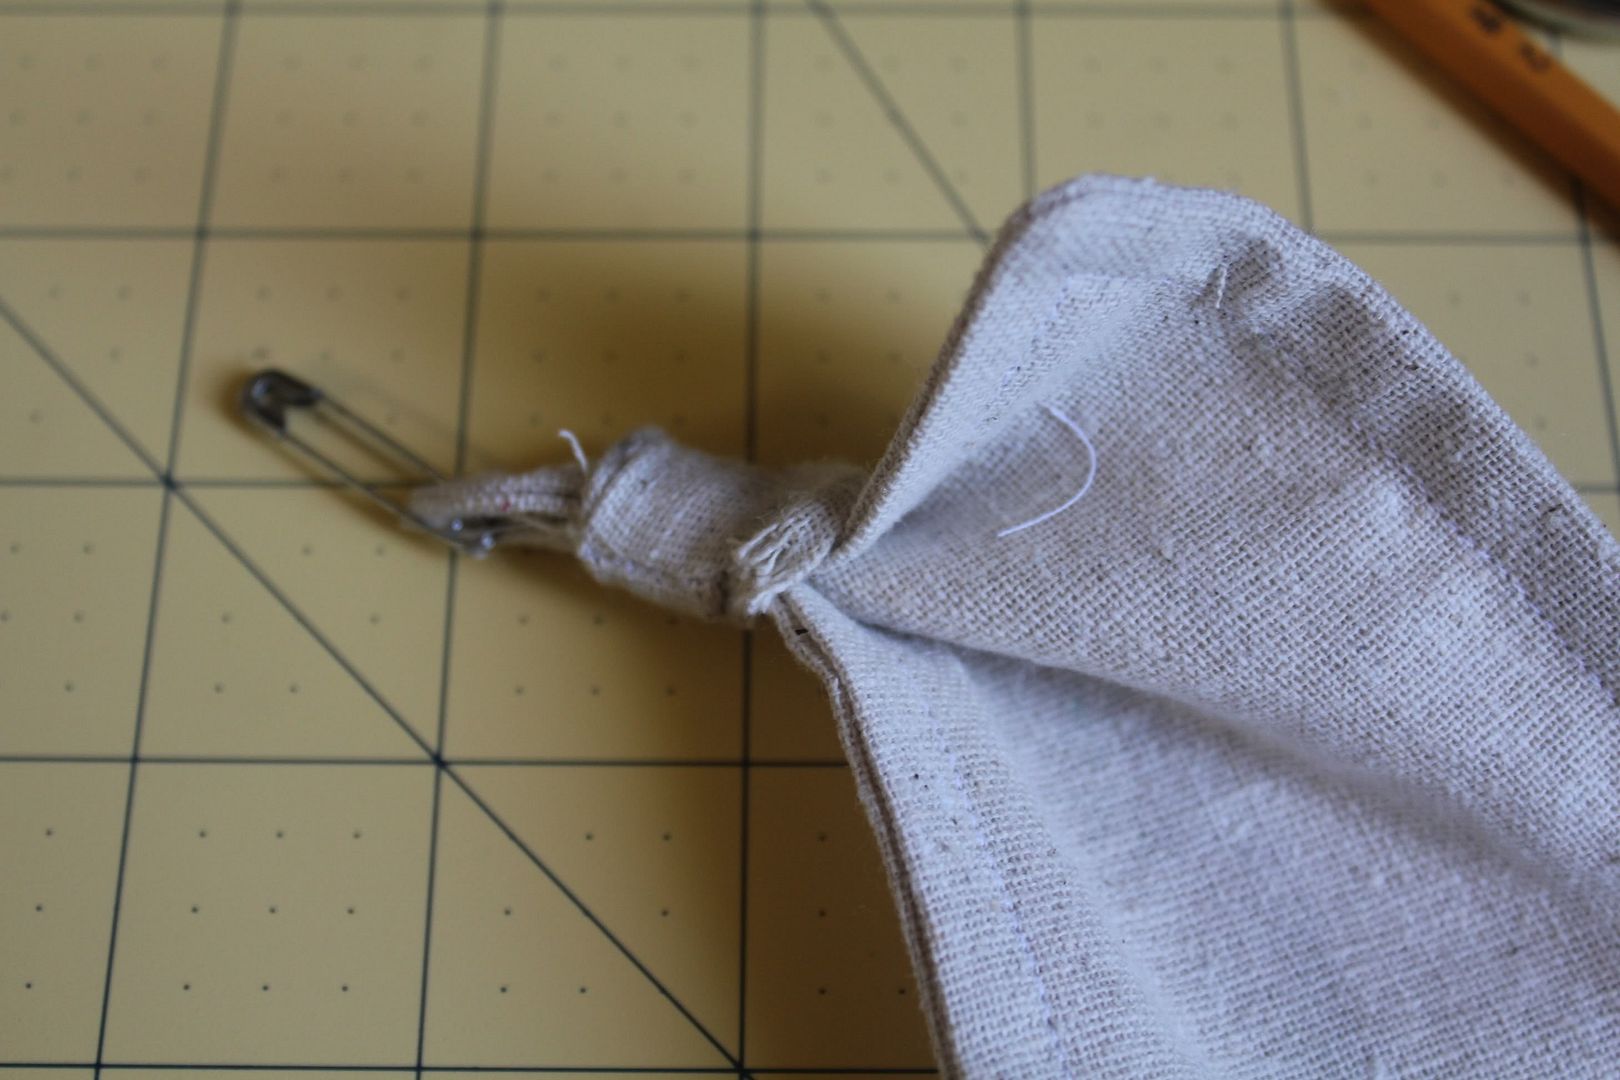
- Hook the safety pin on one corner of the rectangle. Use it to pull the rectangle through the tube. Once both corners are through the tube, shape the bow however you want.
Attach the bow to a bobby pin, barrette, or headband. Easy peasy and completely free. Now if only I could figure out how to actually wear a bow...

Thanks for stopping by! Have a lovely day!
And Sarah...I have another bow for you. :)
And Sarah...I have another bow for you. :)
No comments:
Post a Comment