Tuesday, August 16, 2011

Cook Something: Sour Cream Cheesecake


Ah, coffee cake.  For some reason, I find you so endearing.  Perhaps it's because you share the name with my addiction favorite beverage.  Perhaps it's the sweet crumbly topping sprinkled over a ever-so-slightly sweetened cake.  And perhaps it's because you're pretty dang easy to make.

Coffee cake is pure comfort food to me, and with the school semester rapidly approaching, I think we need all the comfort we can get.  Speaking of school, I was on campus yesterday and today (and tomorrow) helping out with orientation.  I'm a co-director of the Mentor Program.  SMU Law has this cool program where they group incoming students with a pair of current students to help show them the law school ropes.  It was so nice getting to mix and mingle with all of the incoming students.  They're so terrified and nervous, and I remember being in those shoes not too long ago.  It's nice to help out, even if it's only in a marginal way.


Sour Cream Coffee Cake
Adapted from Jan Taylor at All Recipes

Ingredients:

  • 1 cup butter
  • 2 cups white sugar
  • 2 eggs
  • 1 cup sour cream- it's basically the entire small plastic container
  • 1/2 tsp vanilla extract
  • 2 cups all purpose flour
  • 1/8 tsp salt
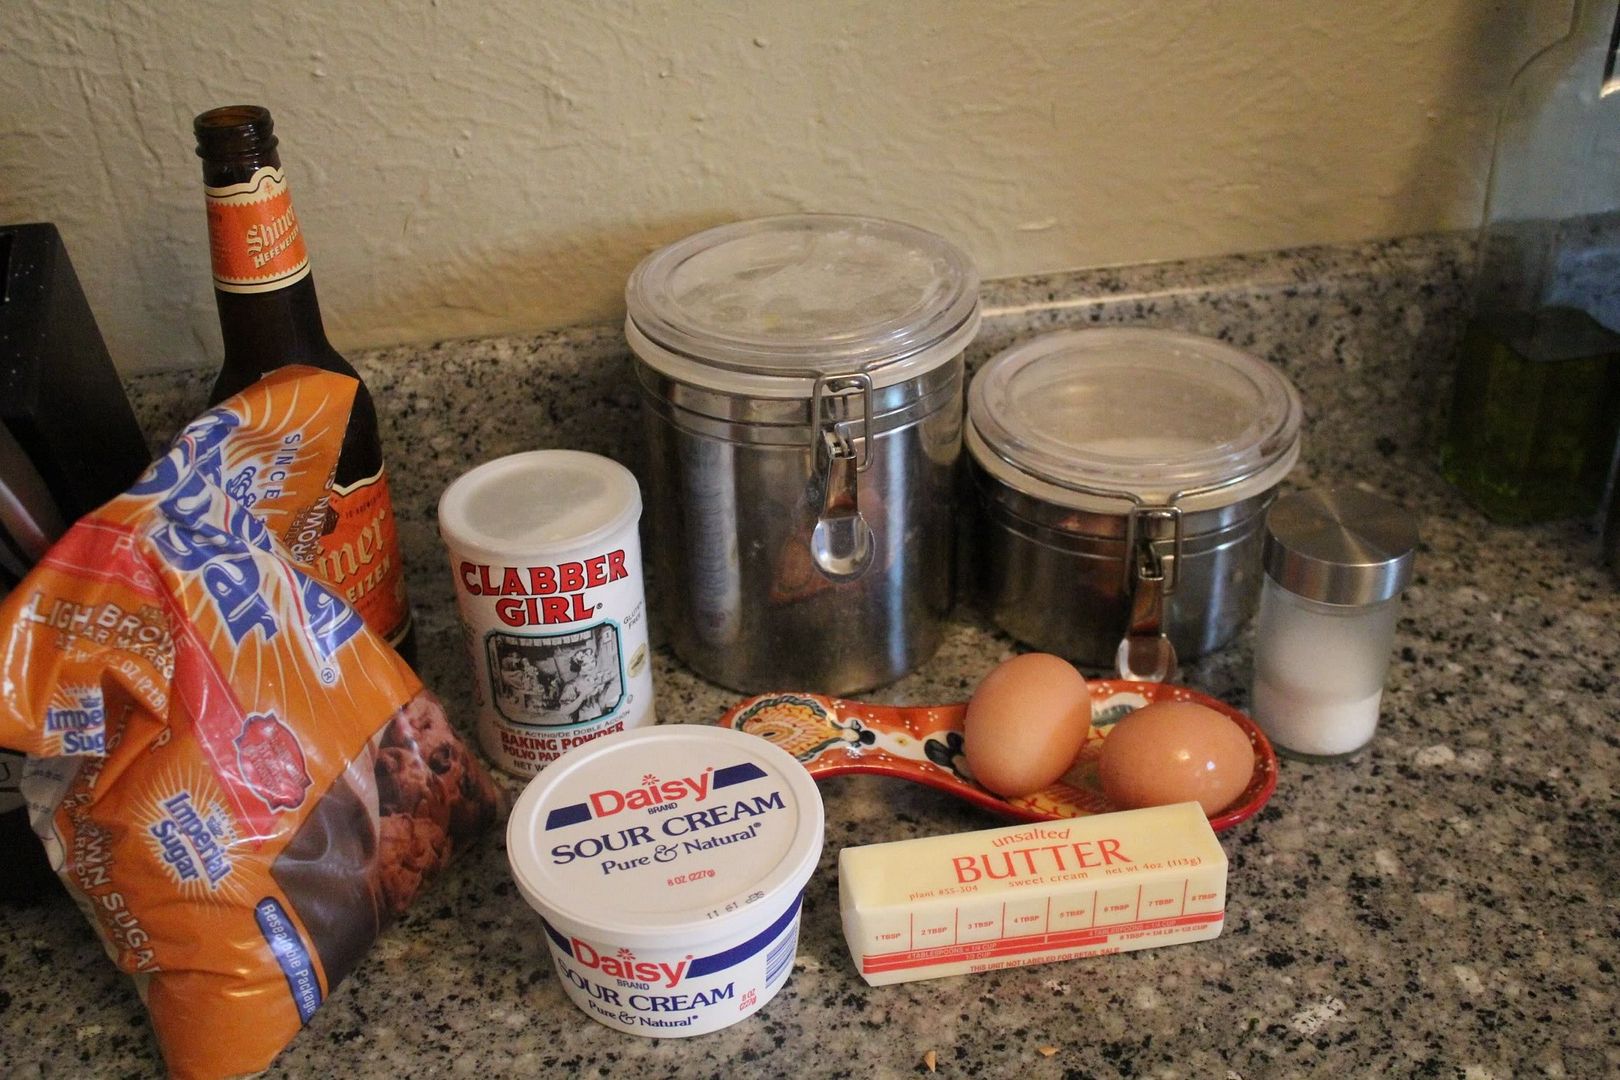
So about the Shiner in the background...I may or may not have made this at 7:00 at night.
Crumb Topping
  • 1/3 cup flour
  • 1/2 cup packed brown sugar
  • 2 tbsp melted butter
  • 2 tsp ground cinnamon
Directions:
  • Preheat the over to 350 degrees.  Grease a 9x13 inch baking pan.  Alternatively you could use a bunt pan, which I considered, but I'm addicted to the crumbly topping and you won't get that with a bunt pan.
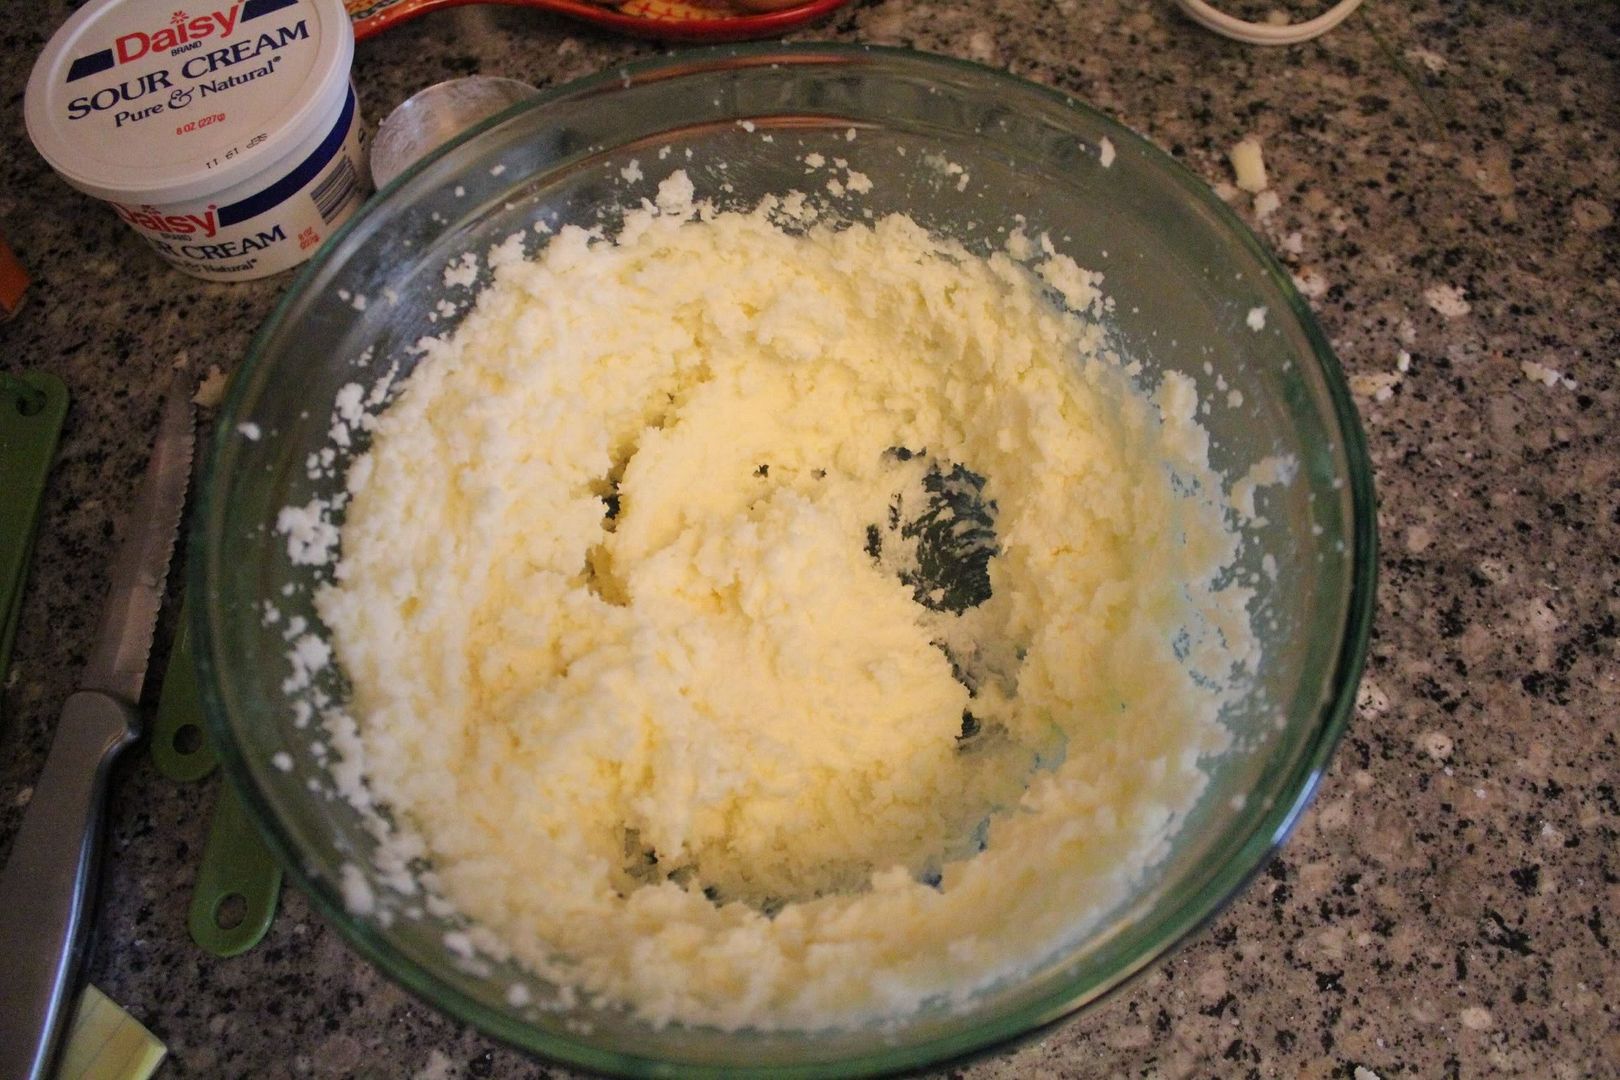
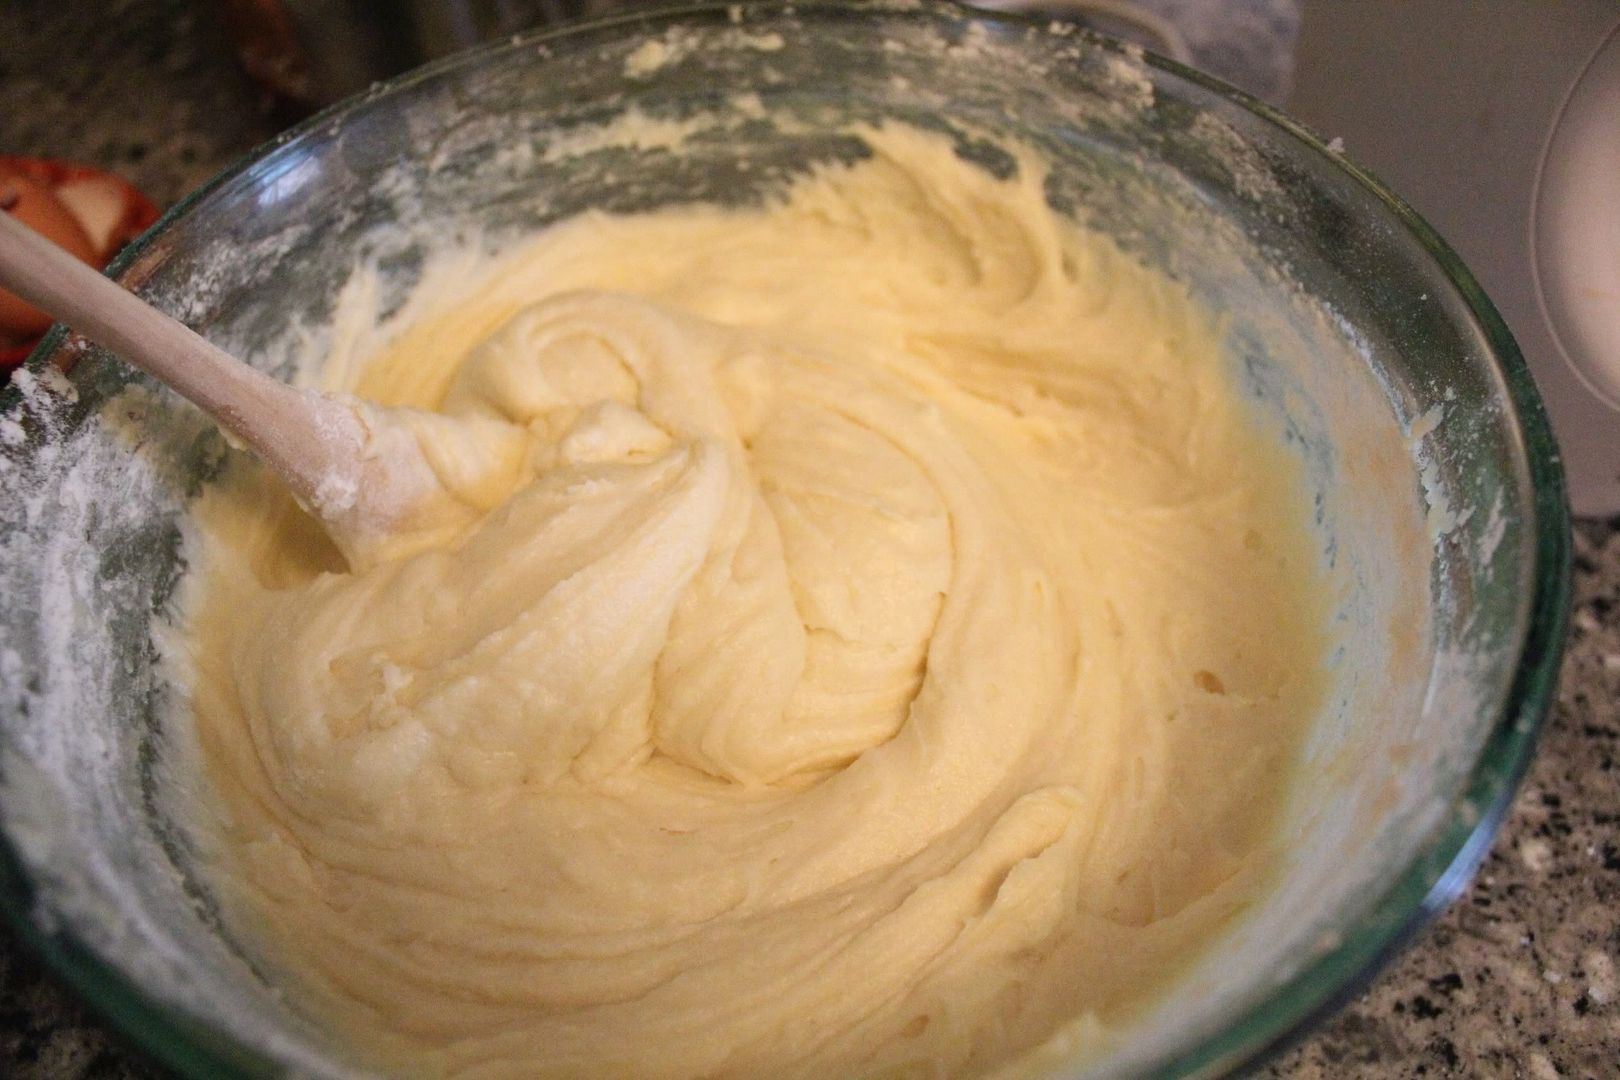
  • In a bowl, cream together 1 cup of butter and the white sugar until fluffy.  It shouldn't take too long if your butter is already soft.  Beat in the eggs on at a time, then stir in the sour cream and vanilla.  Using a wooden spoon, mix in 2 cups of flour, baking powder, and salt.  That's it; told you it was easy.  Spread 1/2 of the batter in the bottom of the pan.
Whip it, whip it good.


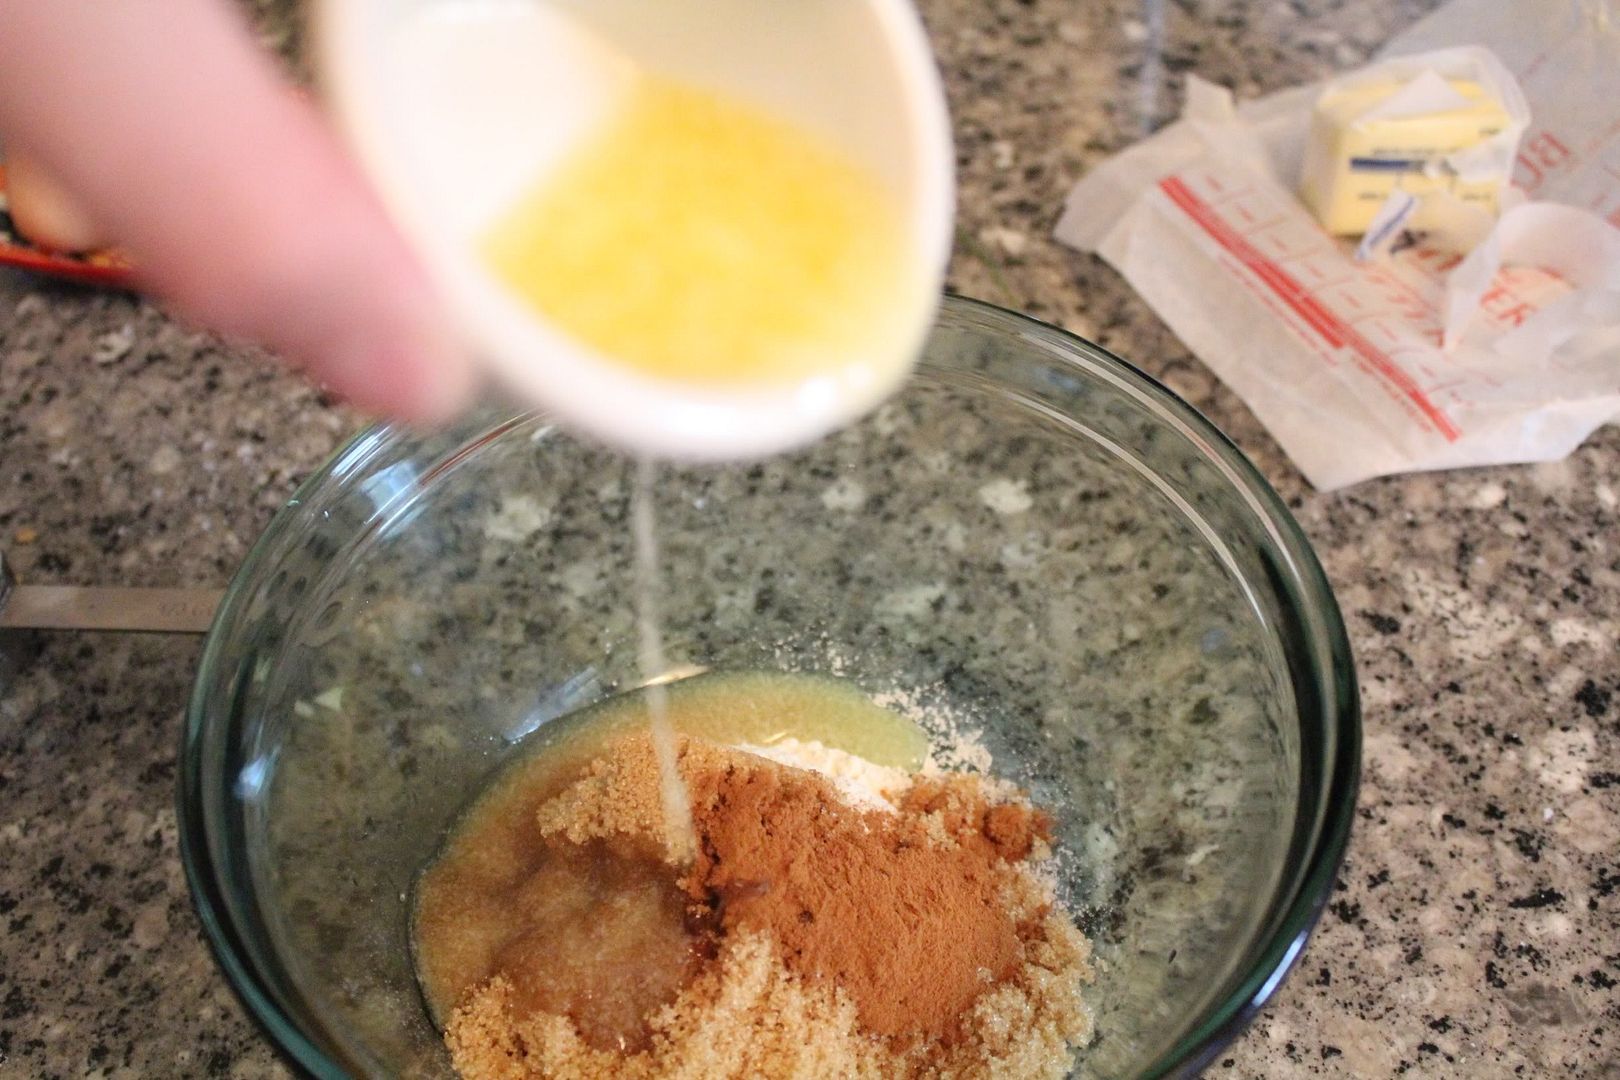
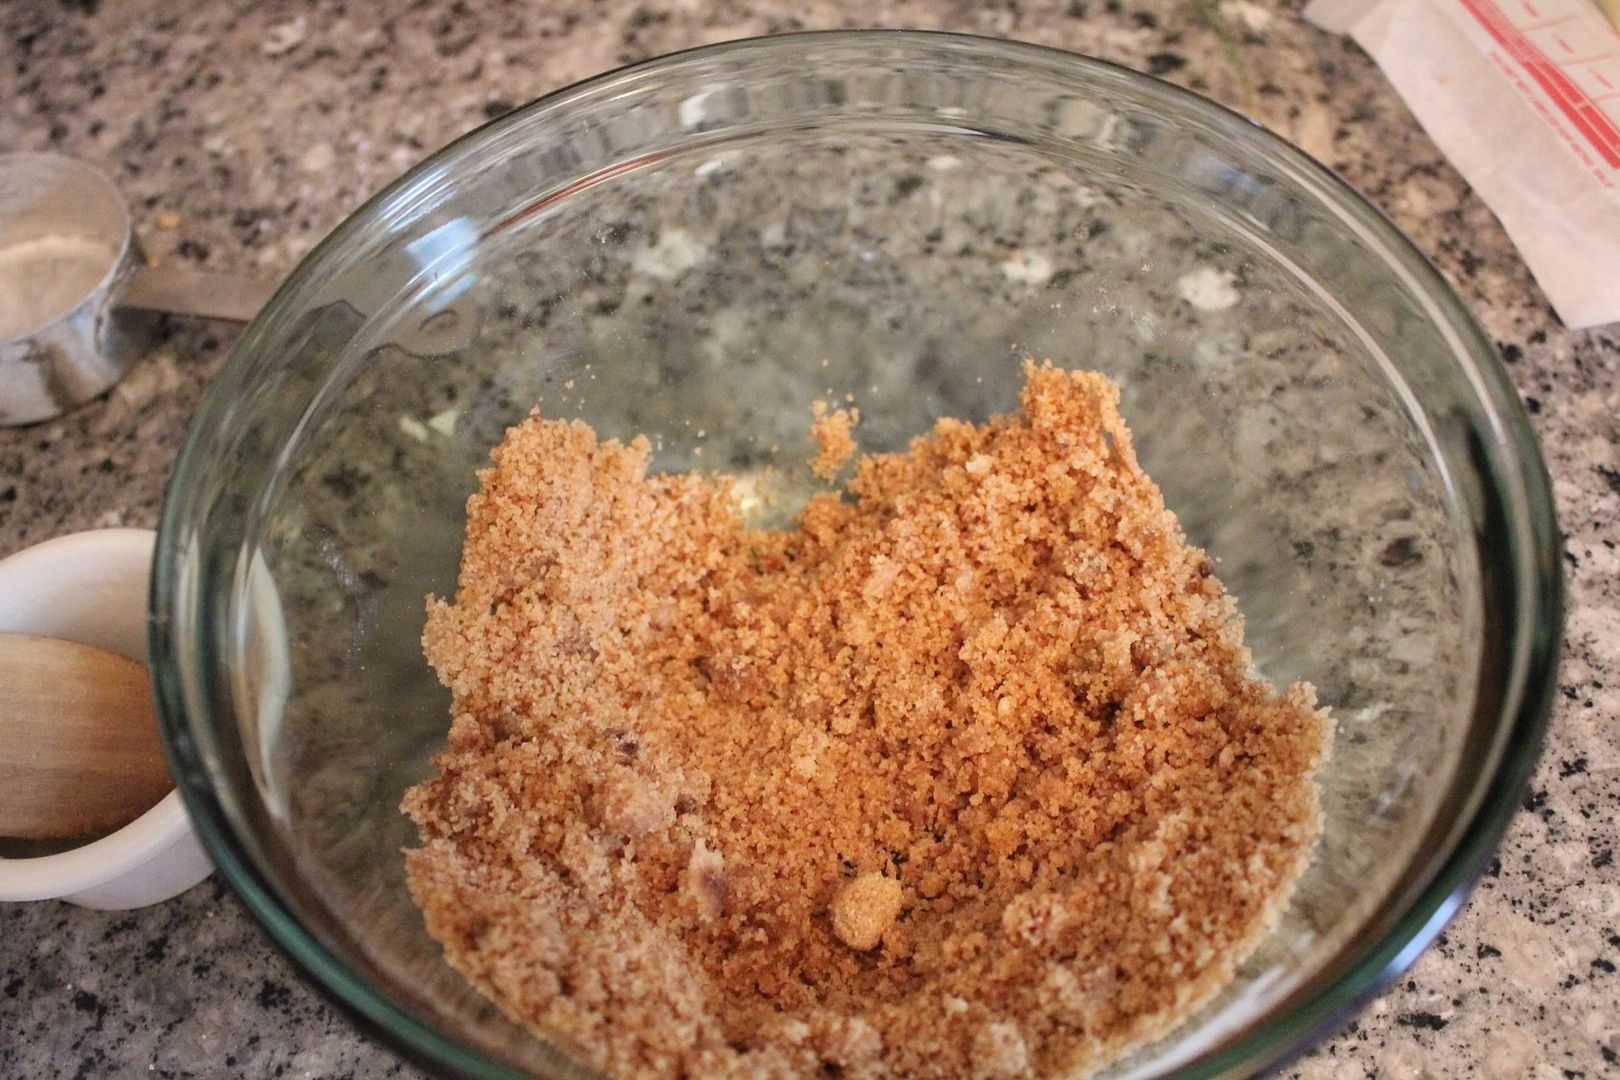
  • Make the filling: in a bowl, combing the flour, brown sugar, and cinnamon.  Drizzle the melted butter on top and toss until small crumbs form.  Spread 1/2 of the filling onto of the batter.
Mmmm...butter.  I happen to share Paula Deen's love of butter.


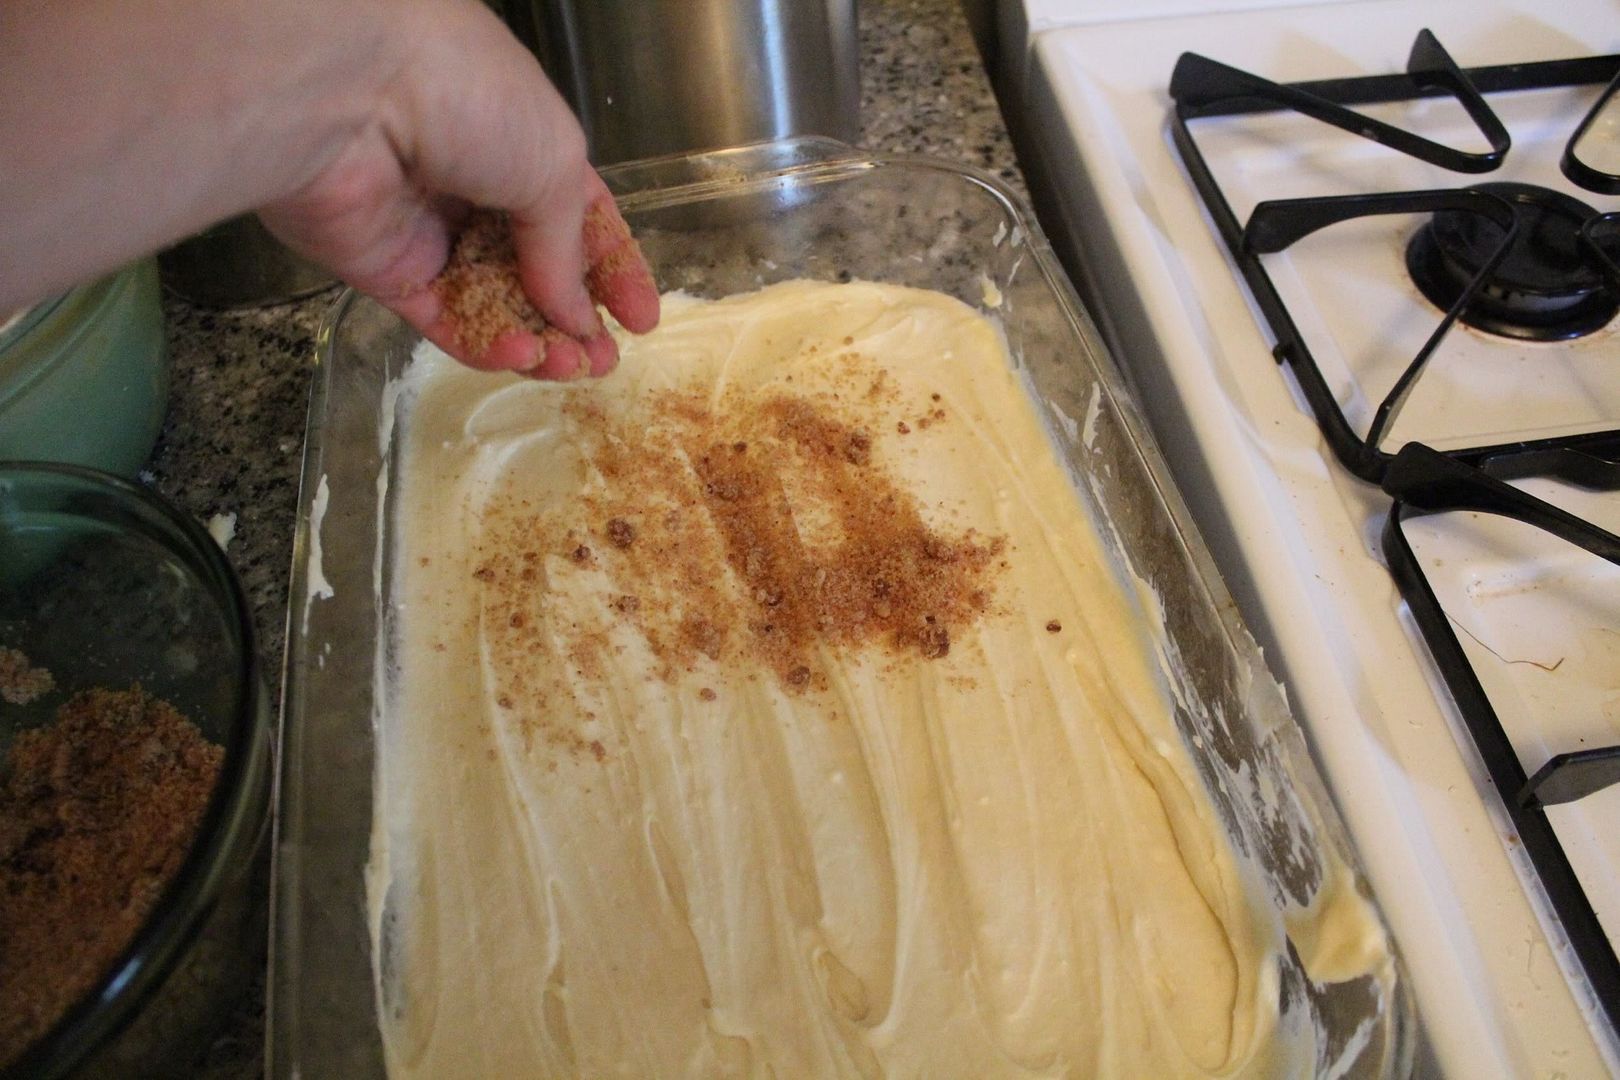
  • Spread second half of batter over the filing and top with the remaining filling.

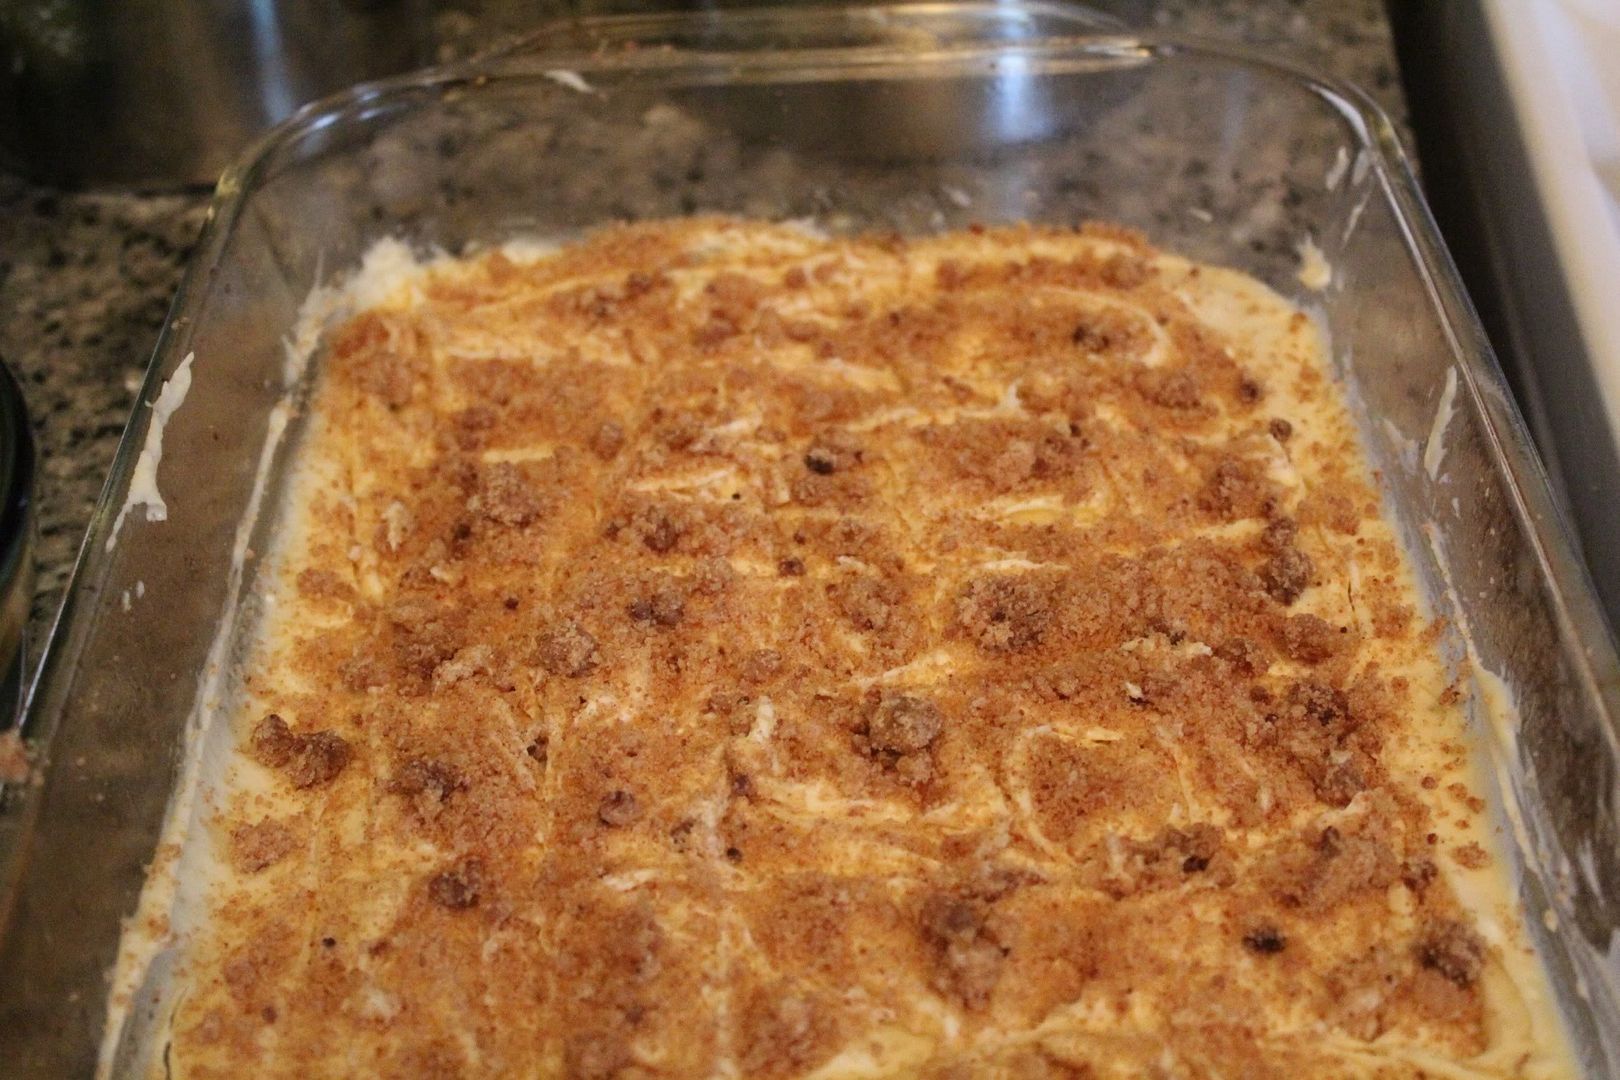
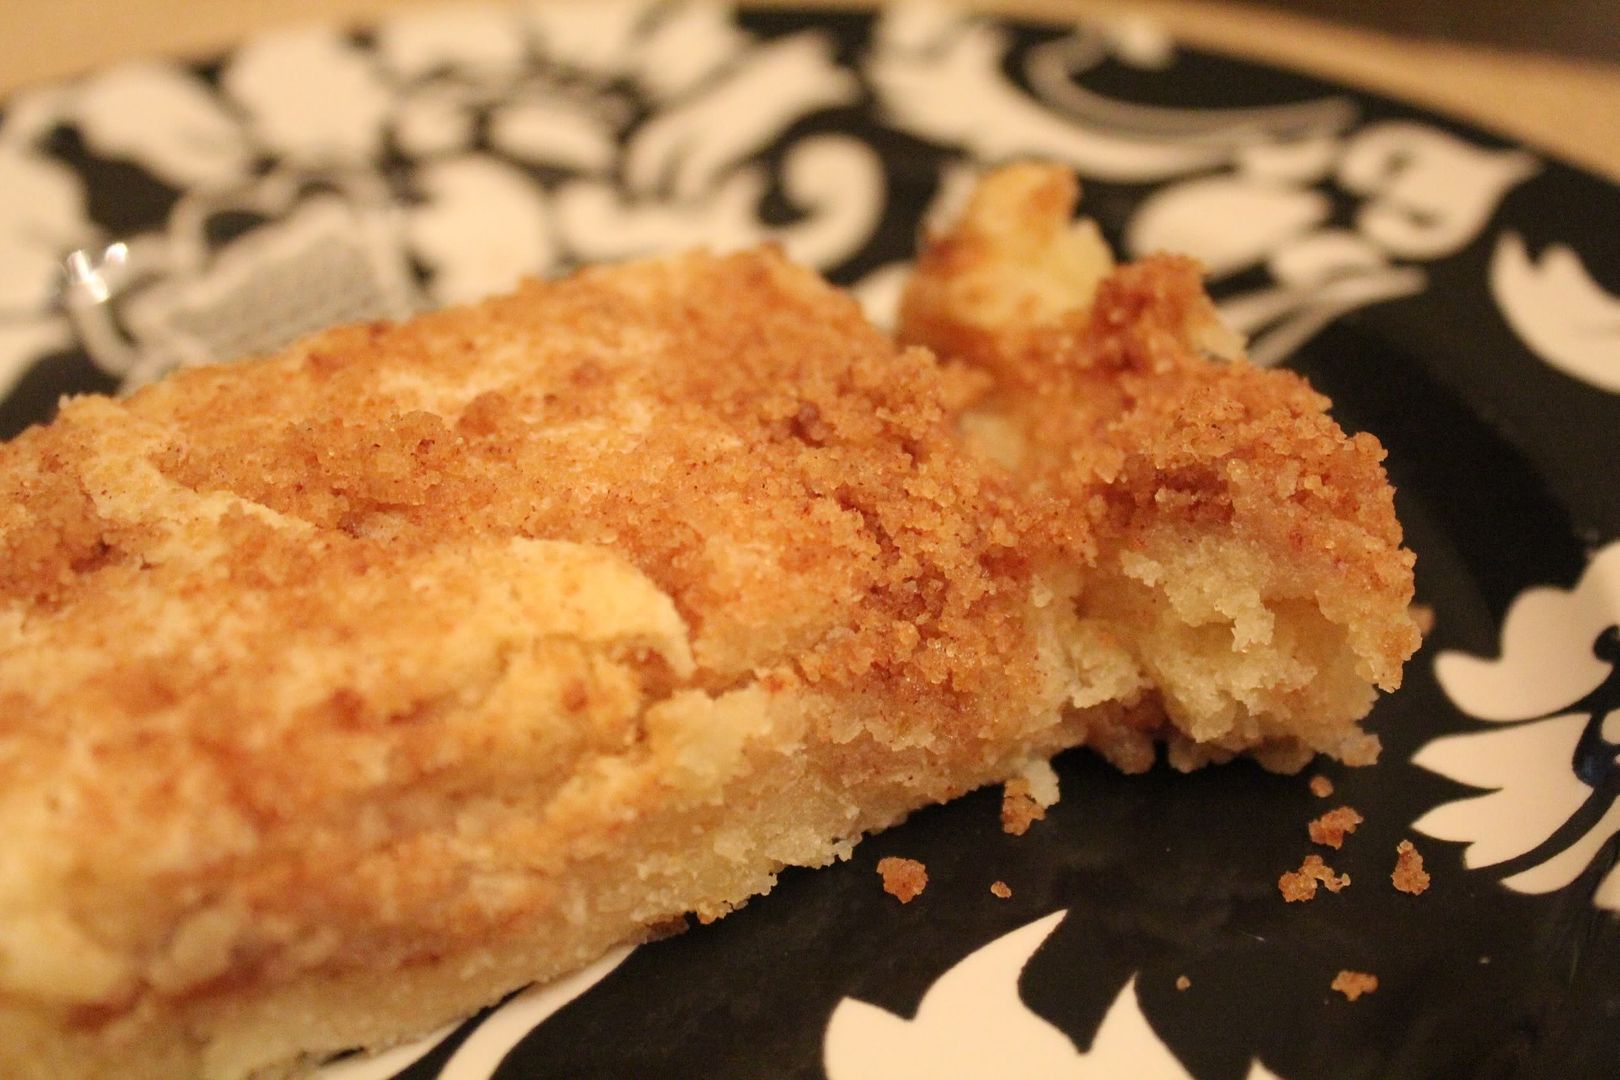
  • Bake for 35-40 minutes or until a toothpick inserted comes out clean.
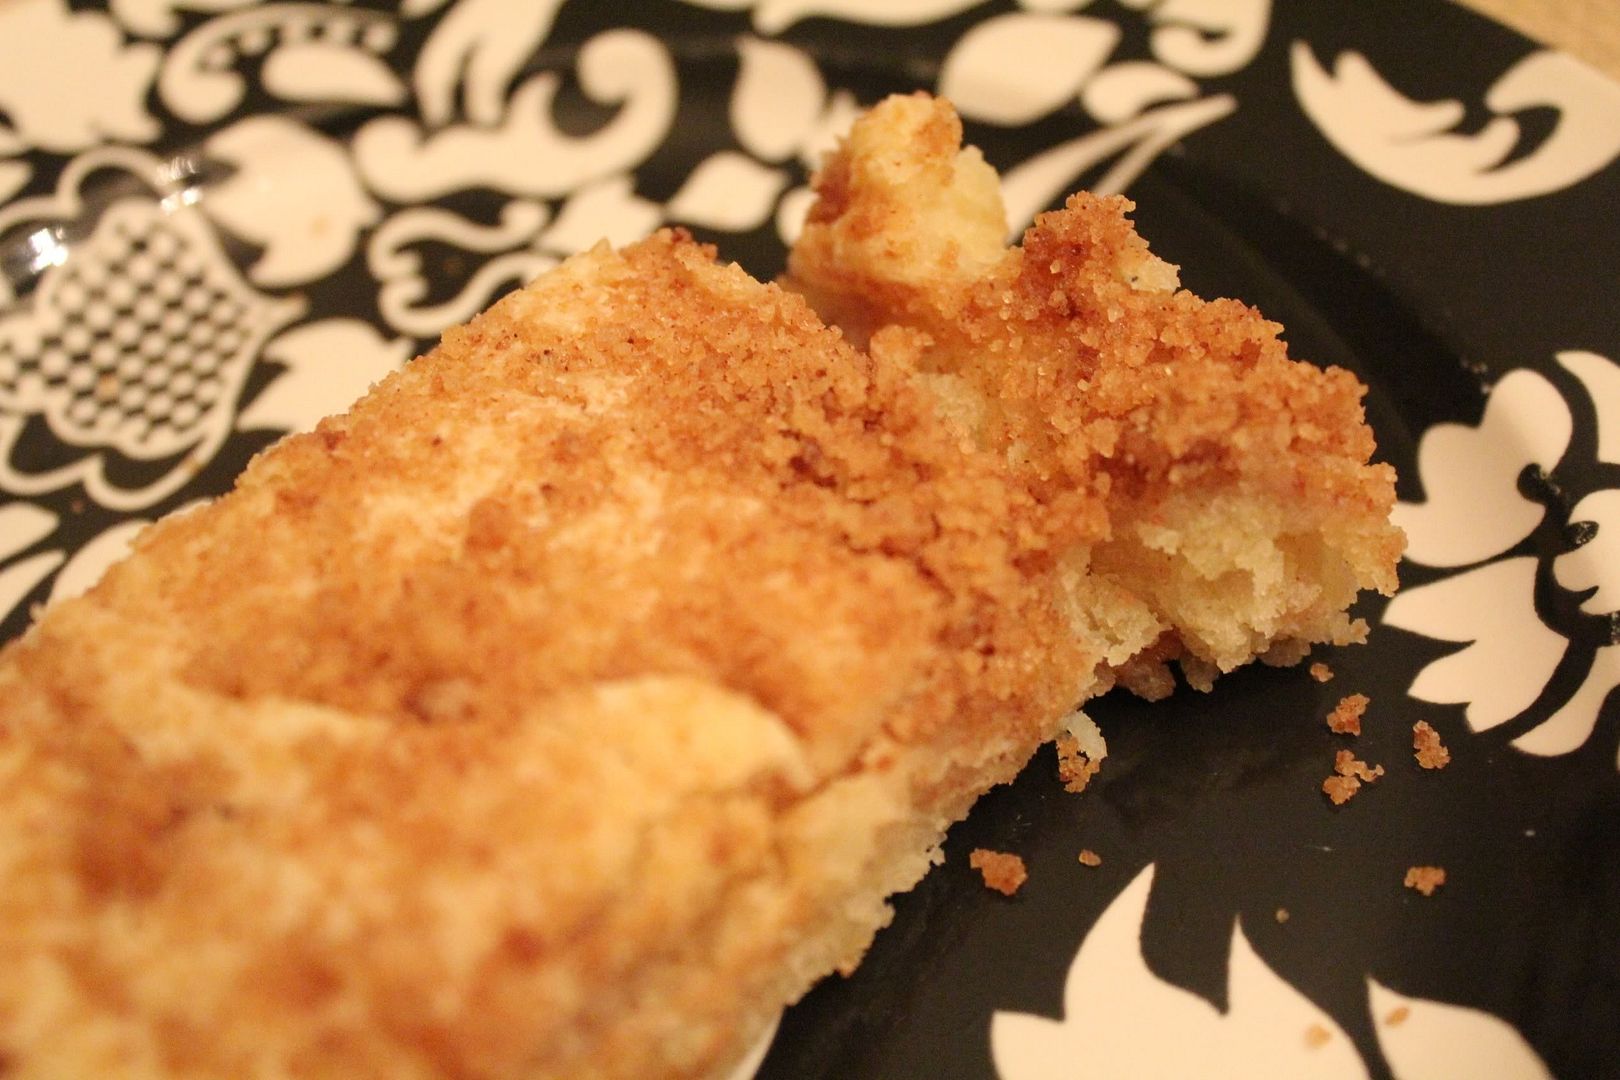
And don't ask me why I cut these into long rectangles instead of the usual squares.  Clearly I need a food stylist.  Anyone from the Dallas area want to volunteer?  Pretty please?

And a heartfelt thanks to everyone who has voted in the craft competition- even if you didn't end up voting for me!  There are so many great projects on there!

One housekeeping thing- I noticed today that the tabs at the top are in desperate need of updating.  I'll try to get it done soon, but in the meantime check out the topic tags and the archive names (I try to name everything accordingly) if you're looking for something.

Love and best wishes!

Monday, August 15, 2011

So You Think You're Crafty?


A while back I applied to be on an online craft competition. I've followed along for a while, and I figured it'd be fun to try my hand at competing. I made the final audition round and voting begins today. There are 14 people auditioning and 10 people make it. I can't tell you which is mine, but you should definitely go vote for your favorite here!


I was BLOWN. AWAY. by the auditions!  There are some really great ones there.  I'm not sure I'll make the cut, but I've definitely enjoyed trying.

And in case you're wondering...yes, I'm trying to add a craft competition on top of everything else I do.  Sleep does not seem like something I'll be doing much of this year.  You know me, always one to live life to the fullest.
Source: Ali Edwards

Thanks everyone for all of the support with this endeavor and with the approaching school year!


Wednesday, August 10, 2011

The twilight of summer


So I know I said that I'd post a couple of tutorials while at the lake, and I had every intention of doing that.  Buuuut, in order to post things you need pictures, and in order to take pictures you need a camera.  I completely forgot to bring my camera, which was even more upsetting by the fact that I couldn't take pictures at the wedding.

I've been pretty terrible about blogging these last couple weeks.  I'm ok with that, but I want to explain why.  I'm currently in the twilight of summer stage.  I have two measly weeks left until schools stars {again}.  I feel like I'm in the eye of a hurricane, and the temporary lull is almost over.  Instead of idyllic evenings and weekend adventures, it'll be 9 months of studying hell, sobbing breakdowns, and obsessive planner usage.  Logically I know the next 9 months won't be all terrible.  They'll be filled with adventures, laughter, and bouts of sleep deprive euphoria.  I know this, and to be honest I'm excited and ready for the upcoming semester.  But right now all I can see is the approaching storm, and all I want to do is be lazy until it arrives.
Free Printable from Making it Lovely.

I don't want to paint.  I don't want to clean.  I don't want to write.  I don't want to do anything that approximates a responsibility until that becomes the full time norm.  My sudden need for laziness is probably exacerbated by the alarming number of meetings I have for the next two weeks.  I have a meeting Thursday, law review training Saturday, a meeting Sunday, helping with orientation next Monday through Wednesday, first day of class assignments to tackle, and who knows what else.  Then, school starts August 22nd.

So forgive me if I'm absent.  I'm trying to soak up the last rays of the summer sun before I lock myself in my office and the library.  Things will be back to normal around here, once I'm no longer chasing freedom.

*I'm also auditioning for a craft competition where the crafts have to be anonymous.  So I'm trying to stock pile crafts for that competition, which limits my ability to post them on here currently.*

Thanks so much for your patience, and good luck to everyone preparing to start another round of school, especially to all of my law school peeps!  

Wednesday, August 3, 2011

Talking 'Bout a Heatwave!

I'm not sure about where you are, but in Texas it is hot, hot, HOT.  Yesterday the forecast looked like this(!):


Yesterday's temperature actually reached 112 degrees at the peak of the day...and it was still over 100 degrees at 10pm!!!  Nuts.  I cannot remember a time when it has ever been this hot, and I've lived in Texas my entire life.  We're on 33 days of triple digit temperatures, and clearly, it doesn't look like the end is in sight.  The record for Dallas is 42 days, and we're either going to break that or get very, very close.  The grass in my backyard is completely burnt, even though we have automatic sprinklers (although the amount/time is drastically limited due to extreme drought conditions).

Days like today make me want to do this:


or this:


or this:
*Note- I have like a billion swimsuits, so I find it funny I'm wearing the exact same one in all of these pictures.

And drink this:

CLSangriaTable

And because I am blessed beyond ways that I deserve, that's exactly what I'll be doing tomorrow through Sunday.  Jason and I leave for the lake this evening, and I can't imagine a better way to turn 26.  There's also a wedding on the docket for this weekend (no, not mine!), so that makes it even sweeter.

I'll be posting lots of photos and a couple of tutorials while I'm at the lake, including a super easy maxi dress and some tasty coffee cake, so come back soon!  And if you're in a city that's being scorched, drink plenty of water!


Tuesday, August 2, 2011

Sew Something: 10 Minute American Apparel Bow Knock-Off

One thing Sarah wanted to do last weekend was visit all of her favorite stores.  So before our downtown adventure, we made several shopping stops.  One of those was at American Apparel.  She loves hair accessories of all shapes and sorts.  So when we happened across an entire wall filled with hair bows she was more than a little ecstatic.  She's trying out the bows and I'm deconstructing them in my head.  I realized almost immediately that they'd be incredibly easy to DIY at home.  Then I asked her how much they cost, just to make sure it'd be more cost efficient.  $14.  I nearly fell over.  $14 for a hair bow that I knew wouldn't take me longer than 20 minutes?  No flippin' way.  So Sunday morning we did just that.  I was a little distracted so I didn't get any pictures of the one we made on Sunday.  So yesterday I decided to make another one.  Unfortunately for you, that means you have to see it modeled in my wild Medusa hair instead of Sarah's well styled hair.  {Side note- I've never been one for hair accessories.  There's something about having a mop of curls that makes hair anything superfluous.  Hence the sad attempts at bow wearing. Oh well.}


The greatest thing about this project?  It was completely free.  It only requires a couple of things, and so long as you have some fabric scraps at home, you won't have to buy a single thing.  That sure as heck beats a $14 one.

Materials:
  • Two 4"x6" fabric rectangles.  And how did I come to this size?  Simply by cutting a piece of paper until Sarah was happy with the shape and size.  Pretty much an exact science.
  • One small fabric scrap to make the tube
  • Basic sewing equipment
Instructions:
  • Iron the two fabric rectangles.  Place them right sides together and pin around the edges.


  • Using a straight stitch sew around the edges with a 1/4 inch seam allowance.  Leave a 1-2 inch opening on one side to turn the rectangle right side to.


  • Snip the corners and turn right side to.  Use something to push out the corners; I usually use a wooden skewer or a chopstick.  Iron flat and top stitch around using a 1/4 inch seam allowance.


  • Take another scrap of fabric.  Fold in half.  Sew a small zig-zag stitch down the side to make a tube.  Turn right side to.  This might be somewhat difficult depending on the size of your tube.  The size of your tube will determine how tight or loose the center of the bow will be.  Sarah wanted hers fairly tight so my tube is pretty small.


  • Hook the safety pin on one corner of the rectangle.  Use it to pull the rectangle through the tube.  Once both corners are through the tube, shape the bow however you want.


Attach the bow to a bobby pin, barrette, or headband.  Easy peasy and completely free.  Now if only I could figure out how to actually wear a bow...


Thanks for stopping by!  Have a lovely day!

And Sarah...I have another bow for you.  :)

Monday, August 1, 2011

My Weekend in Pictures

It's official.  The worst blogger award goes to yours truly.  I know I was completely MIA last week, aside from the closet pictures.  School stuff definitely has me running around like a chicken with my head cut off.  Things should be a little less busy this week, at least one can hope, so I'm planning on posting more.  I'm also leaving for home on Wednesday(!) so be prepared for a change of scenery!  And my birthday is Thursday!  Not sure I'm ready to be 26.  Ha.

My cousin Sarah came to stay the weekend with Jason and I.  We had a great time exploring downtown Dallas. AND happened to find the most awesome art installation at the Nasher Sculpture Center.  There was a room filled with 9,000 orange balloons.  Seriously.  I can't remember the last time I had more fun.


{Jason is still figuring out how to work my camera.}

Overall it was a great weekend.  Come back tomorrow!  I'm making hair bows like this $14 one from American Apparel.  Only it's going to cost us a lot less than $14 to make.  And by a lot less, I mean about $14 less.

See you then!