
It is frigidly cold in Texas right now. So cold that almost everyone I know has been stuck inside for the past 2 days and there are rolling power outages because too many people are using too much electricity. A thing you may not know about me is that I don't drive in bad weather. So when the news people recommend staying at home unless you absolutely have to leave, I do. It also makes it easier when your boss frequently tells you that you're not necessary you're superfluous. That said, I'm going to keep my superfluous self home and finish up some craft projects.
Many of you know that I moved recently! Since then I've been finagling things, trying to find everything a new home. A rather ugly and open storage piece now serves to house my DVD collection. I hate exposed storage. I knew I had to cover it and here's how I did it.
And in case you were wondering, here is what it looked like before...
Materials:


Many of you know that I moved recently! Since then I've been finagling things, trying to find everything a new home. A rather ugly and open storage piece now serves to house my DVD collection. I hate exposed storage. I knew I had to cover it and here's how I did it.
 |
| I'll eventually close the middle better with snaps and add satin ribbon to the bottom, but I didn't have any at home and was certainly not venturing out today. |
 |
| Really drives me crazy. And yes, that's every episode of Seinfeld. |
- 3 yards of heavy weight fabric. (I used a linen.)
- Painter's tape (a lot)
- Very very very watered down paint. I used about a 50/50 ratio. but you could increase or decrease the water depending on how translucent you wanted your final paint to be.
- Basic Sewing Equipment
Instructions:
- First you need to measure the piece you're going to cover. For a 1/2 inch seam add a full inch to the measurements. So if your cabinet side is 12x35 (like mine was), your final measurements will be 13x36. Measure each side and cut out the corresponding fabrics. This is a vital step. If your measurements and cuts aren't correct, your cover will not fit properly so take your time. And remember, measure twice, cut once! Also, there is where a rotary cutter, large clear ruler, and a measuring mat come in extremely handy.
- I cut the front piece into two sections and increased the total width by 5" inches on each piece. This enabled me to overlap the middle, so I can easily access the DVD's without them being easily visible.
Herringbone Pattern
I love herringbone, a lot. I couldn't find a fabric that I loved, and I've been wanting to create my own herringbone pattern for a while. (Originally I wanted to paint it on the wall, but my landlord didn't want me to paint. Boo.)
- The first step is to determine the size of your V's. The taller the V's the more modern the overall effect. I'm a fairly traditional girl so I made mine fairly wide. My V's were 8.5" wide and 4.5" tall.
- If you have some grid paper, by all means use it, but if not I just used a couple sheets of notebook paper. I originally tried to write out all of the instructions, but I think they ended up being way to long and way too confusing. However, put simply, the vertical lines in the pictures are measured at 4.25" and 8.5". The horizontal lines are 2.25 inches apart. I then connected the intersections of each line to from the necessary V's. Repeat each V until you have about 6 total.


- Using a straight edge, cut out the herringbone.

- Using the template, trace the pattern onto the fabric, all the way down. It's a tad time consuming, but keep with it. Once drawn, tape out the pattern using the painter's tape. Conceivably you could skip the drawing step, but I didn't want to change it and end up with wonky lines.


- Mix whatever paint you decide on and mix with water to reach the desired consistency. I used a light blue and a black paint and water it down with about 50% water. Paint in between the painter's tape and let dry. Once dry, remove tape, but keep it because you'll use it to paint the side pieces.


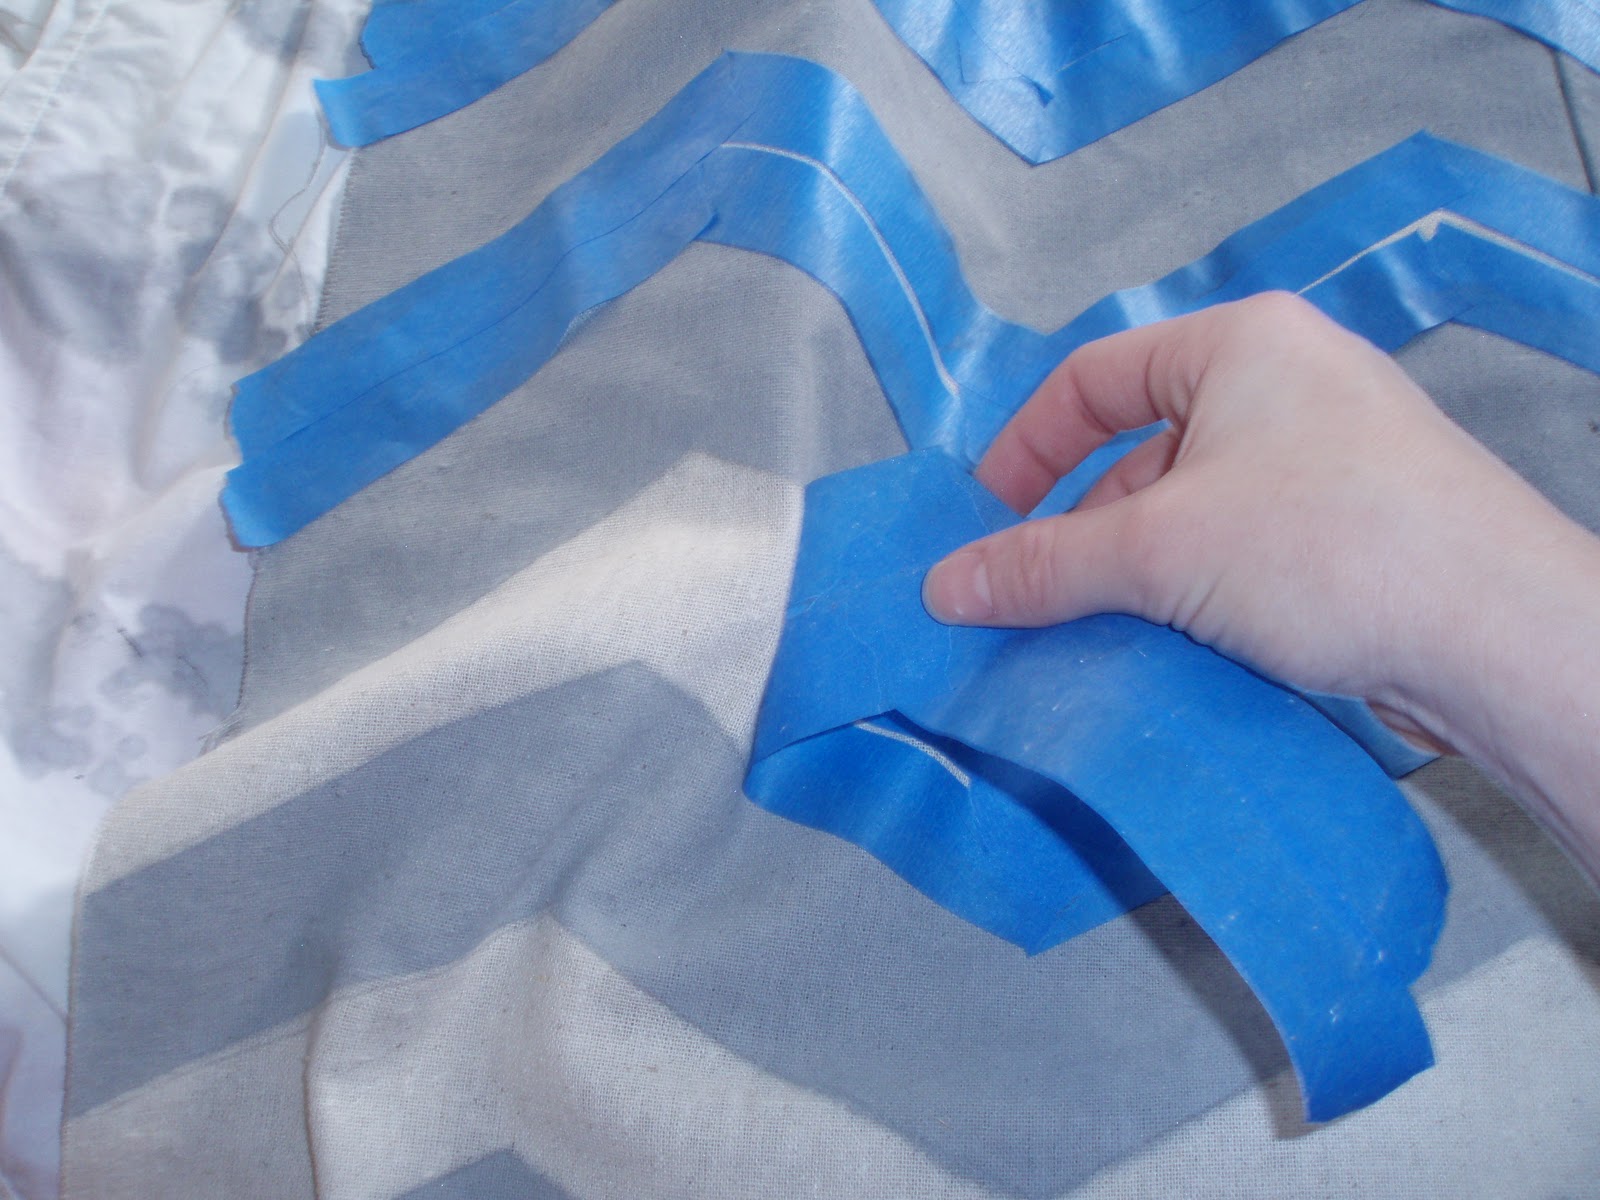
- Using the already sized tape, repeat with the side pieces.


- To assemble, pin with right sides together, the front, side, and back pieces. Sew together using a small, straight stitch. Once complete, pin the top piece to the body and sew. (Essentially you're creating a large rectangular bag.)

- Snip the corners, iron the seam and viola, you're done! Your storage items are now out of sight and out of mind.

Stay warm!
1 comment:
Thank you SO much for the sweet comment! It definitely made my morning! I'll be checking your blog out soon and stop by mine anytime!
-Summer
Post a Comment