Saturday, April 27, 2013

Make Something: Law School *Graduation* Invitations

This was probably the most exciting invitation I've ever designed.  MY law school graduation invitations.  I'm actually a little bit in shock to believe that I really am going to graduate.  That this time next year or heck next month I will not ever have to sit in the uncomfortable wooden chairs and listen to some professor lecture about something only mildly (or not at all) interesting.

Pinterest was not very helpful with searching for ideas, but I did come across a couple decent ideas.  I didn't want the invitations overly formal and thought the idea of a summons was hilarious and the perfect amount of cheesy.  I created a tri-fold design on Photoshop, and printed the invittation on cardstock from Paper Source.  Each invitation was tied with a red string.

***Etsy Listing for the Invitations is Available HERE.***


Pretty happy with these little guys and even happier to be graduating...assuming I don't fail my finals.

Wednesday, April 24, 2013

Plan Something: At Home Picnic

I've been a little busy lately.  Apparently finishing up law school is way more complicated/time consuming/scary than you'd ever think.  And now finals are here so all I have is one more push and I will officially be done.

To compensate for my stress level these days, I planned a backyard picnic for Jason and myself one Friday.  I strung up a makeshift tent (it's actually a white sheet) in our backyard.  I laid a rug down and covered it up with a duvet.


For food I kept things fairly simple.  I had a fruit and cheese plate that included strawberries, pears, brie, comte, blue cheese, and a baguette.  Drinks included water, freshly made lemonade, and rose.  I stored these in a galvanized bucket.


 Heavier food include spring vegetables that were blanched and tossed in a light vinaigrette, duck pate and cornichons, and a delicious tomato tart.  The recipe is here, and believe me when I say it is delicious.


I decorated with things I already had around my house: a lantern, caper candles, wooden boxes. Although very simple they helped to set the tone.

We finished up the evening with a fire in the chiminea eating fresh chocolate palmiers that I'd made earlier.

It was a great and fairly simple way to unwind a little and just enjoy being together.


Tuesday, March 5, 2013

Beer Tasting Party

Jason's birthday was last Friday.  And before you read any further you should know 2 things: (1) he turned 29 and (2) he's not big on birthdays.  When I say "not big," I cannot remember a single birthday party.  I'm sure we did something for his 21st birthday, but I'm not sure what.  This year I decided he needed a birthday party.  It is, after all, the last year of his 20's.  *We upgraded a little for Jason's 30th Birthday - lots of other fun ideas.

I've decided that planning any party/gathering for a guy is difficult.  They just don't seem to appreciate matching plates and napkins and frilly drinks as much as girls seem to.  But I still wanted to do something nice.  So after some awkward Pinterest searches, I do not recommend searching "adult male birthday parties," I randomly stumbled across a beer tasting birthday party.  Eureka.  I looked at several ideas to get a good feel about what I did and did not want to include and the fantastic party below came into existence.

Not only was I thrilled with how everything turned out, the boy was very happy too. 


The biggest problem I ran into was planning the actual beer tasting itself.  Several of the parties I looked at simply had different types of beer placed in different ice buckets depending on type (ales, pales, etc).  But I wanted this to be an actual tasting, where everyone was drinking the same thing at relatively the same time.  Initially I planned on just buying enough six packs for everyone.  But, after some serious googling, I discovered that a Whole Foods near me has 18 beers on tap (which are conveniently listed online)  that you can buy in a growler.  I tentatively picked 5 from the online list, but had to make some last minute changes when I actually purchased the beers.  Fortunately the beer guy at Whole Food was super nice and helped make sure that I had a good balance of beer types and flavors.

I wanted to keep the food and decor fairly simple.  I resisted the urge to buy actual glass tasting glasses (but will inevitably do so when I have a house), and instead found the smallest plastic cups I could find.    I made the chalkboard table runner by spray painting (with chalkboard spray paint) a roll of white contact paper.  This was super cheap and super customizable.  The tablecloth is a linen/canvas blend piece of fabric that I picked up at Wal-Mart for $2.50 a yard.  I bought the golf pencils for the tastings, which I think added a fantastic little element.  I stored extra pencils and chalk in shot glasses around the table.  I used my always handy jars to display leaves I ripped of a tree in my backyard, which was enough flowery-like things for Jason.  I also placed a "dump bucket," which was actually a vase, on the table in case anyone really hated a beer.


For food I served pub type food, but kept it fairly light because we planned to have dinner at a BBQ place.   Food included chili lime pistachios, beer chips, cocktail sausages, soft pretzels and various mustards, and sopapilla cheesecake for the birthday boy.

I downloaded the beer bottle printable and changed the "cheers to you" part to "Happy Birthday Jason" using photoshop.  I designed an invitation, which I texted to everyone and gave to Jason in a sealed envelope with strict orders that he couldn't open the envelope until he was in our driveway.  The actual tasting party was a complete surprise for him.  

I also designed tasting cards and hanging tags for the growlers on photoshop.  The tasting cards listed each beer and had a place for notes and scores.  One of my favorite parts of the party was listening to everyone read their scores and notes.  Some of the responses were pretty hilarious.  The hanging tags contained the brewery (or the beer)'s logo and information about the beer.  We read these at the beginning so that everyone had an idea of what each beer would taste like.  


Below is what the tasting sheets actually looked like and because I love you all so much, I uploaded blank ones (sized to fit 4 on a regular sheet of paper) for you! (I think, if it doesn't work let me know.)  And if you use the tasting cards, please link back to me.  Those things took quite a while to design.  Thanks.  Due to some unscrupulous copying and attempted sales of my beer tasting cards, I've taken the link down.  If you'd like a blank copy of them, just shoot me an email and I'll gladly send them your way.

And that's the beer tasting party in all its glory!  Thanks to everyone who came; I hope everyone had as much fun as we did!


For more beer related party ideas check out Jason's 30th Birthday!

Thursday, February 7, 2013

Plan Something: BBQ Baby Shower

 I hosted a couple's baby shower a few weeks ago.  We went with a BBQ theme so I keep all of the decorations simple with checkerboard and plaid accents.  I think it turned out pretty cute.  And in case you're wondering, I do not have any intentions on throwing any other parties for quite some time.  But I'm sure that'll change.  I'm a sucker for a good fete.


I designed all of the paper products on Photoshop.  We handed out "Temper Tantrum Hot Sauce" as favors.  We had guests sign a copy of Dr. Seuss's Oh the Places You'll Go instead of a traditional sign-in book.  I gussied up mini water-bottles with personalized labels.  We had a onesie decorating station where everyone could create something for the baby.  I didn't get any pictures of the finished onesies, but they were surprisingly good, especially the ones the baby's mother designed,


For food we kept it fairly simple.  We served hamburger sliders, sausage and fixings for the mains.  Sides included mac and cheese, chipotle deviled eggs, and fruit salad.  Jason's mom made her famous chocolate chip and butterscotch pecan cookies.  We also had triple chocolate and Meyer lemon baby cupcakes.  Beverages included pink lemonade with strawberries and peaches in a preggo friendly and not preggo friendly (champagne) version.

I also made the "Oh Baby" banner that hung above the entry table and a not pictured banner that said "Welcome Baby Scarlet" using this awesome download from Shanty to Chic.  Download, cut, and tape.  Super easy.

And lastly it pains me that you can't see this, but I used little kraft bag to hold plasticware and napkins, and I stamped each one with a fork and spoon stamp.  I am slightly devastated that I don't have any pictures of those, but trust me they were adorable.

*Quick Poll: Clearly I changed my photo layout today.  Any preference between the group collage or individual pictures?*

Tuesday, February 5, 2013

Bikram Yoga 30 Day Challenge Recap

"Give me 30 days, I'll change your body.  
Give me 60 days, I'll change your life." - Bikram Choudhury

My yoga practice has been virtually non-existent very sporadic this past year.  I'd string together a couple weeks of consistent practice and then I'd disappear for a couple weeks.  The main problem with this was that every time I returned I'd have to acclimate to the heat all over again.  It was frustrating.  I felt horribly out of shape, heavy, and kind of blah overall.

One day after finals, I was once again re-starting my yoga practice when one of the instructors and owners of the studio, Karen, said something that would forever change how I practice yoga.  I was having a particularly difficult class.  It was shortly after finals and the excessive amounts of coffee and minimal amounts of sleep were wrecking revenge.  I felt terrible.  Second worse class ever; my first day back after blood poisoning will probably go down as the worst ever.  I'm laying there miserable and frustrated with myself and Karen was talking to the class, although she may as well have been speaking directly to me, about finding the time to fit in yoga.  She acknowledged that life is busy, but she encouraged us to find a time that works and schedule that time for you.  Do something for you.  Take the time for you.  And in that moment I realized she was right.  I have time during the day to fit in a yoga class, but my long absences were due in part to me putting everything and everyone ahead of myself.  That's not always a bad thing, but you deserve to make some time for just yourself.  And so I made a pact with myself to do just that.

Conveniently, my yoga studio starts a studio wide "Bikram Yoga Challenge" around the first of the year.  And this year, I decided to complete it.  This post is a recap of that challenge.  The things I learned.  The things I experienced.  The struggle.  The success.  If I had to sum up the challenge in one word it would be this:  doable.  So if you're on the fence, go for it.  You'll be amazed when you cross that finish line.


Acclimation: Days 1-10
I firmly maintain that the first 10ish days of the challenge are the hardest.  Depending on the consistency of your practice, the ramp up was pretty difficult, both physically and mentally.  The first couple days I felt like I'd been run over by a bus and making the commitment to go every day felt foreign.  Most of these issues go away after those first 10 days.  And best of all, the commitment to go doesn't feel like a commitment at all.  It's simply part of my day.  Of course there are days when I'd rather not go, but it's not an option.  It's just something I do.

Expectations
Bikram Yoga is different every single day.  I'd have one of my best classes and the next day I'm struggling through every posture.  Some of it's weather (the room isn't hermetically sealed so humidity can play a factor) and some of it's what's going on internally that day.  Did you eat?  Are you hydrated enough?  Slept enough?  The list of variables is endless.  When I finally accepted that every day is different and there really isn't a need to judge one day from another, my overall stress with the class itself drastically decreased.  Instead of focusing on the comparison I started to focus on what my body was trying to tell me that day.


Needs v. Wants
One of my instructors encouraged us to figure out the difference between "needs vs. wants."  "You want to wipe the sweat off; you don't need to."  I try to keep this in mind during each class.  Do I really need to sit a posture out or do I just find it frustrating?  Do I really need water or is it just a distraction?  You'd be surprise how much less miserable class is when you learn to ignore the "wants."

Random Observations
I really do have more energy, even immediately after class.  I'm still having a hard time waking up in the mornings, but I think that's more attributable to my erratic schedule in general.  My coffee consumption has drastically decreased.  I still make myself a travel cup of coffee every morning, but I can't remember the last time I actually drank the entire cup.  For some reason I just do not want it.  For a self proclaimed coffee nut, this has been really strange.

Results
Clearly I am infinitely more toned today than I was 30 days ago.  I knew that I'd tone up, but I really didn't expect the change to be so drastic.

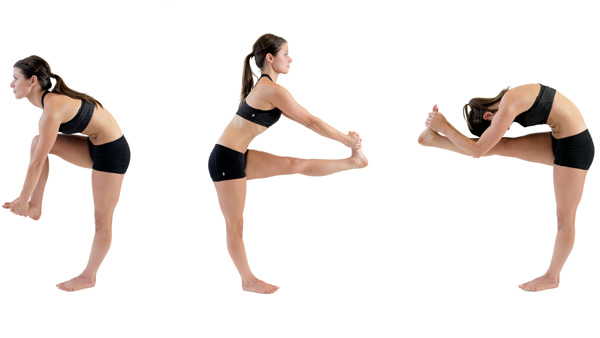
In terms of postures, I have drastically improved as well.  I was already fairly decent at most of the postures, but after 30 straight days I can go deeper in each posture, for longer periods of time.  One day I held standing head to knee for the entire minute, touched my forehead to my knee, held it there until "change", and came out of the posture in a completely controlled manner.  I seriously wanted to shout for joy.


Standing Head to Knee Progression.  Source: Bikram Yoga Dallas


It was little moments like that that really made the challenge worth the effort.  Meeting new people and becoming friends with the other students was also something I really enjoyed.  There's such an awesome camaraderie between everyone doing a challenge.


Favorite quotes I heard during the 30 days:

On the Challenge, "You just have to take it one day at a time; hell, sometimes you have to take it one posture at a time."

On Looking in the Mirror at Yourself, "It's not enough to suffer for 90 minutes; you have to watch yourself suffer."

On Camel,
Instructor: "Camel stimulates the nervous system, so whatever you're feeling right now..."
Random guy: "DEATH"
Instructor: ."...is perfectly normal."

On Bad Class Days, "I've seen better days, been the star of many plays, Ive seen better days...and the bottom drops out."   I may or may not sing that to myself after bad classes.  And by "may" I mean I absolutely do.

So where does one go after completing the 30 Day Challenge?  The 60 Day Challenge, of course.  Bring it on Bikram Yoga.


Thursday, January 31, 2013

Make Something: Wooden Headboard

Well hello there.  I know I've been mia for a while...again.  This time I'd like to blame it on the fact that I'm having photo problems.  According to Blogger my album is full, but I cannot figure out where to delete said photos and my Photobucket account is also full.  So I'm currently stuck between a rock and hard place about how to upload pictures, because let's be honest, no one wants to read a blog, and especially a blog about food and crafts without pictures.  I've also had a really busy Christmas break and start to the spring semester (threw another party, details to follow).  But it's my last semester, my schedule is fantastic (I only have class 2 days a week!), so I really can't complain.

Moving along.

So sometimes I'm a little tempestuous.  A while ago (think over a year), I decided I hated my headboard and the very next day we sold it on Craiglist and it was gone.  Unfortunately I really hadn't thought much about what we'd do for a new headboard.  And so my bed sat, for well over a year looking like a bed from a college dorm room.  Then one day, again being tempestuous, I decided to make a headboard.  starting that day.  I'd seen several of these on Pinterest and figured it wouldn't be too hard to make at home.  Most of the Pinterest ones screw the boards directly into the wall, but I didn't think my landlord would appreciate that, and I really didn't want to chance a board falling on my face in the middle of the night.  With that in mind, I decided to attach mine to 2x4's and then bolt it to a metal bed frame.  Completely sturdy and pretty dang cute.


Materials:
  • 5 pine boards (mine were originally 6"x8')
  • wood screws (I used 2 1/2", but should have used 2")
  • Wood stain (I used Minwax, Dark Walnut 2716)
  • 3 - 2'x4s
  • Drill with a drill bit to fit the screws, a 5/32 wood drill bit, and a 5/8" spade bit (for drilling holes in the 2x4s to attach to the bed frame).  Sounds confusing, but it's not.  All it really takes is a bunch of googling.
  • Nuts and bolts, I think fairly certain my bolts are 1/4", but don't quote me.
Instructions:
  • First you'll need to cut your board down to the desired length.  A queen bed is right about 60 inches wide,  so I cut my boards to 60 inches using my fancy new miter saw.  Side Bar: I am in love with that thing.  If you down have a saw or fear you could lose a limb using one, the people at most home improvement stores will usually cut them down for you.  That said, I don't trust them. The last 3 times I've had wood cut they've been slightly off.  I don't know if it's just the people where I shop or what, but make sure they measure and cut properly or the boards might be uneven.
  • After cutting the boards, I applied 3 coats of stain.  When applying stain, apply with the grain and then wipe off the excess after a couple minutes.  If you don't wipe of the excess it will severely slow the drying time and will leave your boards feeling tacky.  Less is more when applying stain.  Be patient with this part.  I waited around 24 hours between each coat.  You may have to wait longer if you're in a cold or humid climate, because that will delay the drying process.

  • After staining I cut the 2x4s down to size.  I cut two legs at around 46 inches long.  This was tall enough to cover all 5 boards, but and still be a couple inches from the top, based on where I wanted the overall height of the headboard. I determined that using a very exact science of placing painter's tape on my wall until I was happy with the height.  Pretty much full proof.  Then cut 2 smaller braces pieces to attach to the back, the just need to be slightly shorter than 30 inches.  I used 2, but I honest think just one in the middle would be fine.
  • Time to attach.  To be honest, this part sucked, but only because I have the world's worst drill and I spent all day waiting for it to get charged so I could drill the pilot holes.  And what's a pilot hole you ask?  A pilot hole is a hole you pre-drill that is slightly more narrow than the width of your screws.  Pilot holes make screwing the actual screw in much easier.  Ask me how I know that.  When choosing a pilot hole size, simply google pilot hole size chart.  You'll find plenty websites that tell you what size pilot hole to use for what size screw.
When drilling the pilot holes, I only drilled through the 2x4, because I'm lazy and didn't want to worry about needing to line up holes in both pieces of wood, and I knew that it wouldn't be difficult for the screw to go through the 1/2 inch of pine.  To make sure I only drilled through the 2x4s, I put a piece of guide tape on my drill bit.

One thing, when attaching the legs make sure both legs are evenly spaced from the top and spaced the correct distance from the outside to be attached to your bed frame.  Otherwise your legs will be uneven and you headboard will be wonky or you won't be able to attach the bolts to the bed frame.  And really that's the only thing that you really have to get completely correct.  I used painter's tape to make sure everything lined up correctly.

  • After everything was securely attached I carried the now assembled headboard into my room and set it up against the metal bed frame and marked where the metal bracket holes lined up on my headboard legs.  Then using a 5/8 spade bit, I drilled holes through the legs.

And I don't recommend drilling holes on carpet, but it was raining outside and we really didn't have a choice.
  • You sandwich the washer, bolt, and nuts between the wooden legs and the metal bed frame to attach everything securely.  We used a socket to make sure the bolts were very securely fastened.  
And BOOM! You've made a headboard!


I promise you'll be seeing more of me around.  :)


Monday, December 10, 2012

Grad Party 101

The last month has been an absolute blur.  I am generally always busy, but this fall I experienced an entirely new level of frantically busy.  Here's a breakdown of what's been going on around here:

November 10: Margarita Ball
November 17: Friendsgiving (hosted)
November 22 - 25: Thanksgiving and family time (hosted)
December 1: Jason's sister's 30th birthday party (prepared all the food)
December 3-7: FINALS
December 8: Sister's Graduation (100% responsible for party)

Finals are always difficult, but this is the first semester that I really didn't know if I was going to make it.  I cannot remember being so tired.  How tired?  I dumped a cup of water into the ice maker and turned off the kitchen light while in the kitchen, tired.

So after an 8:30 Friday final (which should not be allowed), all I wanted to do was sleep for the entire weekend.  But, instead I drank the strongest glass of coffee available and ran a billion errands for my sister.

Because you see, she graduated from The University of Texas with a Bachelor of Science in Nursing on Saturday and I was responsible for throwing her graduation party.  I've been planning this party for months, and I'm happy to say it turned out exactly how I envisioned and hoped.  I'm so proud of her.  


And now a crash course in throwing a graduation party.

Sweets and Beverages Table
I ordered the cookies from Sugar Mama a baked goods business run by a high school friend's mom.  She made the adorable UT themed cookies for us.  If you're in need of baked goods in the Central Texas area, I cannot recommend her enough.

My sister made her own cake.  I made "Bevo Bellinis" which consisted of champage and a peach thyme puree.  The table was decorated with a picture of my sister, taper candles, and gerber daisies in khombucha bottles that I've been saving vases.


The appetizers consisted of caprese bites, cuccumber hummus bites, goat cheese stuffed bacon wrapped dates, and spicy sausage balls (thanks Kristen for the recipe!).  The meat appetizers were still in the oven so I didn't get a picture of them...and then they disappeared within minutes.
I served a full seated dinner, which meant I needed to rent plates and goblets.  I ended up purchasing silverware and champagne flutes from Ikea, because you'll never know when you'll need service for 20, and it was cheaper than renting them.

You can't read then menus, but dinner included rolls, Caesar salad, Chicken Marbella (recipe sounds super weird, but it was delicious) on fettucini, and roasted asparagus spears.


The tables were decorated with the same gerber daisies and taper candles.  Each place setting included a burnt orange napkin, menu, dinner and salad plates, and a water goblet.


I served water in prosecco bottles that I've been collecting for a while. #partyplanningturnsmeintoapackrat.  Each bottle was labeled with a longhorn tag.
Can you tell how exhausted I am in this picture?


And lastly, I hung a giant photo wall in the dining room.  I traced the Texas onto the paper using a projector and a transparency and then drew a large banner and some other UT appropriate decorations.


That's pretty much everything!

Congrats Hyacinth.  Love you.