Showing posts with label recipes. Show all posts

Monday, December 23, 2013

Cook Something: Spiked Hot Chocolate and Homemade Churros

For a perfectly cozy evening or a late night Christmas treat, I highly recommend some steamy hot chocolate and homemade churros.I made these a couple Fridays ago on a particularly dreary and frigid night and they were the perfect way to spend the evening.


The churro batter is very similar to a French pate a choux, albeit thicker.  Making churros is a lot less intimating than it sounds, but a couple words of advice. Watch the temperature of your oil.  If your oil gets too hot your churros will burn before cooking on the inside.  If the oil is too cool, your churros will be greasy.  Use a thermometer and keep your oil as close to 350 as you can.  Secondly, invest the $8 in a pastry bag.  Most recipes will say you can use a gallon bag with the corner snipped off.  This. Is. A. Lie.  This batter is thick.  If you try to squeeze it out of a gallon bag the bag will split open and you're going to end up with a huge mess all over your counter.  I bought my pastry bag at Michael's of all places, but you can find them at any kitchen wares store and possibly Walmart (if your Walmart has a cake decorating section).


For the hot chocolate, I used this recipe and to be honest I didn't love it, especially because it required a decent amount of work.  Whatever hot chocolate you decide to use make sure it's super thick and decadent.


Churros
Adapted from here.
Ingredients:

  • 8 cups vegetable oil or other frying oil
  • 1 cup sugar and 1 tablespoon ground cinnamon.  Mix together in a gallon size ziploc bag and set aside
  • 1 tablespoon sugar
  • 2 cups milk, at room temperature*
  • 4 tablespoons unsalted butter, cut into cubes
  • 1 tsp salt
  • 1 stick cinnamon
  • 2 tsp ground nutmeg
  • 2 cups all purpose flour
  • 3 large eggs, at room temperature*
*To bring to room temperature quickly, microwave the milk in 30 second bursts.  Be careful the milk doesn't scald.  Place the eggs in a bowl of warm water for 5-10 minutes.

Instructions:
  • Add oil to a heavy bottomed pot and bring to 350 degrees.  I prefer using my LeCreuset dutch oven for frying.
  • Bring milk, butter, salt, remaining 1 tablespoon of sugar, cinnamon stick, vanilla, and nutmeg to boil on medium-high heat in a large saucepan.  Turn off heat once boiling and allow to stand for 10 minutes so the flavors infuse in the milk.
  • Discard the cinnamon stick.  Bring the mixture back up to a boil then add the flour and beat vigorously with a wooden spoon until a smooth dough forms.  This is going to take a bit of muscle.
  • Transfer dough to a large bowl and allow the mixture to cool for 5 minutes, stir periodically to help with the cooling.  Add eggs, one at a time, beating until fully incorporated before add the next egg.  
    • If you do this by hand there will be a moment when you think everything has gone terribly wrong.  The dough will somehow look curdled.  Fear not!  Just keeping beating and like magic the dough will transfer back to a homogenous mixture.
  • Insert a star tip into the pastry bag and add the dough into the pastry bag.  I like to use a chip clip to close the top of the bag to prevent any of the dough from squeezing out the back.
  • Pipe the dough into the hot oil in 4-6 inch long pieces.  Pinch the dough of with your fingers or snip with scissors.  Fry up to 6 churros at a time for 3-4 minutes until a beautiful golden brown.
  • Quickly roll the cooked churros on a paper towel and then toss in the bag filled with the cinnamon and sugar mixture.
Enjoy while warm!

Merriest of Christmases to those of you who celebrate!


Tuesday, November 26, 2013

Friendsgiving 2

This past weekend Jason and I hosted our 2nd Annual Friendsgiving.  If you remember from last year, we hosted the inaugural Friendsgiving outside, and I had every intention of doing so again this year.  Mother Nature, however, had very different plans.  It was cold in Texas this past weekend, very very cold, especially for Texas.  So Jason and I had no choice but to move Friendsgiving inside.  We are fortunate enough that by clearing every. last. piece of furniture out of our living room and dining room that we had just enough room to fit the 26 people who had RSVP'd for the event.  We were fairly concerned about space, and although it may have been a little snug, it was a perfectly cozy way to spend a very dreary and frigid night.

So without further ado, the details from Friendsgiving 2.

I was adamant about using real plates and silverware this year.  I picked up the plates from the Dollar Tree (for a $1 a piece, which is crazy because I actually like them more than my actual plates) and the silverware was leftover from my sister's graduation party.

Jason rented tables and chairs from our trusty rental place and I decorated each table with strands of bittersweet and white candles.


Each table setting had a mini-pumpkin pie thank you gift that I made (completely from scratch, crust and all, which is kind of big deal because I am certainly no baker).  Friendsgiving is a party that requires you to bring food, so I wanted to thank everyone for taking the time to make and attend the party and to thank all of the great friends we have in our life.  Thanksgiving so often gets overlooked and I particularly love this event, because it's simply a chance to say thank you to everyone who helps enrich our lives.

I downloaded the "thank you" calligraphy from here and sized it down in Photoshop to about 3"x2".


For beverages I made spiked apple cider and unsweet tea.  And everyone brought beer and wine to share.

Jason and I were fairly concerned about squeezing 26 people into our 1200 square foot apartment.  We knew in advance that the tables and chairs would fit, because we did the same thing for my graduation party, but that party maxed out around 20 people and we had a solid 6 more coming to Friendsgiving.


My idea to help work with traffic flow was to create a "photo booth" in this weird area that connects every room in our house, but isn't really a room itself.  It's kind of like a foyer, but smack dab in the middle.  I decided to set my camera up on a tripod and let people take pictures in front of a backdrop of streamers that I saved from my mother's fiesta party.  The lighting wasn't great in that room, and I'm working on fixing the white balance.


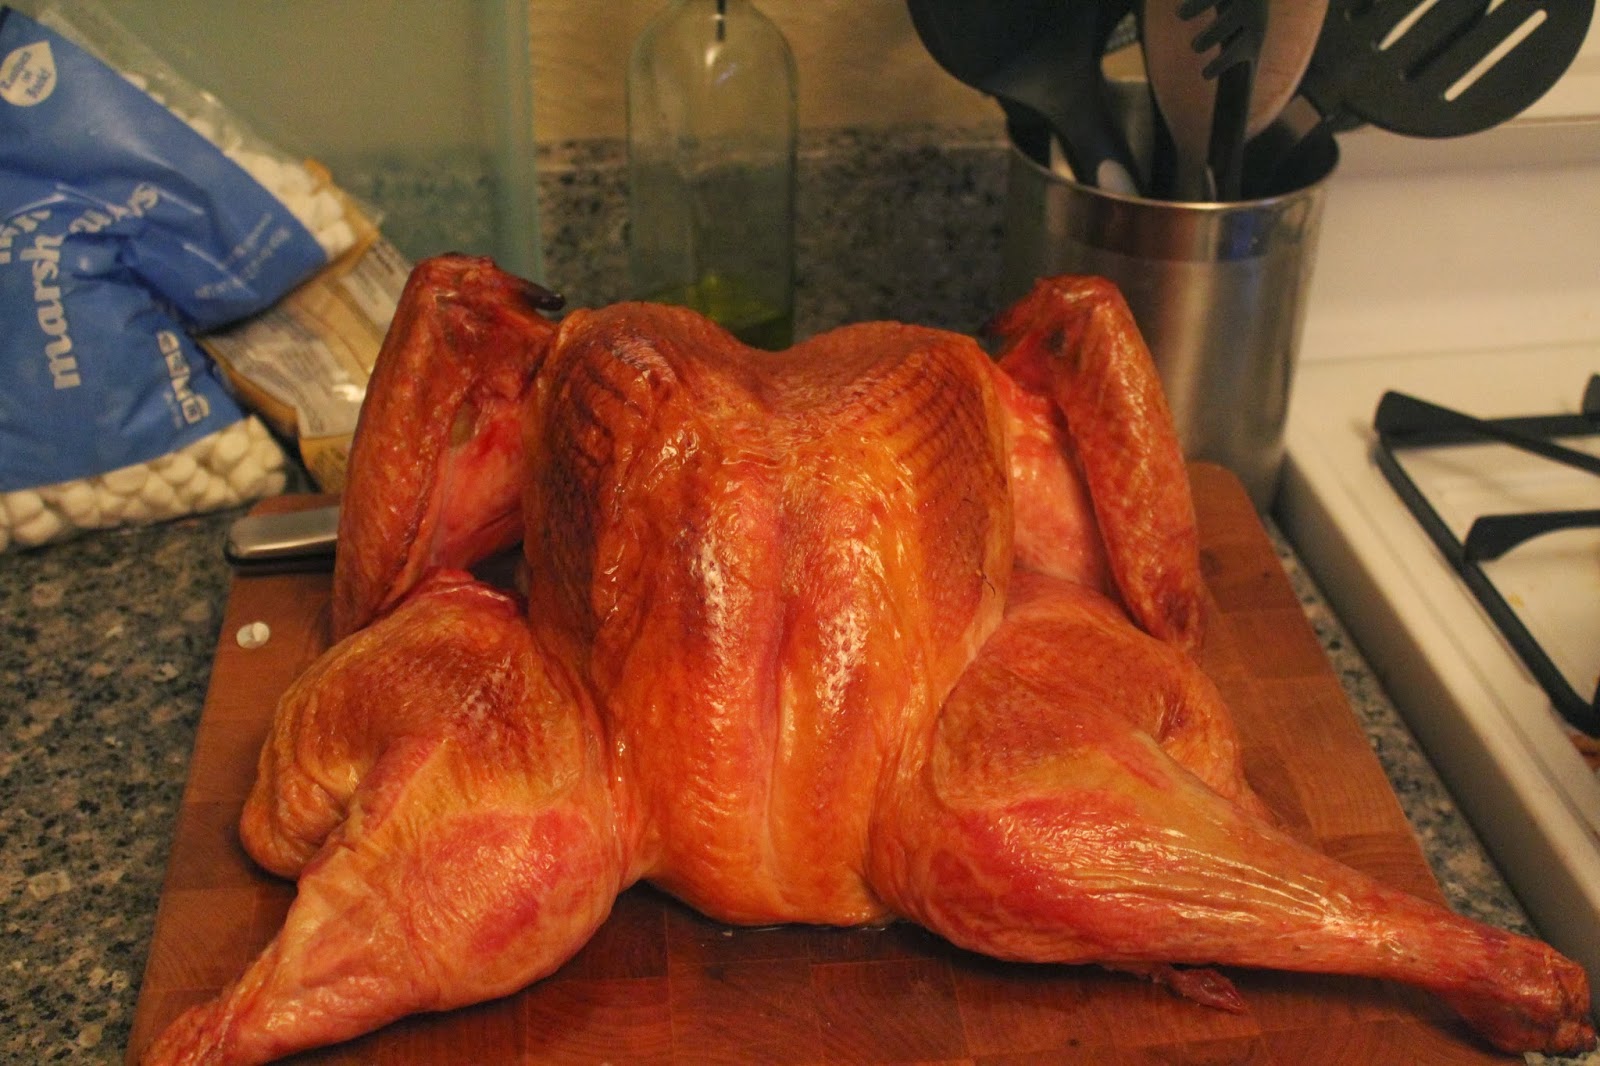
I spatchedcocked the turkey again, using Kenji's method.  This is my second year doing this and I firmly maintain it is the easiest, fastest, and most full proof method of cooking a turkey.

Me shaking "Bertha's" wing.  Yes, I named the turkey.

And this is what you get.  A house full of good food and better friends.  A pretty enjoyable way to spend an evening.

And me the next morning...thinking about how much clean up I had to do.
*Thanks to Tiffany and Keith for the awesome mug.*


I hope everyone has a safe and Happy Thanksgiving!  And a huge thanks to everyone who helped make Friendsgiving a success!

Friday, November 8, 2013

Brunch: Poached Eggs with Corn, Chorizo, Basil, and Brioche Croutons

I am always on the look out for brunch food.  Brunch in Dallas and Texas in general is kind of a big deal, and although most of my friends prefer to while the day away on a patio somewhere (which don't get me wrong is pretty fantastic), I tend to spend my Sundays on my front patio because that requires neither makeup nor shoes.

This brunch recipe from The Food Lab's post on perfect poached eggs is pretty much perfect.  It includes crunchy brioche croutons, crispy Spanish chorizo (and for those of you in Texas, it's different from Mexican chorizo), slightly blackened corn, and a delicious butter sauce.  Add that perfect poached egg and it's one delectable meal.  

Truth be told, it's an involved meal.  And this is coming from someone who barely blinks an eye at involved meals and instinctually distrusts recipes that are overly simple.  That said, it's not difficult, just don't expect to get it on the table lightning fast.

But make sure it gets to your table because it is damn good and so worth the time.


I poach my eggs using my sous vide, which is as easy as dropping the eggs shell and all in the equipment and letting them swim for about an hour.  Then you drain off the thin white part and give them a quick dunk in gently simmering water.  That process is ridiculously easy and your eggs both look and taste spectacularly.

Kenji gives a lot of details on creating the perfect poached egg, both with a sous vide and without so scoot on over there and read it.  Your brunch menus will thank you.


Then whip this baby up at home and enjoy the fruits of your labors.


Wednesday, April 24, 2013

Plan Something: At Home Picnic

I've been a little busy lately.  Apparently finishing up law school is way more complicated/time consuming/scary than you'd ever think.  And now finals are here so all I have is one more push and I will officially be done.

To compensate for my stress level these days, I planned a backyard picnic for Jason and myself one Friday.  I strung up a makeshift tent (it's actually a white sheet) in our backyard.  I laid a rug down and covered it up with a duvet.


For food I kept things fairly simple.  I had a fruit and cheese plate that included strawberries, pears, brie, comte, blue cheese, and a baguette.  Drinks included water, freshly made lemonade, and rose.  I stored these in a galvanized bucket.


 Heavier food include spring vegetables that were blanched and tossed in a light vinaigrette, duck pate and cornichons, and a delicious tomato tart.  The recipe is here, and believe me when I say it is delicious.


I decorated with things I already had around my house: a lantern, caper candles, wooden boxes. Although very simple they helped to set the tone.

We finished up the evening with a fire in the chiminea eating fresh chocolate palmiers that I'd made earlier.

It was a great and fairly simple way to unwind a little and just enjoy being together.


Thursday, November 15, 2012

Weekday Meals: Fennel Fish Stew

Autumn weather has finally made an extended appearance in Texas.  The temperatures are out of the high 80's and into the mid 60's and the leaves are changing colors and beginning to fall.  Autumn really is one of my favorite seasons.  It's a season tailor made for cozy nights inside and food that warms both body and mind.    Cheesy yes, but oh so true.


I made this soup a couple nights ago and it's perfect for any chilly night.  This stew works because the fennel's slightly anise flavor is a perfect backdrop to both the tomatoes and the fish.  The lemon keeps everything bright and the red pepper flakes add just enough spice to round the dish out.

And like any good soup, you should serve with a crusty and warm piece of bread.  

Fennel Fish Stew

Ingredients

  • 2 cans 28 oz whole tomatoes, juices reserved, tomatoes crushed by hand
  • 1 fennel bulb, chopped.  Reserve some of the fronds for garnishing.
  • 1-2 shallots, chopped
  • 1 garlic clove, minced 
  • 2 lbs of tilapia or other mild white fish cut into 1 inch chunks.
  • Sprinkle red pepper flakes
  • 1/2 cup parsley
  • 1-3 Tbs olive oil
  • Juice and zest of 1 lemon

Instructions

  • Heat the olive oil in a large dutch over over medium heat.  Add the fennel, shallots, and garlic and sweat until they become soft and translucent.
  • Add the red pepper flakes and cook for 1 minute until fragrant.
  • Add the tomatoes and crush by hand (if you didn't do this before).
  • Add the lemon zest, juice, and parsley.
  • Add the tilapia and cover.  Bring to a medium simmer and cook for 5-10 minutes until the tilapia is cooked through and opaque.
  • Garnish with the reserved fronds and serve with the aforementioned bread.


And in other news, I'm hosting a "Friendsgiving" Potluck on Saturday, and I should have lots to share! Hope you're having a lovely week!

Wednesday, October 24, 2012

Cook Something: Kolaches

Seriously Tasty Kolaches


On Texas I-35 somewhere between Hillsboro and Waco (or Dallas and Austin for those unfamiliar with Texas geography) lies the seemingly nondescript town of West.  However, West, Texas is home to the famous Czech Stop Bakery and Gas Station, where you can stock up to your heart's content on all sorts of delicious delicious pastries.  Kolaches, in general, are very common to the Central Texas region, which is likely a result of the Czech and German immigrants who settled in the area long ago.  I grew up eating kolaches and they've always been one of my favorite breakfast foods.


Fast forward to now.  There are no. decent. kolaches. anywhere. in. Dallas.  I have searched and searched and searched and simply cannot find any.  And because necessity is the mother of invention, I decided to make a batch one Sunday.

Sausage Kolaches
Adapted from here and here.

For the Dough

  • 1 packet of yeast
  • 1 cup whole milk, warmed (110-115 degrees)
  • 1/4 cup granulated sugar
  • 3 cups all-purpose flour
  • 8 tablespoons of unsalted butter, plus more for brushing on the pastries.
  • 2 large eggs
  • 1 tsp kosher salt

For the Filling

  • 1 package smoked sausage, cut in half lengthwise (I recommend Opa's Smoked Meats, if you can find it.  It's made in Fredricksburg, in Central Texas, so I'm not sure of its distribution area, but it's by far the most delicious sausage you can buy.  I always buy the Jalapeno and Cheese sausage.  It's so tasty.)
  • Grated cheese and/or jalapeno, optional

Instructions:

  • In a large bowl, combine the yeast, warm milk, sugar, and 1 cup of the flour.  Cover and let rise until doubled in size, which should take between 10-15 minutes.
  • Melt the butter.  Beat the butter with the eggs and salt.  Add the eggs to the flour/milk mixture and blend.  Slowly add the remaining 2 cups of flour.  The dough should be soft, moist, and somewhat sticky.  Roll the dough out onto a floured surface and knead for 10 minutes. At this point you may need to add extra flour if your dough is extremely sticky.  I probably added an extra 1/4 a cup of flour.  BUT be very judicious in how much flour you add, because the more flour, the more dense your pastries will be and the goal is soft and light pastries, not hard and dense ones.
  • Put the dough in a greased bowl and allow to rise until doubled in size, about an hour.
  • After the dough has risen, punch the dough down and allow to rise again in the refrigerator for at least 4 hours and up to 8.  If pressed for time you could skip this step, but I really recommend allowing the dough to do the second slow rise.  This rise will allow the dough to develop a more complex flavor and be tastier overall.  It's why those "no-knead" recipes work.
  • After the second rising divide your dough into 8-12 even pieces, depending on how big your sausage is.  Roll the pieces into ovals and then flatten.  Place these on a greased cooking sheet and allow to rise for another 30 minutes, until slightly puffed up.
  • Place the sausage (and/or additional toppings) on one side of the dough and roll the dough around the sausage.  Try to be gentle during the step, because you do not want to flatten the dough out too much.  If end up getting a little aggressive, you may want to allow the dough to rise for another 30 minutes before baking.
  • Bake at 375 degrees for 12-15 minutes until golden brown and delicious.  Brush with some melted butter as soon as they come out of the oven.  Serve warm.

Most of the time involved in this recipe is just waiting for the dough to rise.  I highly recommend starting the dough in the evening and just letting the second rise happen over night.  Then you'll be able to get those babies on the breakfast table in no time.

And although these are not bona fide Czech Stop kolaches, they'll at least keep the cravings at bay until I take another trip down I-35.  Enjoy!


Monday, October 8, 2012

Cook Something: Everything and the Kitchen Sink Chili

Disclaimers:

  • This chili is pretty involved; the active prep time took me right around an hour. But the results are 100% worth the effort.  I'd be surprised if you've had better chili with less work.
  • The ingredient list is bonkers, so much so that I refrained from telling Jason what all was in it until after he gave me the "this is the best chili you've ever made" seal of approval.  There are around 5 things that will make you say huh and about 3 that will make you say what the hell.  Trust me, you want the weird ingredients.  They'll provide a complexity and depth that you probably didn't think was possible in chili and you can have fun contests to see if anyone can pick out the ingredients.  My prediction? They won't.


So on to the chili.  Fall (or winter for us Texans) rolled in this weekend.  The high on Saturday and Sunday barely made it to the mid-50's, which is pretty cold for early October.  It was also drizzly and just overall kind of gross outside.  I'm an admitted seasonal eater so naturally the only thing I wanted to do was snuggle under the blankets and eat a giant bowl of chili.

Everything and the Kitchen Sink Chili
Adapted from here.  Note: I made very few changes to the original recipe.  And if your interested in why the weird ingredients are in there, check out the explanation here.

Ingredients:

  • 2 cans red kidney beans, drained not rinsed.
  • Dried Chiles (look for them in the produce section) either
    • 3 whole Ancho/ Pasilla OR 2 New Mexico red, California, Costeno, or Choricero, seeded and torn into 1 inch pieces; and
    • 1 while Cascabel, Arbol, or Pequin chile, seeded and torn in half.
  • 5 lbs bone-in beef short ribs
  • 2 tbl vegetable oil
  • 1 quart chicken stock
  • 2 whole anchovy filets
  • 1 tsp Worchestersire sauce
  • 2 tbl soy sauce
  • 1 1/2 tbl whole cumin seeds, toasted, then ground
  • 1 1/2 tsp whole coriander seeds, toasted, then ground
  • 2 whole cloves, toasted, then ground
  • 1 star anise, toasted, then ground
  • 1 tbl extra fine ground coffee beans
  • 1 tbl unsweetened cocoa powder
  • 1 large onion, finely diced
  • 1 serano, finely chopped
  • 4 cloves garlic, minced
  • 1 tbl dried oregano
  • 2 bay leaves
  • 28 oz diced tomatoes, keep the juices
  • 1/4 cup cider vinegar
  • 1 tbl buffalo style hot sauce (like Frank's)
  • 2 tbl dark brown sugar
  • Garnishes, some I recommend:
    • Cheese
    • Green Onions
    • Sour Cream
    • Corn Bread
Instructions:
  • Add dried chiles to a Dutch oven or large stock pot and cook over medium heat, stirring frequently until the chiles slightly darken.  Make sure they do not smoke/burn.  Remove and set aside.
  • Season short ribs generously with salt and pepper.  Add oil to the Dutch over and heat over high heat until smoking.  Seriously, you want it hotter than you think.  You want the meat to immediately sizzle when put into the pot.  Working in batches, brown all sides of the meat.  Do not overcrowd the pan!  It took me three batches.  Once browned, transfer to a baking sheet.  Pour the fat out of the Dutch oven and reserve.  Allow ribs to cool.
  • Turn the heat to medium-high and add 1 cup of chicken broth to deglaze the pan.  Use a wood spoon to scrape the brown bits of the bottom off the pan.  Bring the stock to a simmer and add the chiles.  Simmer the chiles until softened, around 5-8 minutes.  Add the chiles and stock to a blender.  Add the Worchestershire sauce, soy sauce, ground spices, coffee, and chocolate.  Blend on high until the mixture is pureed.  I just left it on high for a couple minutes and chopped the onion.  Set aside.
  • Heat 4 tbl of the rendered beef fat in the Dutch oven over medium heat (if you don't have enough, just use extra vegetable oil to make up the difference).  Add the onion and cook for several minutes until translucent and soft, but not browning, approximately 6-8 minutes.  Add the serrano, garlic, and oregano and cook for one minute, until fragrant.
  • Add the chili mixture to the Dutch oven and cook until mixture sticks to the bottom of the pan, approximately 2-4 minutes.  Add the chicken stock, beef bones, and bay leaves.  Bring to a simmer and scrape the bottom off the pan to loosen the browned bits.  Reduce heat to the lowest setting and cook, covered, with the lid slight ajar for 1 hour.
  • After the hour, add the cider vinegar, tomatoes and beans.  Cook with the lid slight ajar, until the meat has fallen off the bones, which should take between 2 to 3 1/2 hours.  Don't rush this part. You want the meat to cook low and slow so that it is tender.  Once tender, use tongs to remove the bay leaves the bones.  I also rough chopped any large pieces of meat.  Add the hot sauce and brown sugar and stir.  Season to taste with salt and pepper, although I didn't feel the need to add any.

Top with the garnishes and enjoy!  I know it's a long and complicated recipe, but I really suggest giving it a try.  You will not be disappointed!


Wednesday, October 3, 2012

Cook Something: 5 Minute Lunch

This is a perfect lunch for when you're rushed and hungry but do not want to eat something greasy/overly filling/time consuming.  This lunch literally took 5 minutes to get to my plate.  I cooked the egg on low over some olive oil and covered the pan with a lid.  This helps the top of the whites to cook through without overing cooking the yolk.  Simultaneously I chopped several thick slices of tomatoes and a couple slices of fresh mozzarella.  I layered this on top of a bed of arugula, added the egg and lunch was served!


One quick thing, I recommend liberally salting both your tomatoes and your finished egg.  Egg yolk is very rich and find that salt really helps to balance out the richness.  I also added some fresh pepper and a sprinkle of paprika for color and flavor.


The best thing about serving an egg on top of a salad is that it provides an instant dressing.  It may sound like an odd mixture but it truly is divine.

Wednesday, July 18, 2012

Cook Something: Corn Grits and Crab, Snow Pea Saute

I love meals in the summer.  They're so easy they practically cook themselves.  I spotted this recipe in the July edition of Food & Wine Magazine.  Side note: If you like to cook, do yourself a huge favor and subscribe to the F&W.  It's pretty much the most amazing magazine ever.

Sorry for the iPhone pictures again.  I decided to paint a dresser on a whim last night, so dinner was a bit rushed.

The original recipe called for shrimp, but our local market had jumbo lump crabmeat flown in from the coast that morning.  And since crab meat is pretty much my favorite, we decided to do a little reconfiguring of the recipe.  The crab meat and the sweetness of the fresh corn are perfect compliments to each other.

Fresh Corn Grits and Crab Snow Pea Saute
adapted from Food and Wine


Ingredients:
Grits

  • 5 ears of corn, shucked and grated on a box grater (this step kind of sucks).
  • 1/4 cup milk, plus more if grits over thicken
  • 1/4 tsp each chile powder and smoke paprika
  • salt and pepper to taste
Crab Saute
  • 1 lb lump crab meat (or any other seasonal seafood)
  • 1 cup snow peas, ends trimmed
  • 1/2 cup thinly sliced red onion
  • 1 ear of corn, kernels removed with a knife
  • 6 tablespoons unsalted butter
  • 1 cup lager
Instructions:
  • Add the corn, milk, and spices to a saucepan and cook over moderate heat until thickened.  It should be the consistency of grits.  Set to the side.
  • Melt 4 tbs of butter in a large skillet.  Add the vegetables and cook until they begin to become tender, but remain crisp.
  • Add the crab and cook for approximately one minutes.
  • Add the lager and bring to a  boil.  Cook on high until about half of the liquid evaporates and the shrimp is cook through.  Swirl in the remaining 2 tbs of butter.
  • If your grits are too thick, whisk in a little more milk and heat until warm.  (I didn't need to do this.)  Ladle the grits in a bowl and top with the crab sautĆ©.  Serve with a lemon wedge.
Seriously delicious.  We have extra crab and I'm pretty sure we'll be eating this again later in the week.

Tuesday, June 26, 2012

Make Something: Housewarming Gifts

Two of my friends bought, remodeled, and moved into their first house recently and they did the remodeling in around 2 months!  They're even still married.  Last weekend they had a housewarming party to celebrate.

I find housewarming gifts difficult to buy sometimes.  I don't want to buy decor type stuff, because people always seem to change up decorations when they move.  I thought about going the "bucket of cleaning/tools" route that you can see on Pinterest.  But I knew that with a remodel under their tool-belts, that they probably already had both.

I know they like to grill and it's summertime (so indoor cooking is out of the question).  I decided that a basket of grill accompaniments would be perfect.

I'm sorry about the photo quality.  I kept telling myself to take better pictures, but I was a little busy.

The little basket is a napkin holder from World Market and there are some cute striped napkins beneath everything else.  The basting brush is from Williams Sonoma.  Then I purchased a glass bottle and a glass spice jar from World Market.  I filled each with my BBQ sauce and BBQ rub.  (Both heavily modified from here and here.)  And lastly a cute card from Papyrus.

Definitely a housewarming gift I wouldn't mind receiving.

Wednesday, June 20, 2012

Cook Something: Grilled Chicken Salad

I know,  I've been away again.  But I haven't been doing anything fun, so instead of filling you in on all of the tasks I've been doing lately (Hello Summer vacation, Are you there? ), I'll just let everyone pretend I've been off in some exotic vacation doing super fun things.

One thing I have managed to {mostly} do is make dinner every night.   Up tonight is a grilled chicken salad with grilled peaches served on a bed of arugula.  Great seasonal eating and very healthy.

Grilled Chicken Salad

The only things you really need to cook are the chicken and the peaches.  To dress the chicken, I simply chopped up a handful of fresh tarragon and thyme from my herb garden.  If you don't have an herb garden, get one.  Stat.  Herbs are the easiest (and if you grow them at home) cheapest way to dress up any meal.  I do not have the greenest thumb (ask all of the hydrangeas I've managed to kill over the years), but I can managed to keep alive around 10 different herbs each summer.  And each winter I find myself longing for the day I can replant my little herbs.

So back to the chicken, chop a couple tablespoons of tarragon and thyme.  Mix this with one minced shallot and sprinkle on some salt and pepper.  Add a just enough olive oil to make a paste and smoother this on the chicken.  Grill over medium heat (I just my panini grill this time) until fully cooked with nice grill marks.

Crank the grill to high heat and add one peach cut in half, with the pit removed.  I also grilled one lemon cut in half to sprinkle over the chicken and the peach.  Gril both until softened and grill marks appear.  Chop the peach into chunks.  I find that the fresh lemon juice is such a nice compliment to the sweet peaches.


This truly was one very delicious salad.  I also add some cherry tomatoes, toasted pumpkin seeds, and crumbled fresh ricotta.  I usually make my own vinaigrette, but it was kind of late so I just used a champagne caper vinaigrette that I had on hand.  If I could change one thing it would be the ricotta.  Fresh ricotta is very mild and this salad could have benefitted from a saltier, tangier cheese.  Next time I'll probably use a blue cheese or some feta.


All in all a very tasty, quick, and healthy summertime meal.  Not bad for a Tuesday night.


Thursday, May 31, 2012

Cook Something: Three Bean Salad and Fresh Corn Cakes

So...remember when summer vacation meant lounging around lazily and doing whatever your heart desired?  Yeah.  I haven't seen any of that y et.  My first month of summer has been filled with 2 cite checks, summer school, and tons of other school stuff.  Still waiting on some real free time.

But summer has meant that I've been home at night to cook.  I'm really working on minimizing our meat consumption, because...well it's a little out of hand.  Summer produce really is a beautiful thing, which makes basing entire meals off of it a piece of cake.  Corn cake, in this instance.

To my vegetarian friends, this one's for you.


So on the plate tonight is a three bean salad and fresh corn cakes.  I followed this recipe and they turned out wonderfully.   They had a fantastic sweet/savory balance and weren't too heavy or dense.  She served hers with a very cute tomato and avocado salad.  But as the boy constantly reminds me, "if I'm not going to feed him meat, then I have to serve something with a little bit of heft."  So I perused a hodge podge of various bean recipes I found on the internet and ended up coming up with my own.


Three Bean Salad

  • 1 14 oz can each black, pinto, and kidney beans.  Drained but not rinsed.
  • 1/4 cup chopped red onion, soaked in a couple tablespoons of red wine vinegar for approximately 10 minutes.
  • the kernels from 1-2 ears of fresh corn
  • 1/4 cup avocado tomatillo salsa (recipe below)
  • 1 avocado roughly chopped
  • 1/2 pint of cherry tomatoes, cut in half
  • 1 serano finely diced (optional)
Mix everything except the avocado in a large bowl.  Immediately before saving add the chopped avocado and gently mix.  I wait to add the avocado until serving to prevent browning.

Avocado Tomatillo Salsa
  • 1 lb tomatillos, husked removed and cut in half
  • 1-2 cloves of garlic
  • 1-2 jalapeƱos/seranos
  • 1 avocado, roughly chopped
  • 1/2 a medium red onion, roughly chopped
  • 1/3 cup of fresh lemon juice
Roast the first 3 ingredients  under a broiler until slightly charred and softened, around 10-15 minutes.  Add to the bowl of a food processor along with the onion, avocado, and lime juice.  Pulse until smooth.  This should keep in the refrigerator for approximately one week, but I like to eat it with chips and on salads...so it doesn't last that long in my house.


This truly was a simply and very satisfying meal, even without any meat.

Thursday, May 10, 2012

Cook Something: Brunch and Easter Dinner

I don't want to talk much about the specific details of this brunch or the rest of the day.  Suffice it to say that it was a lovely day for Jason, Dolce, Roy, and myself and I'm very thankful that our last day together was so special.


Moving along...I love brunch.  Love it.  It is my absolute favorite meal.  I mean, when else can you eat sweet food, savory food, and drink libations before noon without being judged?  Winner.

The key to a good brunch is to balance foods you have to prepare/cook with those you do not.  For this brunch, the only thing I actually cooked was the asparagus tart.  I simply laid the "lox, stock, and berries" {you know you missed the bad puns} in a pretty arrangement on a platter.  After that it was simply a matter of pouring the coffee and blood orange soda {for mimosas} into pretty containers.


Asparagus Gruyere Tart - Thank you Martha.  Super easy and very tasty.  I would recommend cutting it in much smaller pieces than she suggests.  It was kind of difficult to bite the large pieces.


"Lox, Stock, and Berries" - strawberries, brie, blackberries, smoked salmon topped with capers, fresh sliced baguette, and cream cheese

Beverages- ice coffee and blood orange mimosas.  

Easter Dinner:


Onion Souffle - probably the most delicious thing I have eaten in a long time.
Sous vide lamb, with a mustard thyme glaze.  If you have no idea what "sous vide" is stay tuned, I'll be singing its many many praises soon.
Yeast Rolls - not pictured
Pecan Peas - you can almost see them behind the candle.

 Easter Dessert:

Lemon Cream Butter Cake - This was absolutely heavenly


 Perfect meals for a perfect day.