Wednesday, March 23, 2011

Because I am crazy enough to actually paint a rug (DIY)

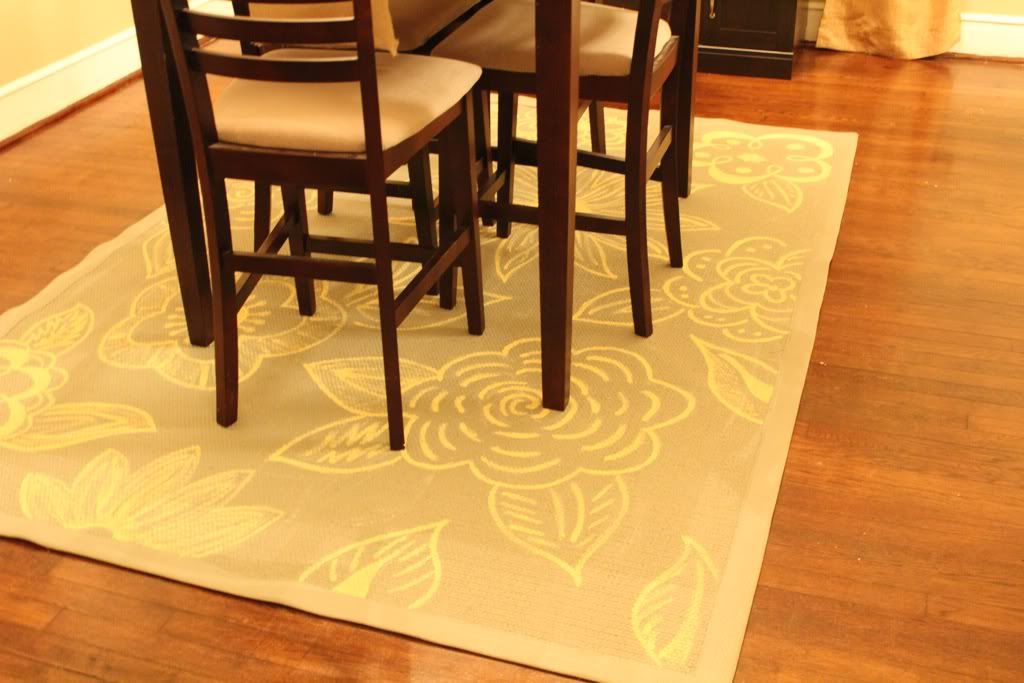
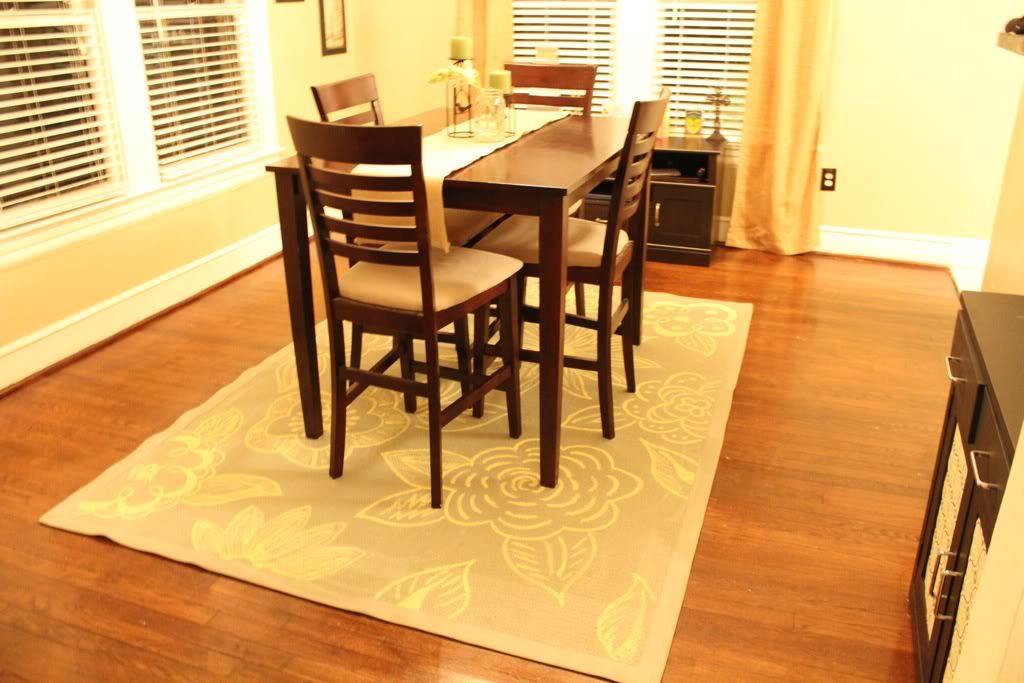
Awhile back, Sarah Baltare over at Sarah Wandering posted an awesome rug painting tutorial.  After drooling over her creation for an embarrassingly long time, I realized that I had the exact same rug that she'd painted.  And better yet, I'd be wanting to replace it for a while.  Jason thought I was nuts when I pitched the idea to him, but like most of my crazy ideas, he smiled and told me to go for it.  I figured even if I screwed up I'd only be out the cost of paint (since the rug was given to me in the first place.  I'd be lying though if I I said I wasn't a little nervous about the first paint stroke; I mean there wasn't any turning back at that point.  But happily enough, the results came out far better than I hoped for and I'm so glad I didn't chicken out.  So let that be a lesson, sometimes the best results are the ones with the greatest potential for failure.


Annnd when buying all of the supplies, you may want to refrain from telling the guy at Home Depot that you're going to actually be painting a rug.  I mentioned something about painting a rug and he tried to sell me a drop cloth to protect it, as if I don't have a billion of those already.  Pretty sure he thought I was certifiably nutso when I told him my purpose was to paint the actual rug.

Alright, enough jabbering.  Here's the breakdown:

Materials:

  • an old rug.  Mine was a sisal rug from Pier1.  I will also be painting this rug from Ikea, which I already own, so maybe you could try that one.
  • Latex based primer- and lots of it.  I bought a quart thinking it would be enough and was WAY wrong.   I ended up using almost an entire gallon in addition to the quart.  As a side note, I always by Kilz, but that's just me.
  • Exterior grade latex paint.  As Sarah explains in her tutorial, exterior paint is a little sturdier since it's meant to go on houses.
  • Arcylic craft paint and paintbrushes
Instructions:
  • Vacuum and clean your rug, as best as you can.  You really do not want to paint a dirty rug.
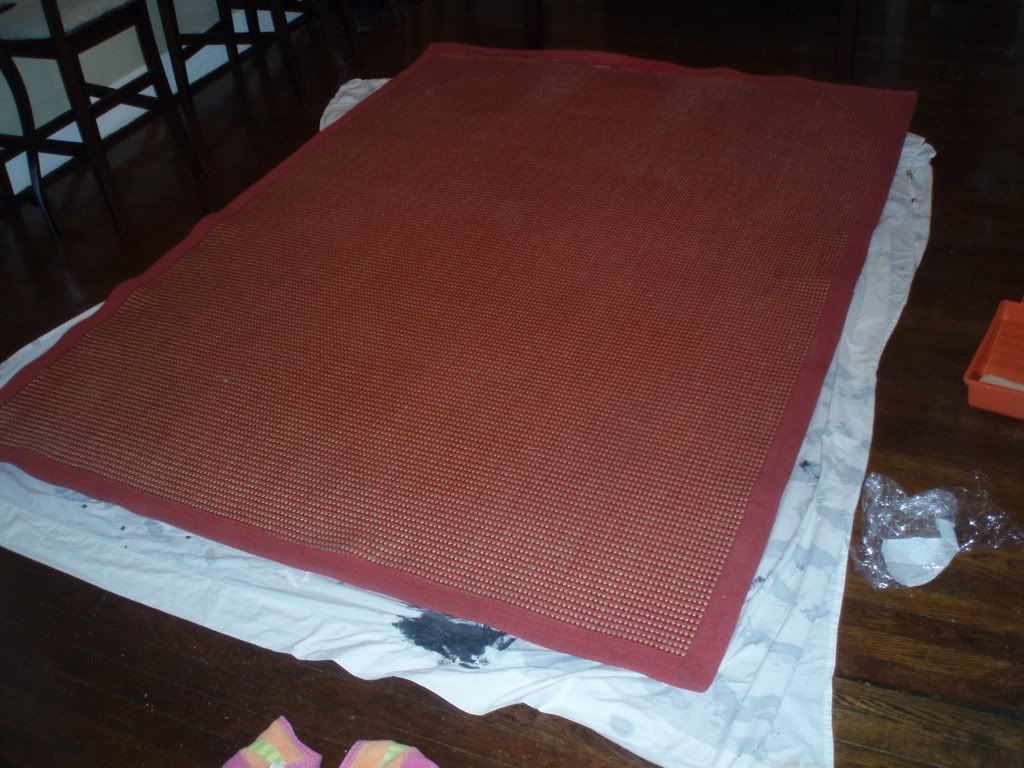
  • Using a "rough" brush roller (I think the one I used was meant for stucco.) Begin to paint the rug.  Apply it liberally, but not globbily.  You want to completely coat the fibers.  This is the suckiest and most time consuming part.
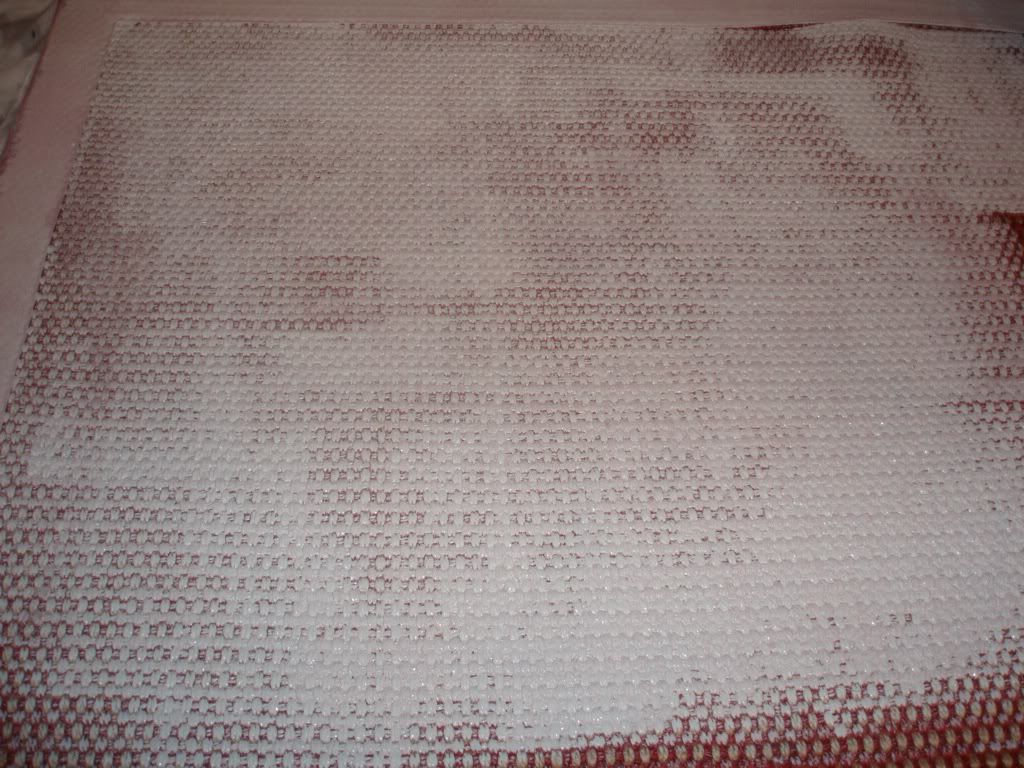
This is the incorrect way to prime your rug.  See how many fibers are showing?
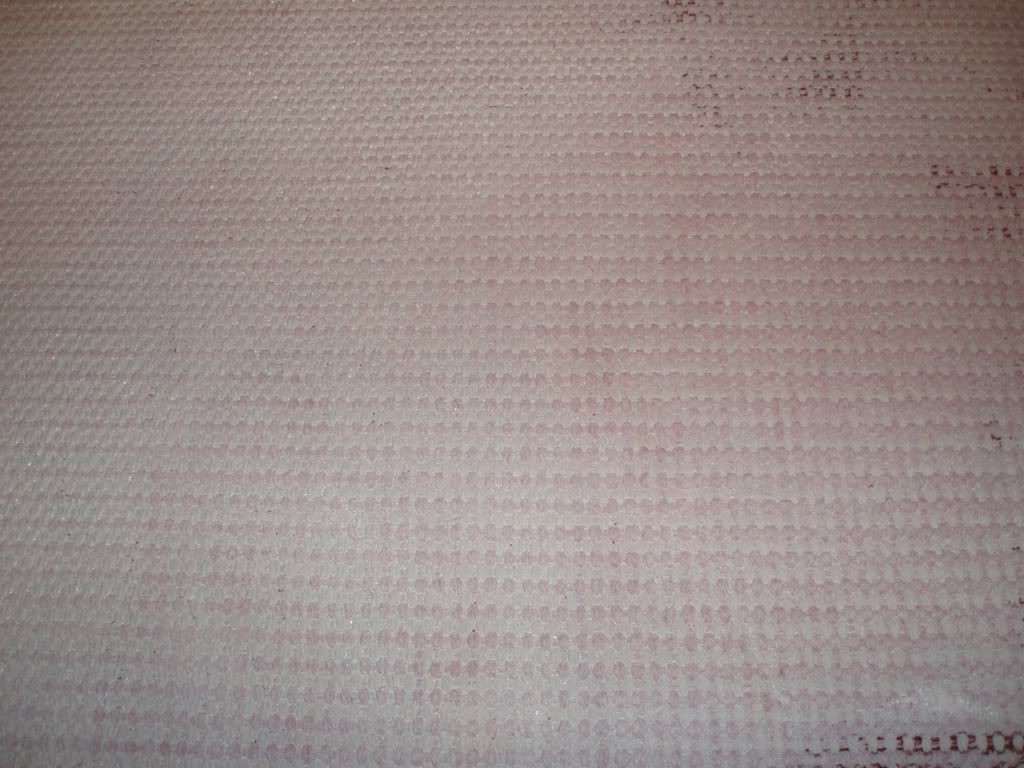
This is the correct way to prime.  Much  more even.

And if you're house is prone to hilarity as much as mine, then you're boyfriend may come home and find this:


or this:

And FYI, getting primer off a dog is not exactly fun.
  • Once you have the entire rug covered, let it dry.  Then do another coat of primer.  Yes, that's right 2 coats of primer.  Trust me, it'll make the latex cover much much better.  And here is what it will look like after the second coat of primer.
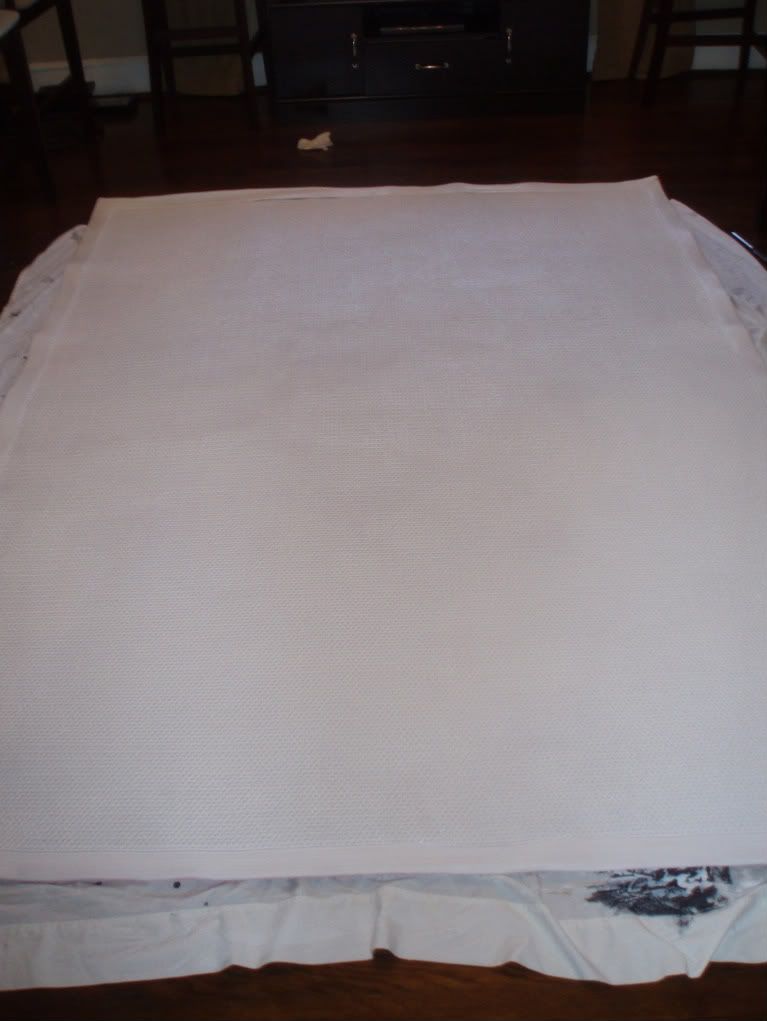
  • Let the primer dry and paint with your latex paint.
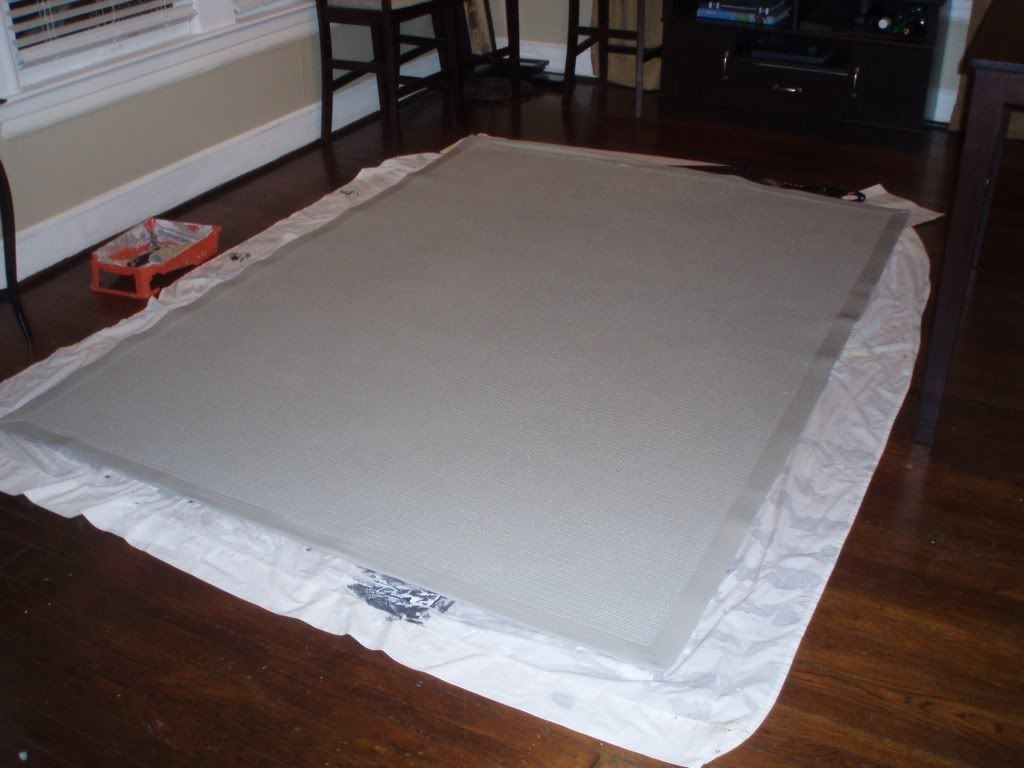
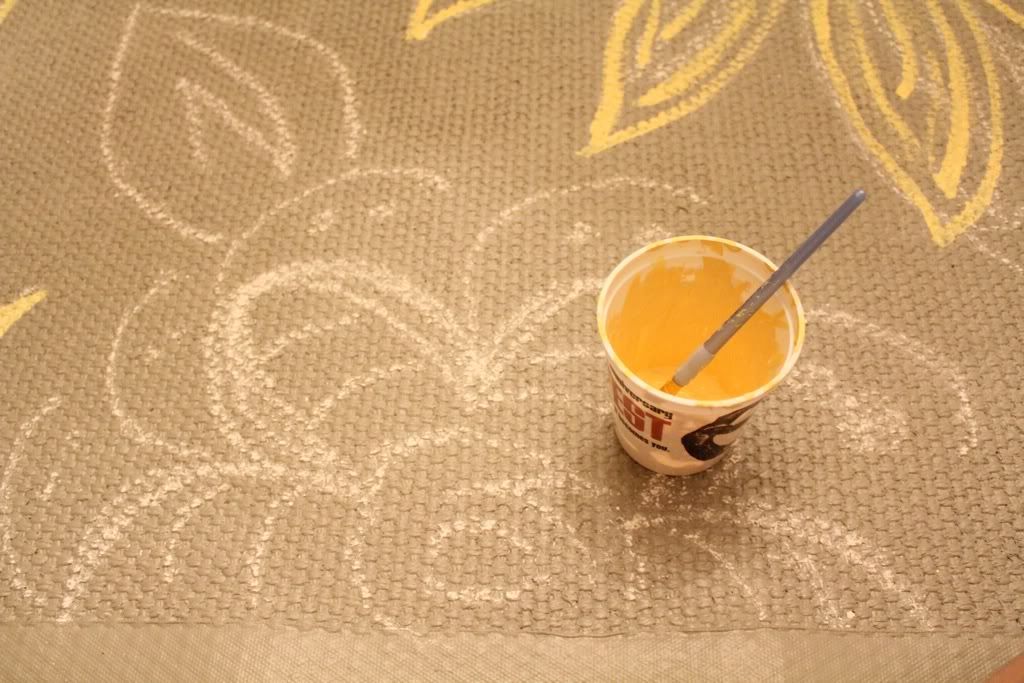
  • And then finally adding the details.  I pretty much copied Sarah's rug, which got it's inspiration from an Anthropologie rug.  The color and pattern matched perfect with my dining room.  Love it when that happens.  Because I didn't want to mess up, I free handed the flowers on the rug with chalk.  I had a print out of the Anthro rug nearby and kept referring to it as reference.
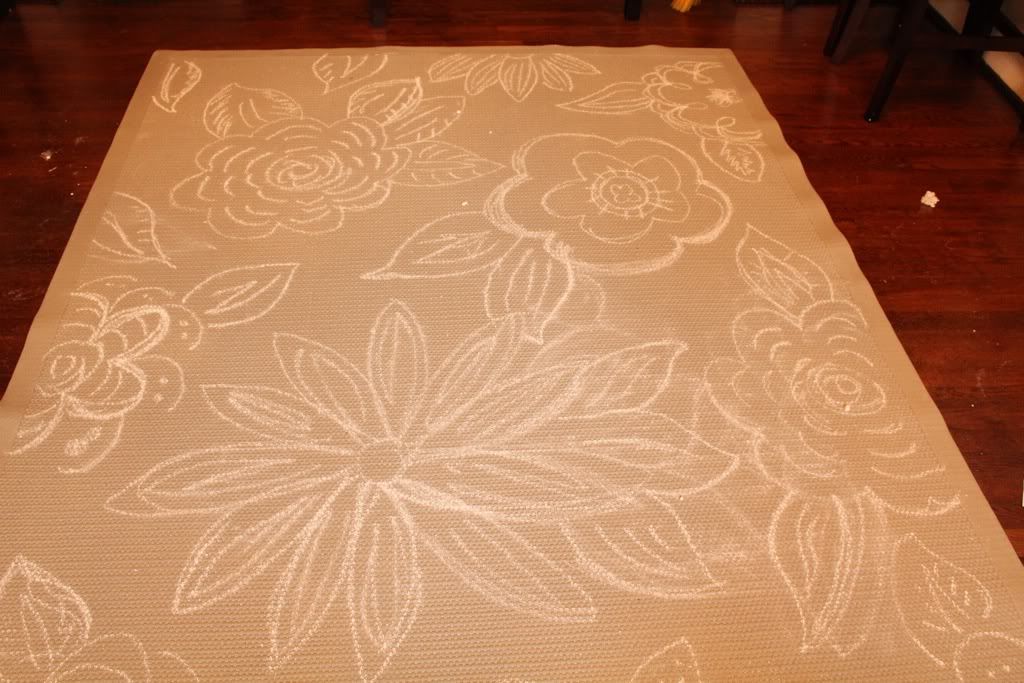
All chalked up.

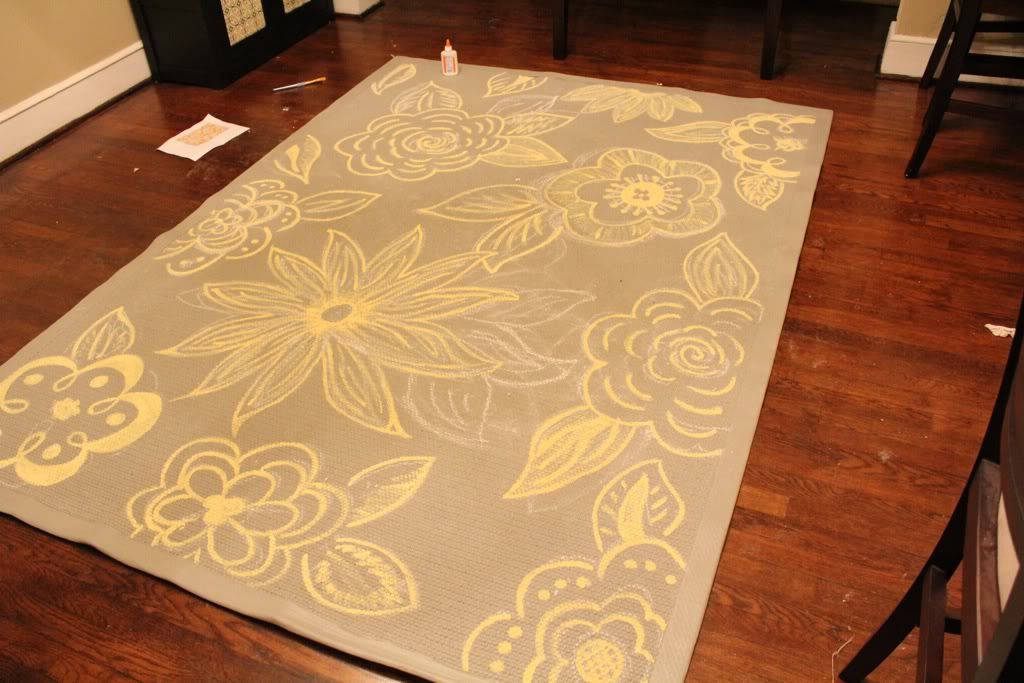
Paint from the center out to avoid stepping in what you've already painted.  

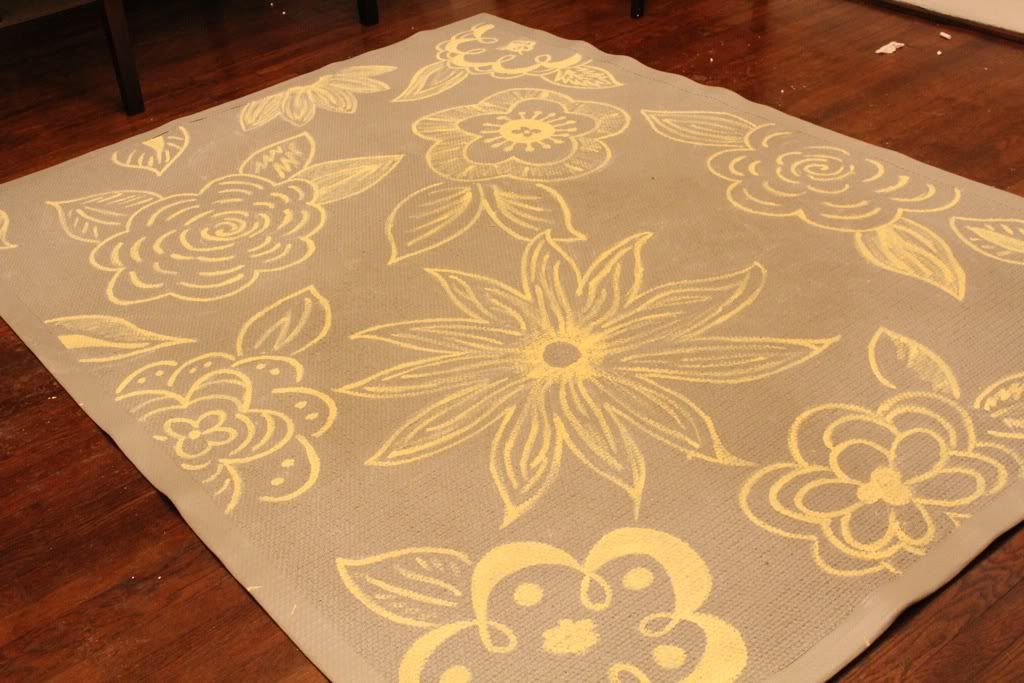
Finished before I erased the stray chalk lines.  And in case you're wondering, the chalk part took about 30 minutes and painting the flowers took a little over an hour, which is about 3x less time than the first part.

Ta-da!

Honest, I could not be happier with it.
Now get out there and paint your own!  Let me know if you have any questions!

Tuesday, March 22, 2011

For Japan with Love


I may be a little behind on posting this (that's what taking a week off from the internet will do), but I wanted to direct everyone's attention to a great cause to help those in Japan.  The kind souls over at Utterly Engaged and Ever Ours have teamed up to create For Japan with Love.  It's an online donation effort to support Shelter Box, an organization that provides emergency shelter and necessities to families affected by disasters.  Each box is tailored to fit the particular disaster, but basically includes a disaster relief tent for an extended family, blankets, water storage and purification equipment, cooking utensils, a stove, a basic tool kit, a child's activity pack and other vital items.  They originally hoped to raise $5,000, which is enough money to purchase 5 boxes.  They've currently blown this number out of the water, and have raised over $56,000.  The effort continues until March 31.  Please donate whatever you can to help those affected by the earthquake and tsunami.  Even a little can become a lot when when aggregated with other like-minded individuals.  
Clicking on either the For Japan with Love or the Shelter Box links will take you to the online donation page.


Thanks to all!  


And, I'm hoping to finally post the rug painting DIY tomorrow!  (I'm in pre-finals season, so things are about to get crazy(er) in my world.)

Sunday, March 13, 2011

Spring Has Sprung!


It's spring in Texas, and I'm on spring break!  Suffice it to say that I am one happy girl.  I'll be taking this upcoming week off from posting, but I promise that I'll make good use of the time!  Stay tuned for all kinds of crafting craziness!  Have a safe week!  And here are some feel good spring time photos from my weekend.

St. Patty's Day Parade!

Tuesday, March 8, 2011

Quick Cabinet Overhaul


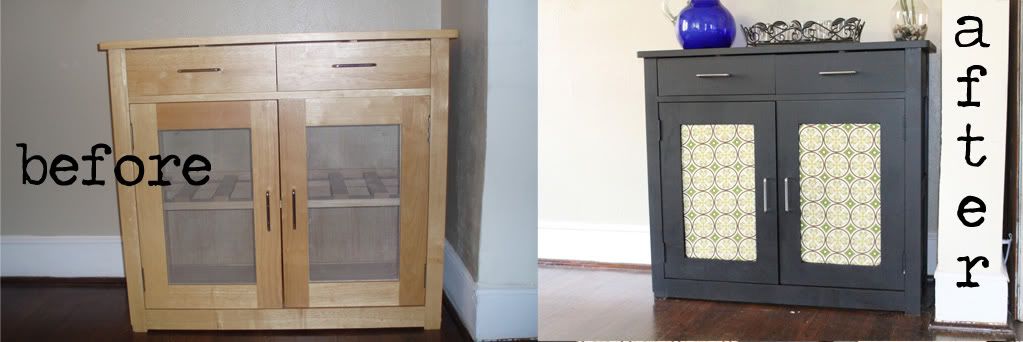
I bought this little Pier 1 cabinet off Craigslist for $50.  It fit in the tiny dinning room in my previous apartment.  It was laminate.  It was ugly.  I had plans of immediately refinishing it...it's been in it's original state for over a year.  I'm almost embarrassed to admit I let it stay that way for so long.  The funny thing is that I've hated it the entire time.  I'd sit in my dining room and I'd silently curse how ugly it was.  Any given Monday I'd decide this was the weekend I'd finally tackle painting it.  And on Saturday I'd do something else.

You see, I'm a little homebody ADD.  I have about a billion projects going at all times, and I have a really bad tendency to never fully complete things.  Does my DVD storage cover have snaps yet or a finished hem?  Nope.  Opps.  So with all of these other odds and ends floating around, it was fairly easy to not start another one.  My other confession is that I was a little afraid of painting this cabinet.  It's laminate, and if you've ever heard anything about painting laminate, you'd know that being nervous about painting it was probably warranted.

But last Sunday evening, as I sat glaring at the ugly cabinet in the corner, I decided it was way past time to paint it.  After convincing Jason to cart it outside for me.  I'm pretty sure he thought I was crazy.  I mean who else jumps off the couch at 5 on Sunday and decides it's time to paint a cabinet?  But, he's pretty used to my crazy endeavors.  If the boy can handle coming home on a Saturday night to our dining room rug half painted in primer and me trying to get said primer off our dog (and yes, there will be an entire post about that adventure soon), then I'm sure painting a cabinet sounded normal.

Cabinet DIY
*Warning.  This is not the "proper" way to paint a cabinet.  If you know a professional painter, do not show them this post.  I'm sure they'll die at the not-correctness of this.  But hey, it's a $50 cabinet.  I'm not expecting it to last forever, and this works for me.


Materials:

  • Ugly cabinet
  • Black spray paint.
  • Chalkboard paint
  • Pliers
  • Foam cardboard
  • Fabric
  • Staples and stapler
Instructions:
  • Remove all the hardware.   I planned on removing the doors, but I couldn't get the screws out, and since I was already planning on ripping out the cabinet fronts, I wasn't too worried about painting them.
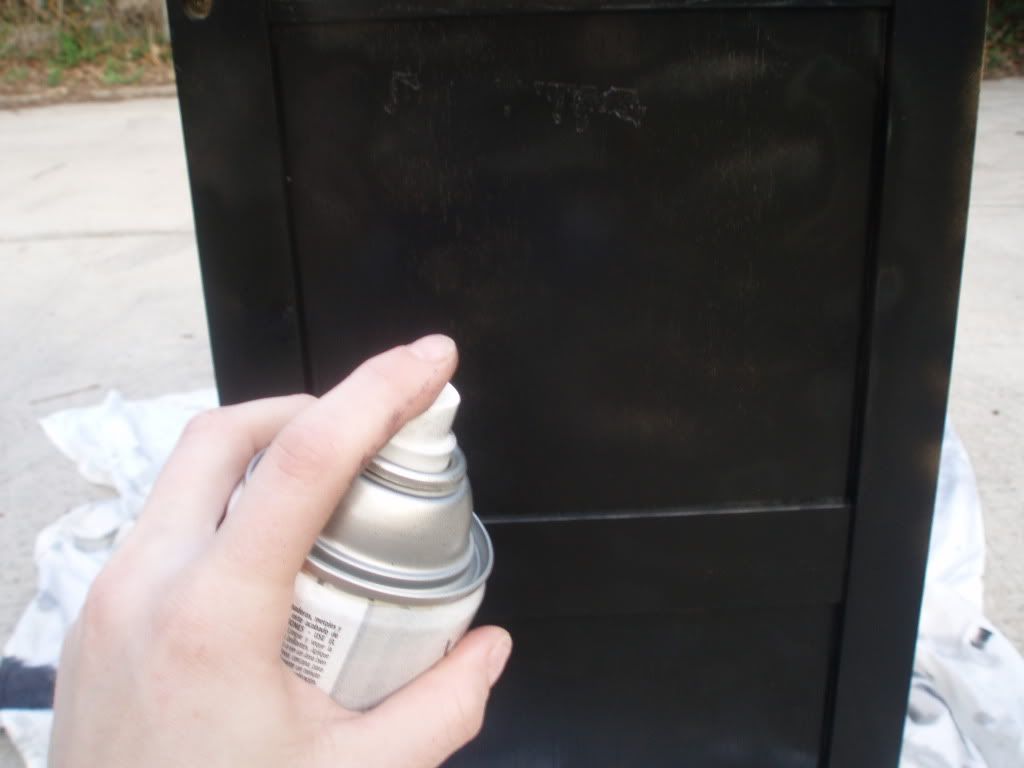
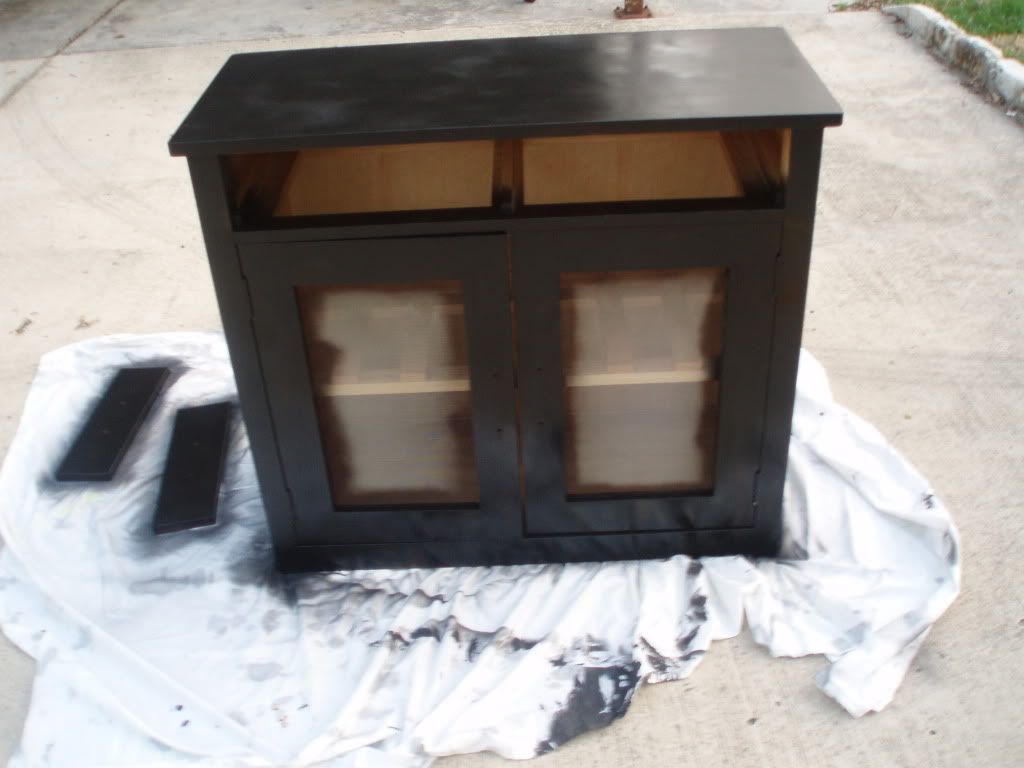
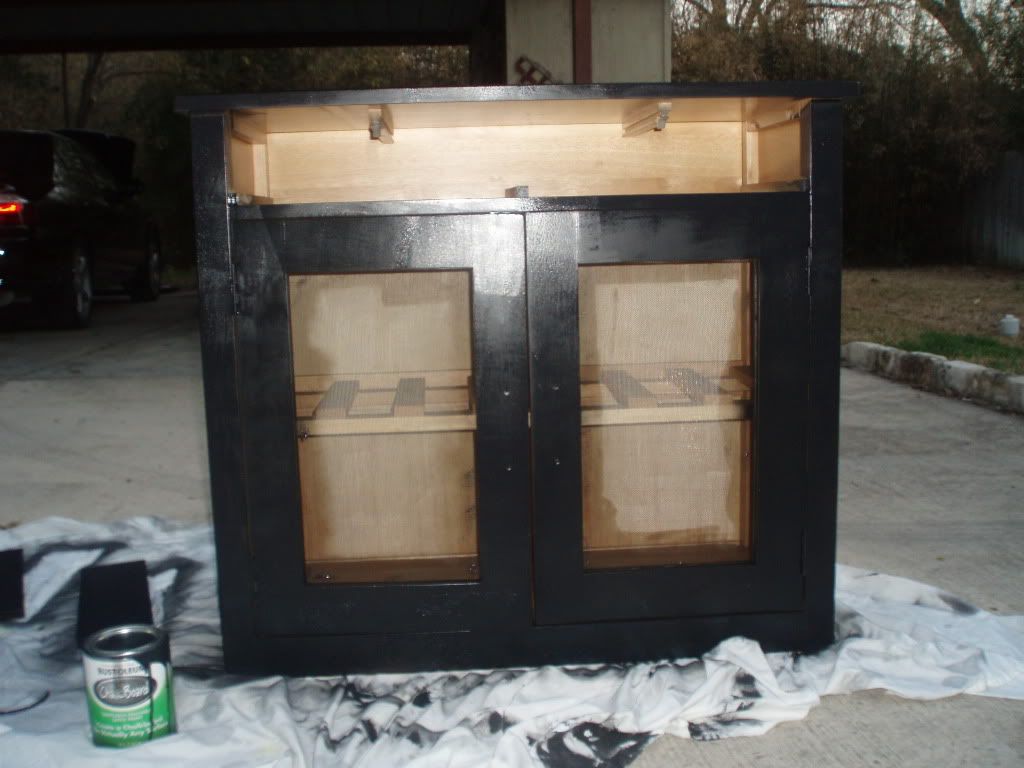
  • Cart your cabinet outside.  You really do not want to spray paint indoors.  I've tried it once.  It was a mess, and I almost passed out from the fumes.  So probably not a good idea to try.  The goal of my spray painting was simply to cover the cabinet.  I didn't care what it looked like.  All I needed was something for the actual paint to adhere to; laminate is notorious for paint not sticking to it.  It was NOT a pretty paint job, but it did the trick.  I also had intentions on using a spray paint primer to help with adhesion, but I had two cans of black spray paint on hand and figure it'd give them a try.  Fortunately they adhered MUCH better than I anticipated.  
  • Once your spray paint has dried enough (according to the label) coat lightly with the chalkboard paint.  There isn't a particular reason that I'm using chalkboard paint.  I just happened to have it already. Repeat with second coat, if needed.
Fighting a losing battle with the sun.
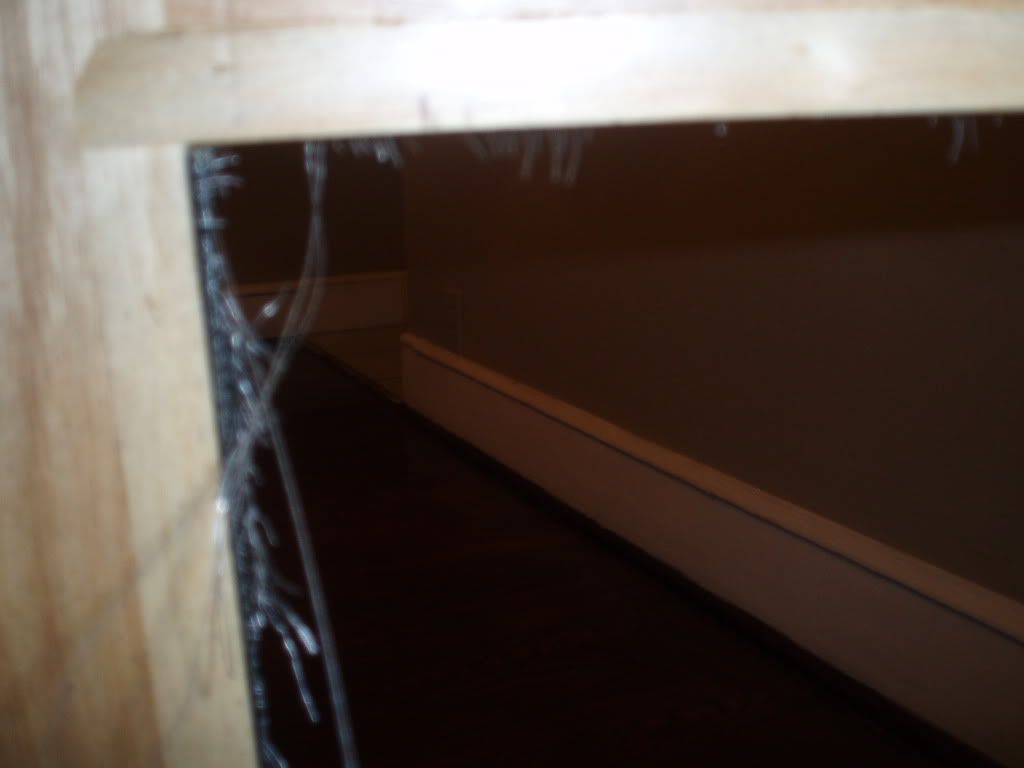
  • Cart your cabinet back inside (especially if the sun has already set).  Cabinet front demolition time.  The cabinet happened to have tacky wire fronts, which I also hated.  I spent the next hour ripping it off, using pliers.  It was a messy, messy job.  I was completely covered in metal dust, but I'd be lying if I said I didn't enjoy ripping it off.  
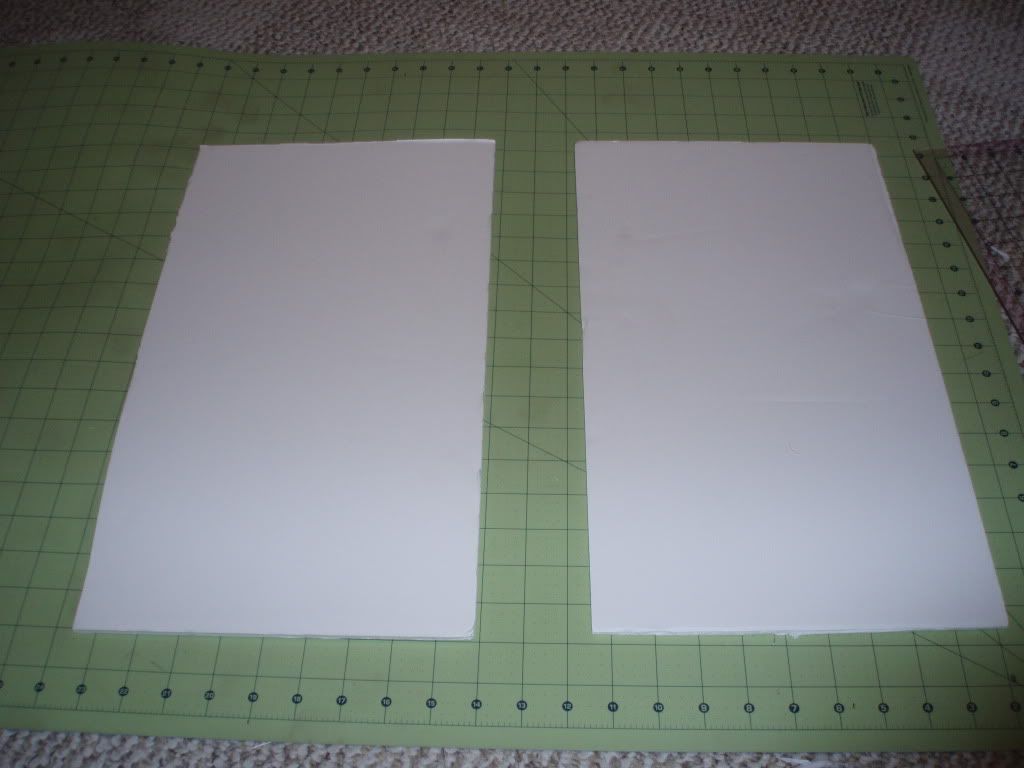
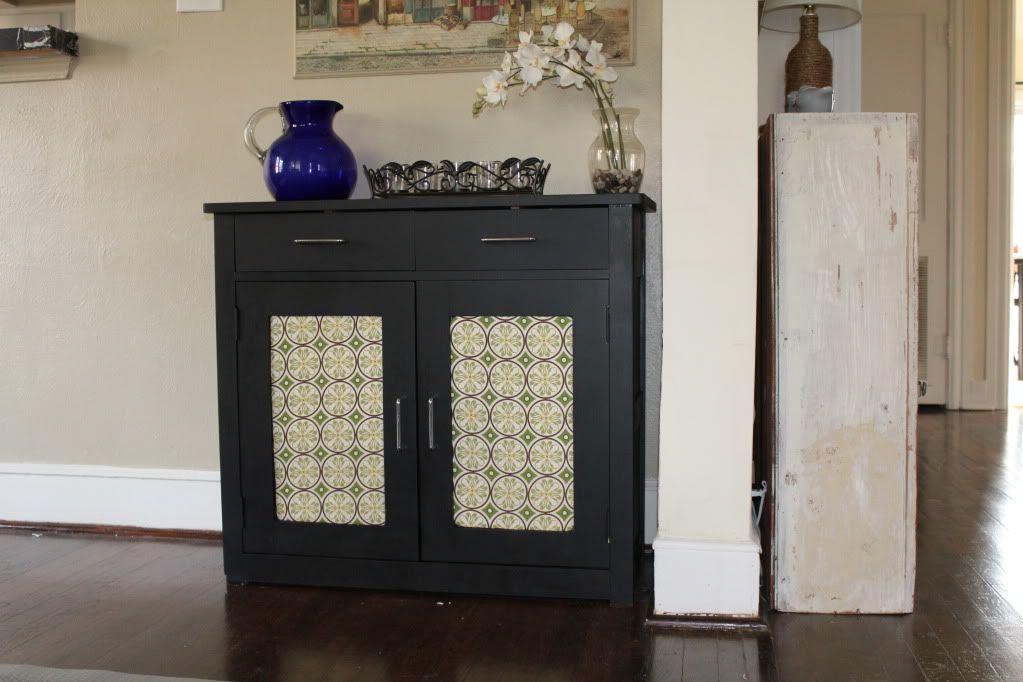
  • Measure the cabinet front opening and cut foam-board to size. I cut mine just slightly large to ensure that it would be a tight fight.  Cut your fabric so that it's about 2 inches longer on each side than the foam board.  Staple fabric to the foam board.

  • Wedge foam board into the cabinet fronts and you're done.

I have plans to replace the handles, but I'm still on the hunt for vintage silverware to do so.  For now, I'm happy that it's finally painted.

Monday, March 7, 2011

Not Your Typical Weeknight Meal

There are everyday, easy weeknight dinners, and there are dinners that you only make once every blue moon.  This is one of those meals.  It's not a difficult recipe; it's just a tad time consuming, and by a tad time consuming I mean 4-5 hours total.  This is one of my signature recipes.  It's the one that people always want, and it's taken me about 4 years to perfect.  It's a fairly simple recipe, with fairly simple ingredients, and because of that you must use high quality ones for it to taste properly.


So, without further ado, SummerTime's Manicotti Recipe


For the Sauce
I have tried about every sauce recipe you can imagine.  I've tried my own.  I've tried others.  This is the best, Jerry, the best!, sauce recipe I have ever found.  The only difference I've ever made and will ever make is that I wilt fresh basil into the sauce at the very end.  Other than that it cannot be beat.   This recipe is from  The Frankies Spuntino Kitchen Companion & Cooking Manual by Frank Falcinelli and Frank Castronovo.  You can find it in their book or online at Serious Eats.  Basically it goes like this:
Ingredients:

  • 1 cup olive oil
  • 13 cloves of garlic
  • 1 pinch red pepper flakes
  • 96 oz canned Italian tomatoes
  • 2 tsp sea salt.
Instructions:
  • Combine the olive oil and the garlic cloves in a deep sauce pan.  Cook over medium heat until the garlic becomes fragrant and has dark striations running through them.  Do not overcook.  If your garlic begins to burn or smell, turn the heat down.

  • Once the garlic is nicely colored add a pinch (or two) of the red pepper flakes to the olive oil.  Cook for about 30 seconds to infuse with the olive oil.
  • Dump in the tomatoes, add the salt.  I usually pick out the basil leaves at this point, and crush the tomatoes with the back of a wooden spoon.  Simmer gently for four hours, stirring occasionally.
(I use Cento tomatoes.  I think they taste the best, but you can use whatever you like.)

For the filling:

Ricotta Reicpe:
I make my own ricotta.  Undoubtedly, several of you are rolling your eyes and thinking, Of course she does, but hear me out.  Making homemade ricotta is painfully easy, and infinitely better than the store bought version.  Better yet, it's made with things virtually everyone already has in their kitchen.  I discovered this homemade ricotta recipe from Kenji over at Serious Eats and haven't looked back since.

Ingredients:

  • 2 cups whole milk (and yes, it does need to be whole milk.  Read all of Kenji's article and he'll explain why.)
  • 1/4 tsp table salt
  • 2 tbl white vinegar
Instructions:
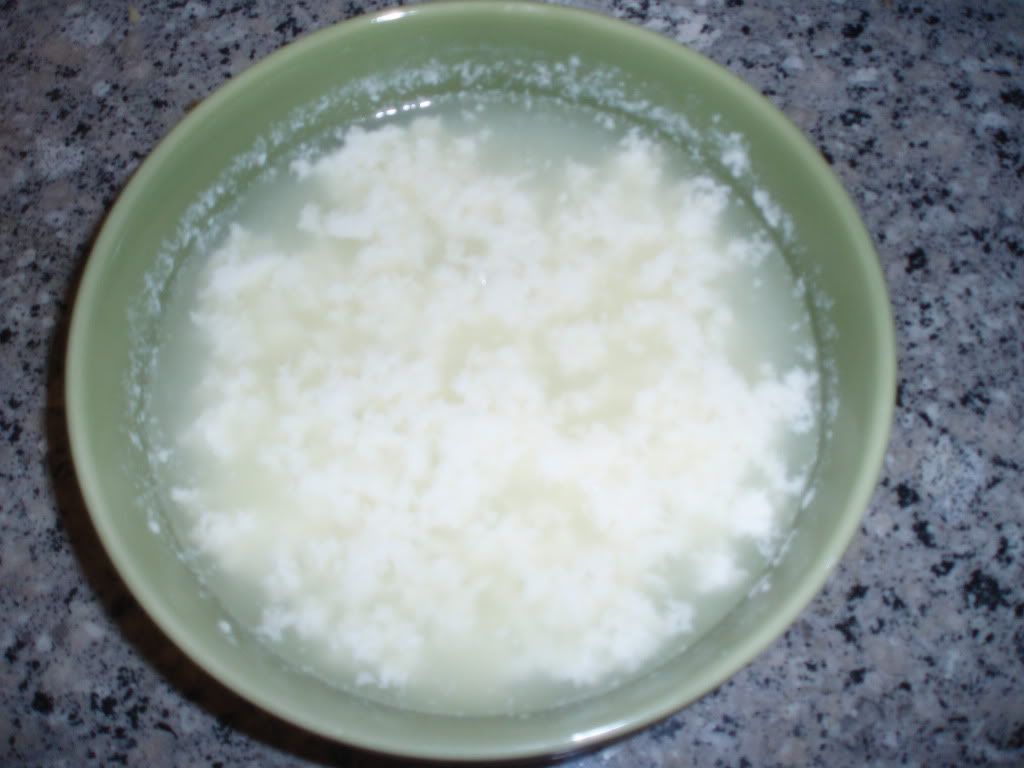
  • Add all of the ingredients into a microwavable bowl.  Microwave from 2-4 minutes.  Remove from microwave and stir for several seconds. The curd and whey (does that remind anyone else of Little Miss Muffet?) should completely separate, the liquid will be translucent, not white.
Clear liquid, white curds.  Time to strain.
  • Pour the mixture into a colander lined with a cheesecloth or a dish towel.  I tend to use a dishtowel when I'm making several batches.  Each recipe makes approximately 1/2 cup of ricotta.  You'll need 1- 1/2 cups of ricotta for this recipe, depending on how cheesy you like your manicotti.  
While making the ricotta:
  • Parboil your manicotti shells.  Only cook them until they begin to turn al-dente.  You want them to be a little hard when you put them in the oven so they're not overly mushy when you take them out.
  • Brown 1 - 1/2 lbs of Italian sausage (either sweet or hot will work fine).  Drain the fat and allow to cool on paper towels.
  • Thaw 1 box of chopped spinach.
  • Mix ricotta, Italian sausage, and spinach in a bowl.  You can season with salt and pepper also, but I rarely do.  Stuff into manicotti shells.  I've tried every way possible to stuff these things: using a piping bag, special gadgets, whatever.  The easiest way to do it, is simply to use a spoon and your fingers.  Wash your hand thoroughly first! 
Your ricotta should be slightly firm, and most of the liquid should be drained out before use.
  • Because I used my new and oh-so-beloved LeCreuset, I simply nestled the stuff shells back into it to go in the oven.  Feel free to use a baking dish though.  If you do use a baking dish, spread about 1/2 a cup of sauce on the bottom of the dish to help prevent the shells from sticking.  Cover the shells generously with sauce and bake for about 30 minutes, until the shells are tender.  Remove from oven and sprinkle with freshly grated Parmesan cheese.

That's it, enjoy!
And a got my new Canon Rebel yesterday!!! Goodbye terrible pictures! ...Although none of these were taken with said new camera, hence the peaky quality.

Friday, March 4, 2011

Weekly Meals and an Easy Weeknight Meal

Law school doesn't leave time for a lot of normalcy, and since I take night classes; it seriously interferes with my ability to eat dinner.  However, the fact that I don't get home until around 9-10 pm does not stop me from making dinner every night.  It does however require some diligent planning on my part.  Part of Sunday Brunch includes JP and I figuring out our meals for the upcoming week.  It takes us anywhere from 30 minutes to an hour depending on how noncommittal we're being that day.  I know that spending an hour planning out meals seems like a ridiculous long time, but you end up saving way more time during the week.  Remember all those nights you've stood in front of the refrigerator and pantry mumbling, "What am I going to make for dinner?"  Planning ahead eliminates this.  It also cuts down on the amount of wasted food, particularly those that go bad quickly like fruits our veggies.

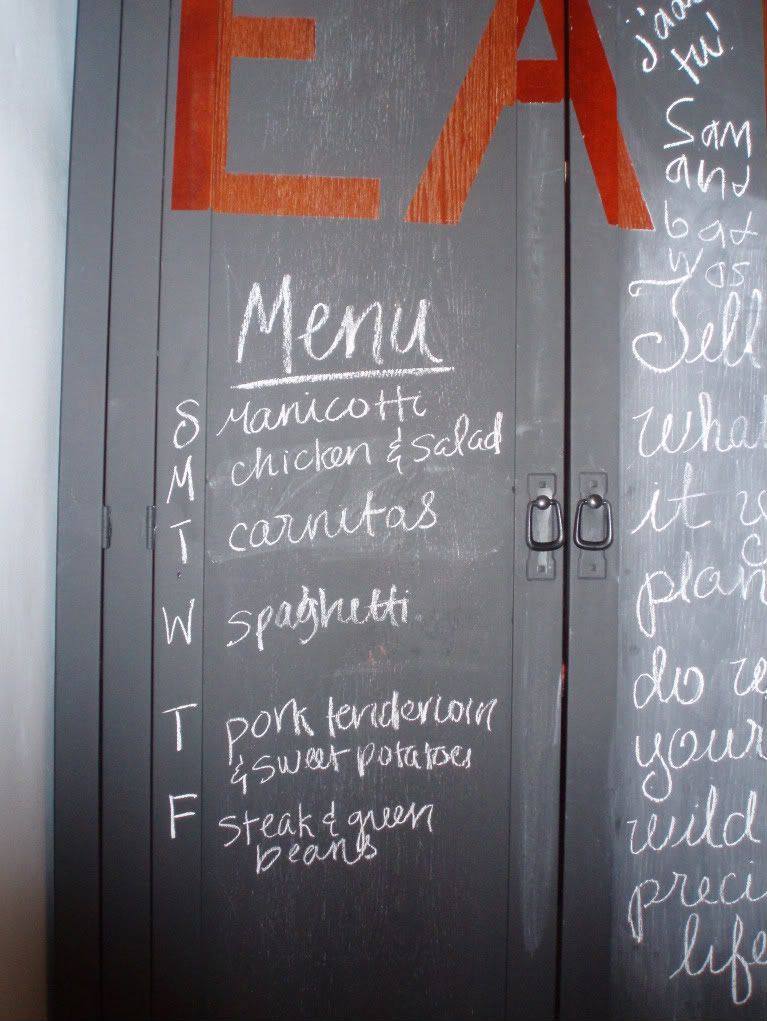
When I first told my sister about this plan she flat out rejected it.  Not a, maybe I'll think about it.  Nothing.  She was like, nope.  I don't have that kind of time.  Fast forward to the present-- My sister now does the exact same thing every Sunday and wholeheartedly agrees it makes dinner faster, easier, and less stressful when you know what's supposed to be on your plate every night.  Because there are 2 busy people in my household, we try to pick meals that whoever is home first can prepare.  JP does not work on Wednesdays so we usually plan on grilling something.  Just look at your schedule and pick meals accordingly.  I promise it'll make things so much easier on your during the week.  So here's a look at mine.

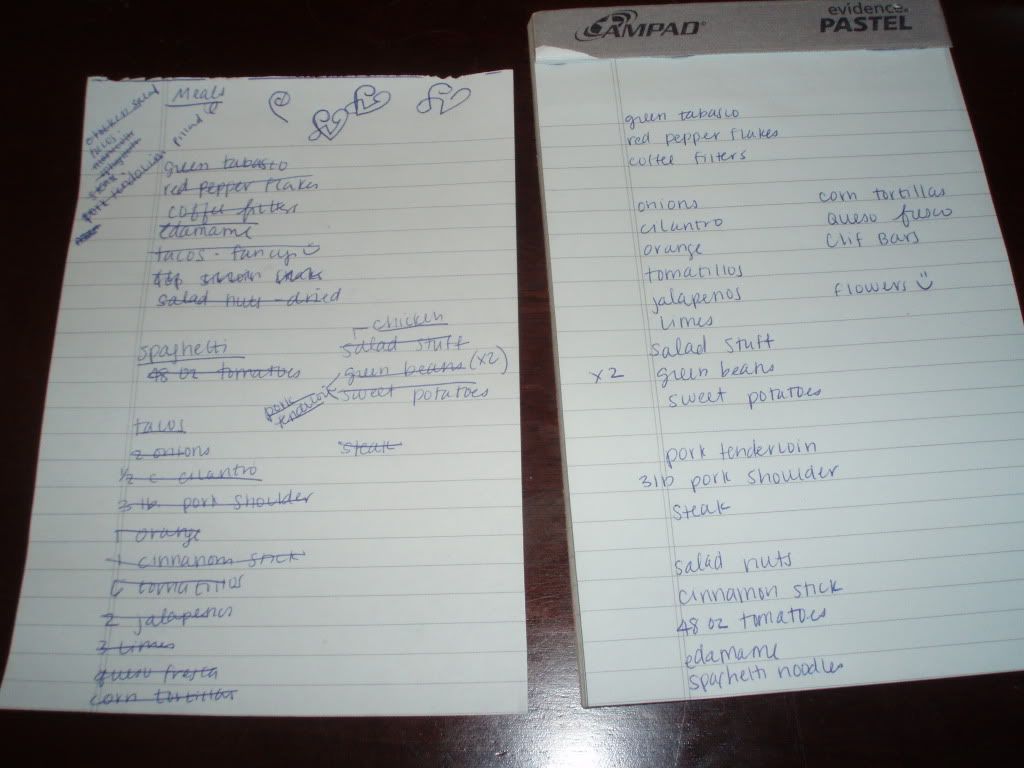
The first list (on the left) is where I jot down the meal ideas and what goes in each.  After I get everything planned out I organized it into a second list according to how my grocery store is arranged...I never said I wasn't a little bit too organized.

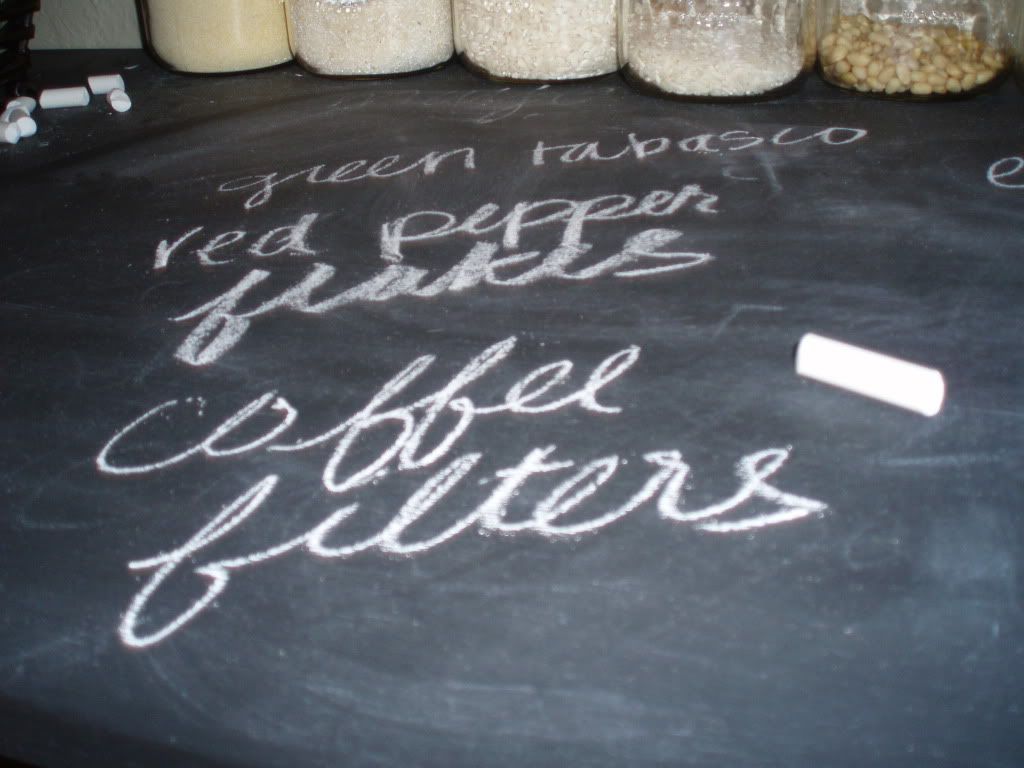
Now you may be wondering about the other things people normally need to buy.  Like sugar, or coffee filters, or soap or anything that wouldn't normally go into week night meals.  Well, here's my solution on that.  We use the top of the chalkboard cabinet (but could use anything) and whenever we realize we need something during the week, we just add it to that list.  Then we add those items to the meal list.


Simple as that.  If you're crazy strapped for time, you really should try it.

And because that was super boring, here's a quick and easy weeknight meal that takes about 30 minutes. It'll take longer if you're a dingbat like me and forget to put the fettucini pasta on to boil until you're completely done with everything, but I'm guessing you're not a dingbat.


Salmon with a Shallot Lemon Bechamel Sauce  
(Don't be intimidated by the Bechamel part.  It's just a typical French white sauce, nothing scary.)


Ingredients:

  • Salmon (you could also use a chicken breast if you'd like)
  • 1 shallot thinly sliced
  • 1 lemon
  • 1 tbs flour
  • 1- 1/2 cup(s) dry white wine.
  • 1/4 cup heavy cream
  • Basil chiffonade (which basically means cut into shreds.  To do it, stack all the leaves on top of each other and then roll into a tube, make small thin cuts across the tube.)
Instructions:
  • Preheat your over to 350 degrees.  Sprinkle the salmon/chicken with salt/pepper.  If wanted, cover with slivers of lemons.  Bake until the skin flakes, about 15-20 minutes, depending on the size of your salmon.  Remove from the oven and tent with foil.
  • Bring your water to a boil and cook the fettucini!  Don't forget like I did.
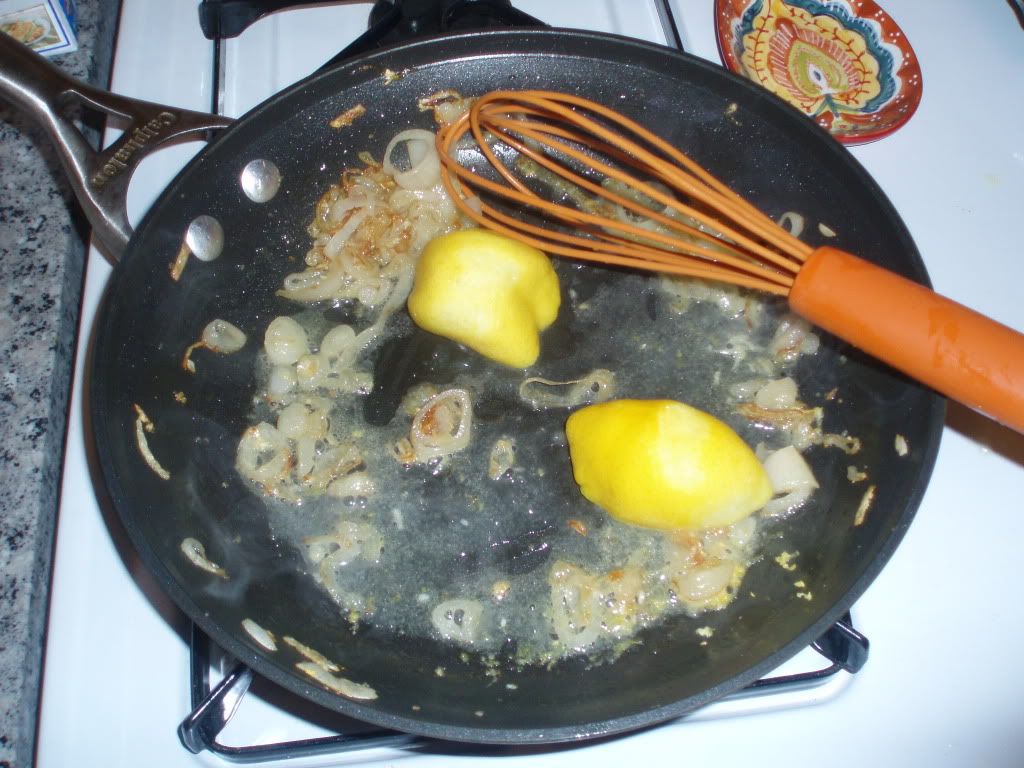
  • While the salmon is baking, preheat a large skillet over medium high heat, add the shallots.  Cook until they begin to caramelize.  Reduce heat to medium-low and cook, stirring occasionally, until golden brown and tender.  Squeeze the juice out of the lemons and add the shells to the pan.
  • Add the flour and cook for a couple of minutes, to cook out the flour taste.
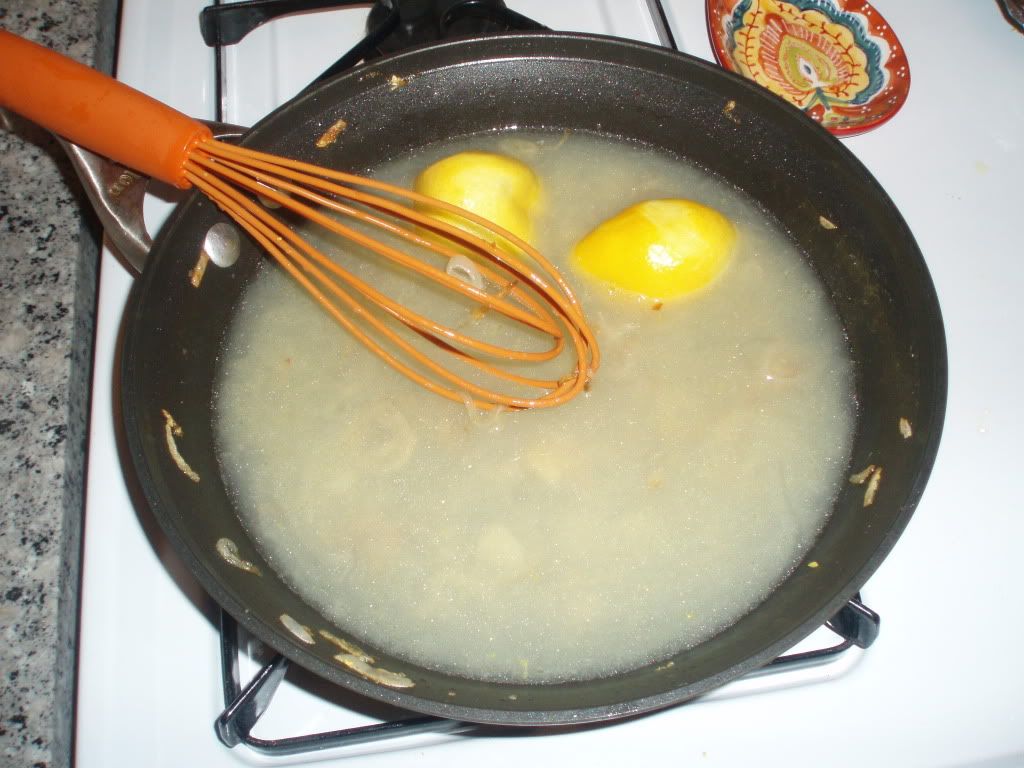
  • Ge-glaze the pan with the white wine and bring to a simmer.
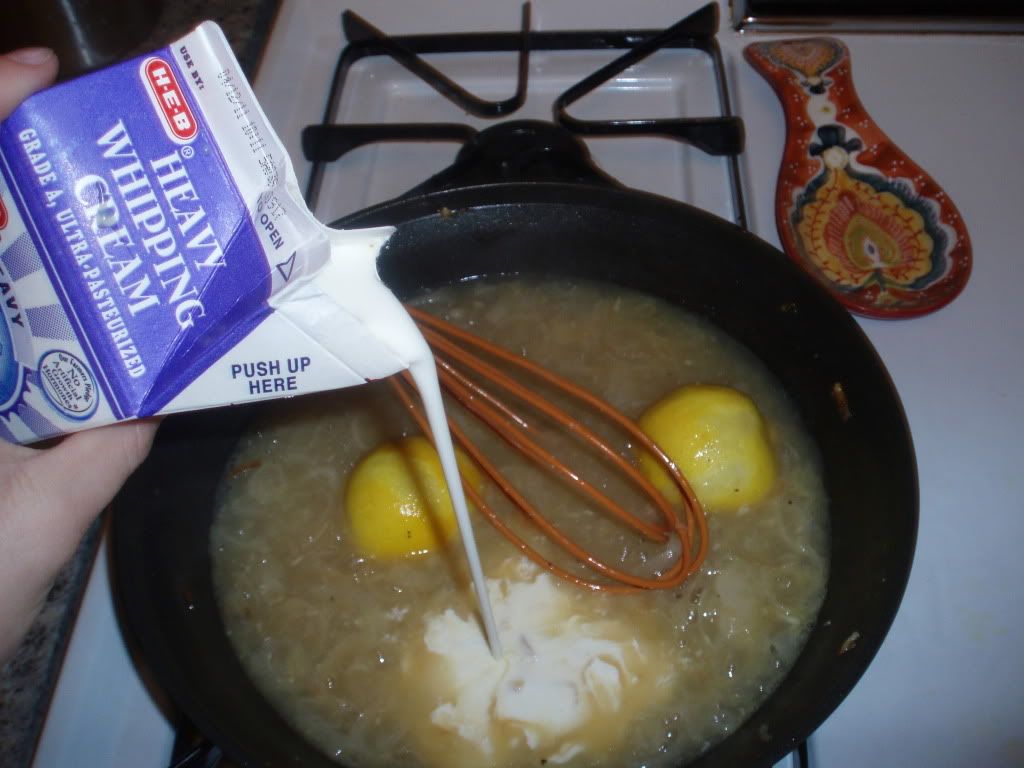
  • Add the heavy cream and bring back to a slow simmer.

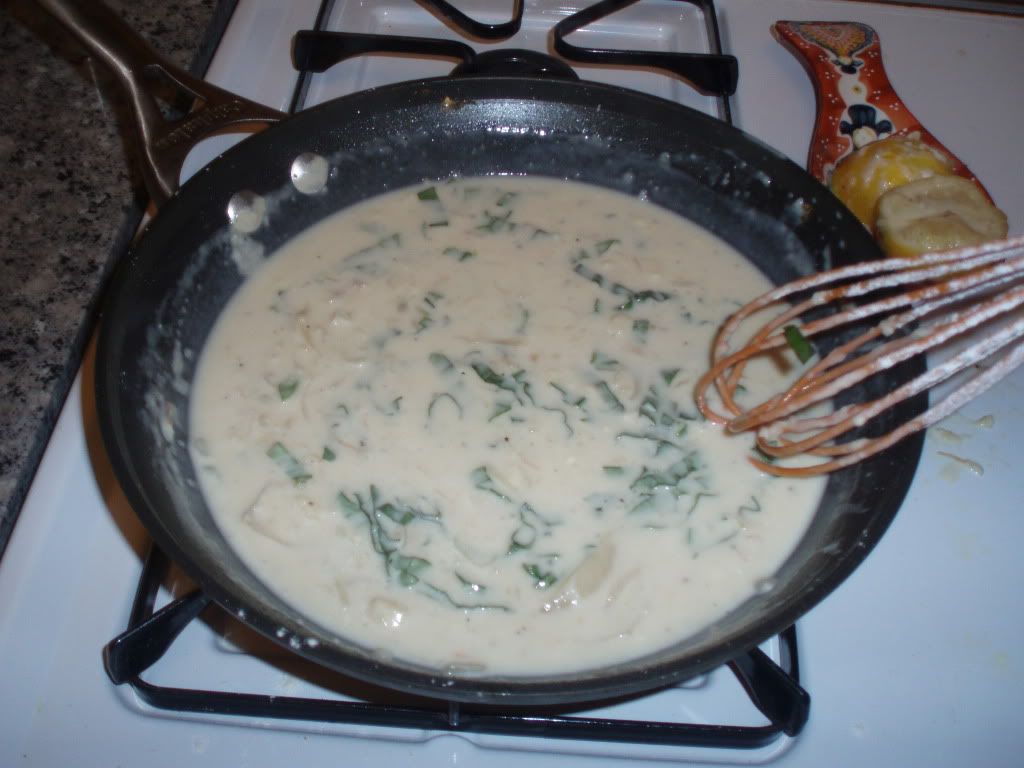
  • Season with salt and pepper, and simmer until reaches desired consistency, about 5 minutes.  Remove the lemon half.
  • Add basil chiffonade at the end and cook a minute more until the basil wilts into the sauce.  Do not add the basil earlier, because it burns easily and becomes bitter.
  • To serve: make a bed with the fettucini pasta, add a little of the bechamel on the pasta, gingerly place the salmon on top of the pasta, and drape more bechamel over the salmon.

Tasty, quick, and easy.
That's my kind of Monday night meal.

Tuesday, March 1, 2011

Sunday Brunch Quiche Recipe

My all-time favorite meal is Sunday Brunch.  Sunday is the only day that JP and I are both home and we've  fallen into this fantastic Sunday routine that I cherish very much.  We "sleep in" (meaning we're usually up by 9), Jason makes coffee and I figure out something to make for brunch.  I love that it's not planned or contrived.  I make brunch using whatever we have on hand, and usually try to make something new.  Sometime it's Spanish tortillas, sometime it's cornmeal pancakes, and this week it was quiche.  Sunday morning brunch and lounging on the patio with coffee is natural for us, and it's a great way to re-connect before the week ahead.


This week's breakfast was a decadent quiche recipe that I found in the New York Times.  I basically followed it, mostly.  You should by now be aware of my problems with following recipes.  The original recipe can be found here and here's my slight variation:

Decadent Sunday Quiche
Ingredients:
  • 1 frozen pie crust (The original recipe actually makes the crust, but I do not have time to slave over pastry on Sunday morning when there is coffee to drink and lounging to be had.)
  • 3 large eggs + one egg yolk
  • 1 egg white
  • 1/4 cup cheddar
  • 6 strips of bacon
  • 1 1/2 cups heavy cream
  • 2 tablespoons chopped thyme
  • 1/2 tablespoon pepper
  • 1/4 teaspoon nutmeg
  • 1/8 teaspoon kosher salt (try to refrain from adding more.  The bacon is already salty and you'll run the risk of over salting.)
  • 1 tablespoon butter, cubed.
Instructions:
  • Preheat over to 375 degrees.
  • Place the pie crust in the heated over for 10-15 minutes, or until the pie crust is slightly golden brown.
  • In the meantime, cook the bacon until it begins to brown but is not fully crisp.  Drain fat on paper towels and chop into bite sized pieces.
  • Remove pie crust from over and brush with the egg white and sprinkle with the cheddar.  Bake for an additional 10 minutes, until the cheese is melted and bubbly.
  • While the cheese is melting, mix whisk together the eggs, heavy cream, 3/4 of the chopped thyme, nutmeg, salt and pepper.
  • Once melted, sprinkle 1/2 - 3/4 of the bacon on top of the cheese.
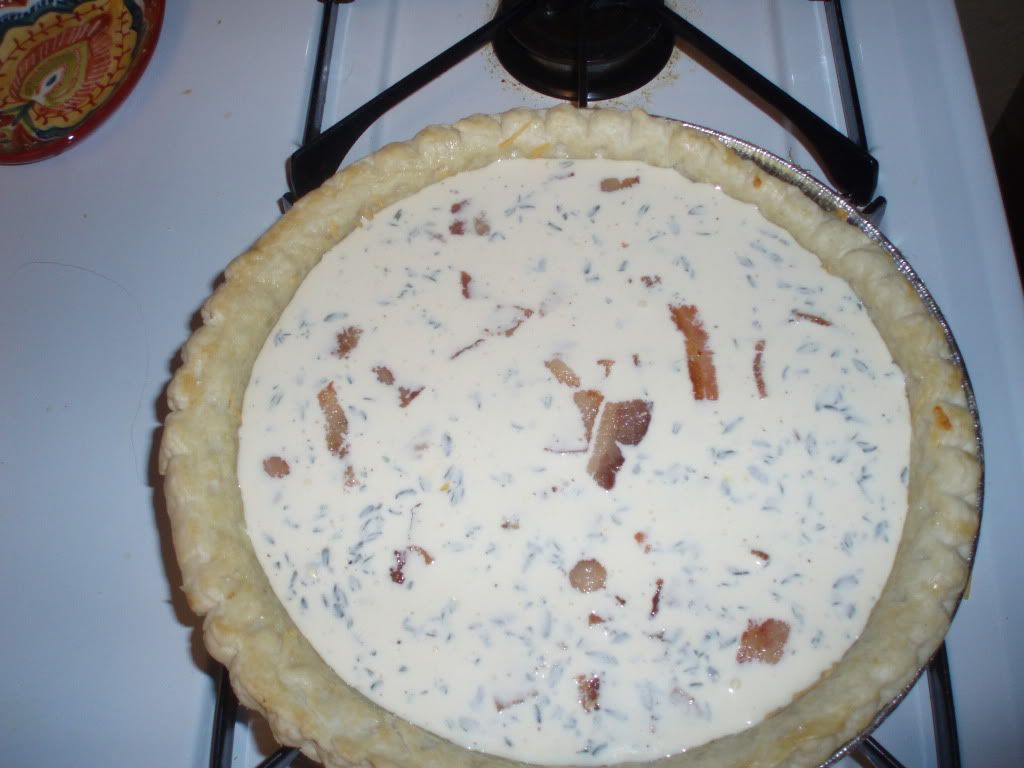
  • Slowly pour in the egg mixture.  Top with the remaining bacon, the remaining thyme, and dot with the cubbed butter.
  • Bake from 25-35 minutes, until the top is puffed and golden brown.  The middle of the pan should be almost set, and only slightly jiggle when shaken.  Try not to over bake, overcooked eggs really are the worst.
  • Enjoy with a loved one along with a steaming cup of Joe or tea.

Not a bad way to start of the week.
Hopefully you'll give this a shot.  It really is fairly simple to make, especially since you don't have to worry about making the crust.  Thanks for stopping by today!  And stop by tomorrow because I'm posting on weekly meal planning and a beautiful but easy week night recipe!